Function
This option lets you enter points in the database and edit existing points.
Procedure
When Editing a point, simply input the point number in the dialog box and press the TAB key to see the remaining fields show the correct data for that point.
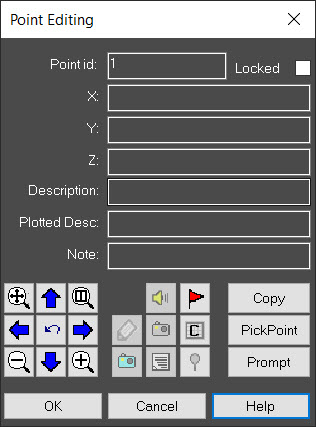
Note: Do not use the Enter key to move between the fields in the dialog box. Pressing Enter is the same as pressing the OK button and is used to complete the Store/Edit command. Be sure to either use your Mouse to pick the fields to change, or use the Tab key to move between the fields.
Locked checkbox
Use this checkbox to lock or unlock the current point, to prevent its coordinates from accidentally being changed.
Audio Note Button (Speaker icon)
If you've recorded audio notes with Evidence Recorder, this icon will appear yellow. Pressing the icon will play the audio note.
Photo Note Button (Camera icon)
If you've recorded photo notes with Evidence Recorder, this camera icon will appear. Pressing the icon will display the photo note, using your default program for .JPG files.
Feature Attributes Button (List icon)
You can assign a feature and attributes to a point using this button. Please see the Feature topic for more information.
History Button (Flag icon)
Use this button to view the points history.
Active Drawing Technology Button (Coordinate Editor icon)
Use this button to view this point in the Active Coordinate Editor.
Map Button (Pin icon)
Use this button to view the point in Google Maps. An internet connection is required. You will be prompted to select a coordinate system if one has not yet been specified for the project, because the grid coordinate must be converted to a geodetic position.
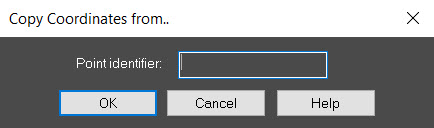
Copy Button
This option allows you to accurately copy the coordinates of any point in the database to the point you are currently editing. This is especially useful when computing closures to known points.
Pick Point Button
This option will prompt you to pick a location on the screen. You can use the Object Snap options to snap to a point, line, arc, center point, symbol, or text insertion point. The coordinates (in 3D) of the point you select will be copied into the dialog.
Command Line Entry (Prompt) Button
If you prefer, you can pick the Command Line Entry button from the Store and Edit points dialog. The command sequence will be like the following:
Enter the point number to Edit:7
Enter the Northing: <39.008>:39.000
Enter the Easting: <-0.941>:-1.000
Enter the Elevation: <0.000>:
Enter the Description: <>:sample
Point Number: 7 North: 39.000 East : -1.000 Elev : 0.000 Desc : sample
Is this Ok (Y):y
7 N: 39.000 E: -1.000 El: 0.000 D:sample
HOT TIP: If you wish to edit an existing point and you do not have any command active and your Grips are turned off, simply pick the point, point number, description or elevation of an existing point. This will activate the Coordinate Editing dialog box and allow you to edit anything related to the point, except the point number. At the same time the point on screen will now be highlighted and a large X will be placed at the point to help show you if you have selected the correct point to edit.