Function
Images of the impact patterns will be placed on the wall for analysis. The user can pick multiple points on the image to align and scale accurately to measured reference points or targets.
Procedure
Align and Scale Photo
-
Select the photo button and browse to an image for the analysis.
-
Pick on the current surface to insert the image from the bottom left corner. Make sure the image is not directly over the area the photo will be aligned to.
-
Pick reference points on the image to use for the alignment. There is no limit to the number of reference points. Select Enter when selecting is complete.
-
Pick the corresponding reference points from the defined surface. A guide line is provided from each picked point to assist the user in picking the common points in the same order.
-
The photo will automatically scale and align to best fit the picked points.
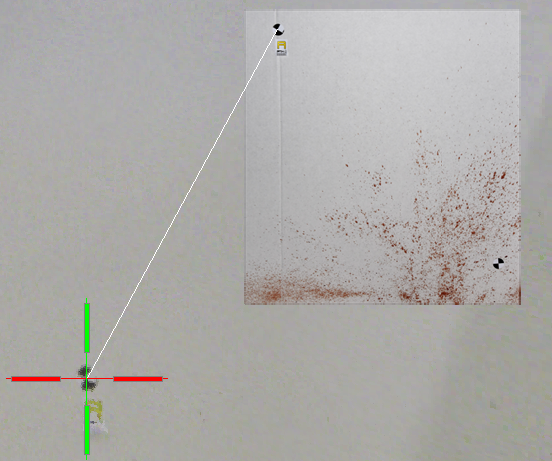
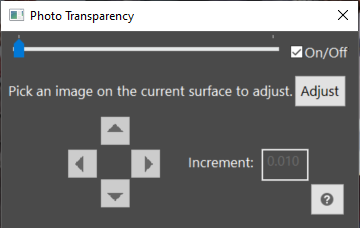
Photo Transparency
The transparency of the photo on the current surface can be adjusted or turned on and off.
To assist with accurate alignment, the image can be adjusted left, right, up, or down on the surface. Click the Adjust button, select the image(s) to adjust, and press Enter. Use the arrow buttons on the dialog to move the image along the surface with the defined increment.
Align Photo
The photo can be realigned without having to reinsert the image. Click on the Align button and select the photo to realign. The user will be able to repick points on the image and the corresponding points from the surface.