This guide continues covering the best practice registration workflow for large registrations, emphasizing the Review and Optimization stage.
During the Import stage of the workflow, you successfully imported a dataset represented as a minimum spanning tree and now it is available in the Review and Optimize area.
Please review Import Introduction.
Initial Inspection
-
Start by conducting an initial visual inspection of the registration to assess its quality. This will help ensure you have a solid foundation for further correction and optimization.
Inspecting Error Metrics
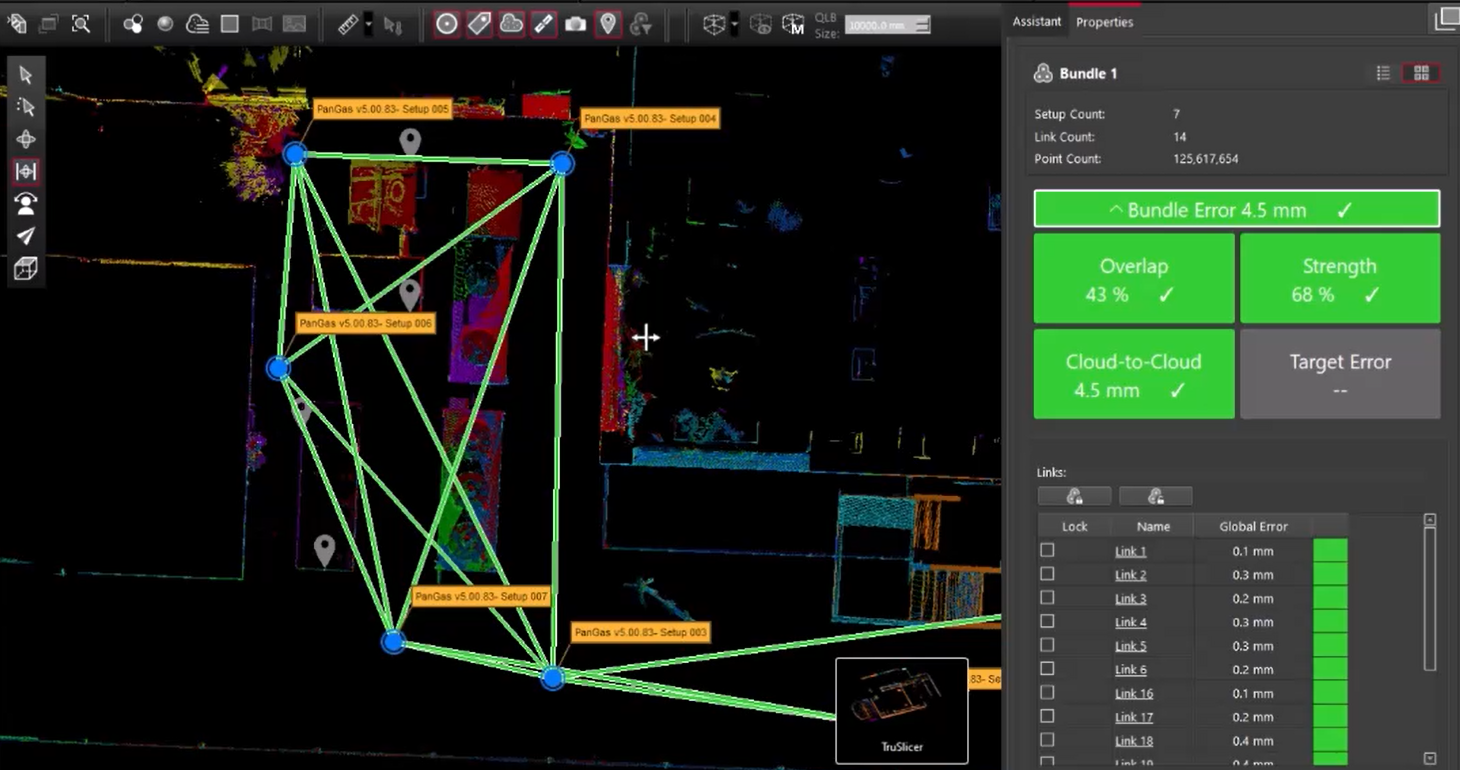
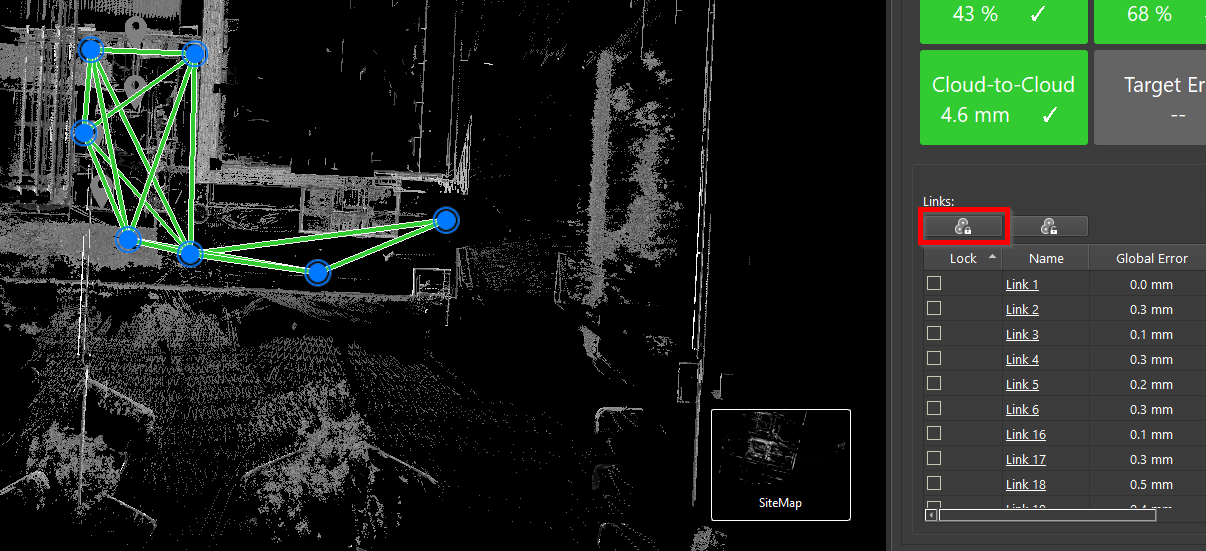
1.1. In the Properties panel, inspect the initial errors. Refer to the Error Reporting guide for more details about how error metrics are calculated and reported.
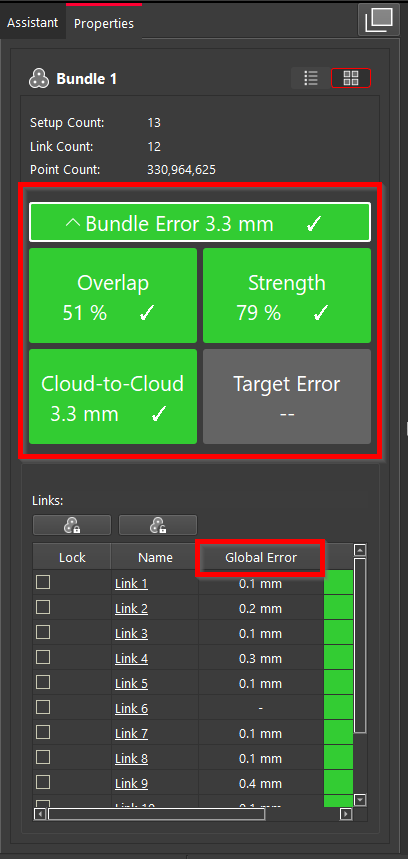
1.1.1. Typically, when data is imported as a minimum spanning tree, there is no Global Error, as this only occurs in the presence of loops within the registration. To refresh details on the difference between a minimum spanning tree and a loop, refer to the Summary section of the Import Introduction guide.
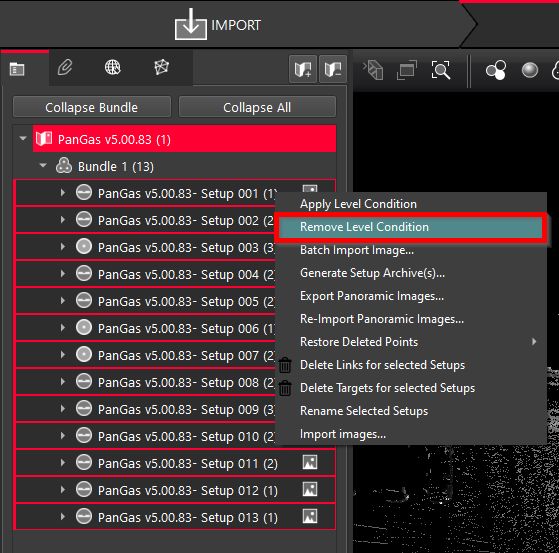
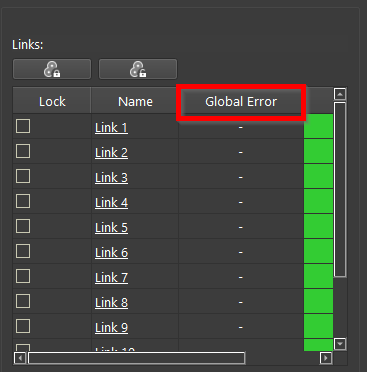
However, if data is imported with Setups that have a level condition, a Global Error may be present. If you're uncertain whether the Setups are properly leveled, remove the level condition: simply click Remove Level Condition in the context menu of the selected Setups.
You’ll notice that the Global Error will vanish.
Verifying Alignment Errors
1.2. Access the link quality using TruSlicer.
Registration Enhancement
-
After the initial inspection, continue enhancing the strength and quality of the registration as follows:
Breaking Up Bundles
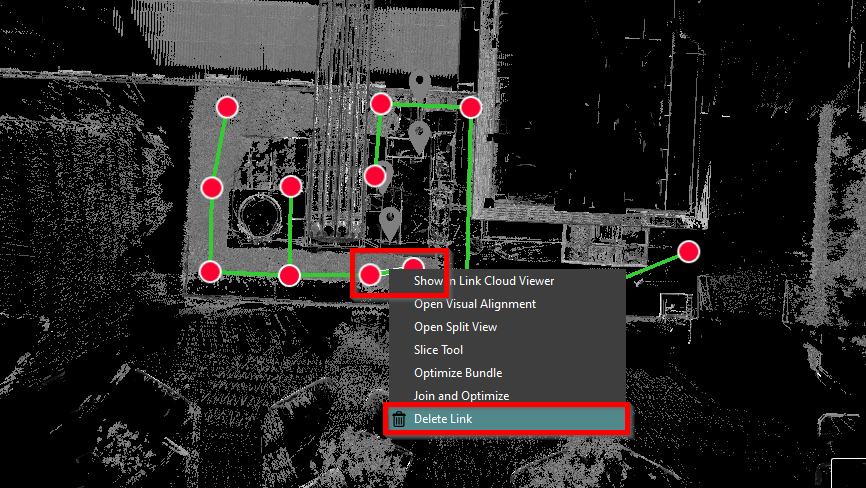
2.1. Split large Bundles into smaller parts. It is a highly effective strategy when managing large datasets. By working with smaller groups, you can easily inspect and correct any issues. Once refined, you can merge the Bundles back into a single point cloud.
2.1.1. In the Graphical area, select the link, right-click it, and then select Delete Link from the context menu. As a result, two smaller Bundles will be created.
Adding New Links
2.2. Adjust link creation settings.
When handling Bundles with numerous links, settings play a crucial role. Adding more links can extend processing time significantly, so it's essential to manage settings to better control the new link creation.
2.2.1. Go to Settings | Links.
2.2.2. Specify the link creation criteria.
2.2.3. Specify Maximum suggested links added per bundle.
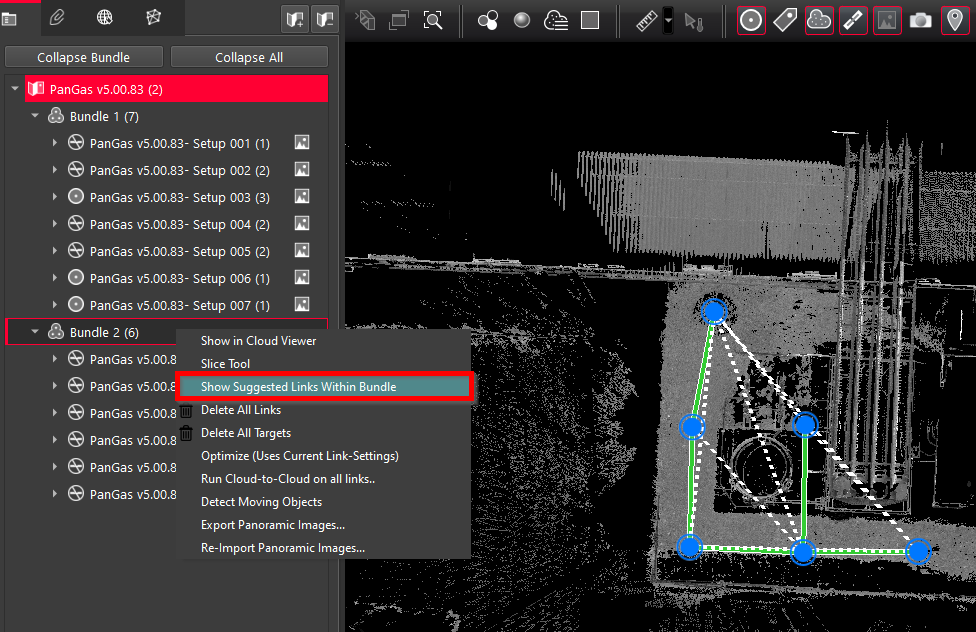
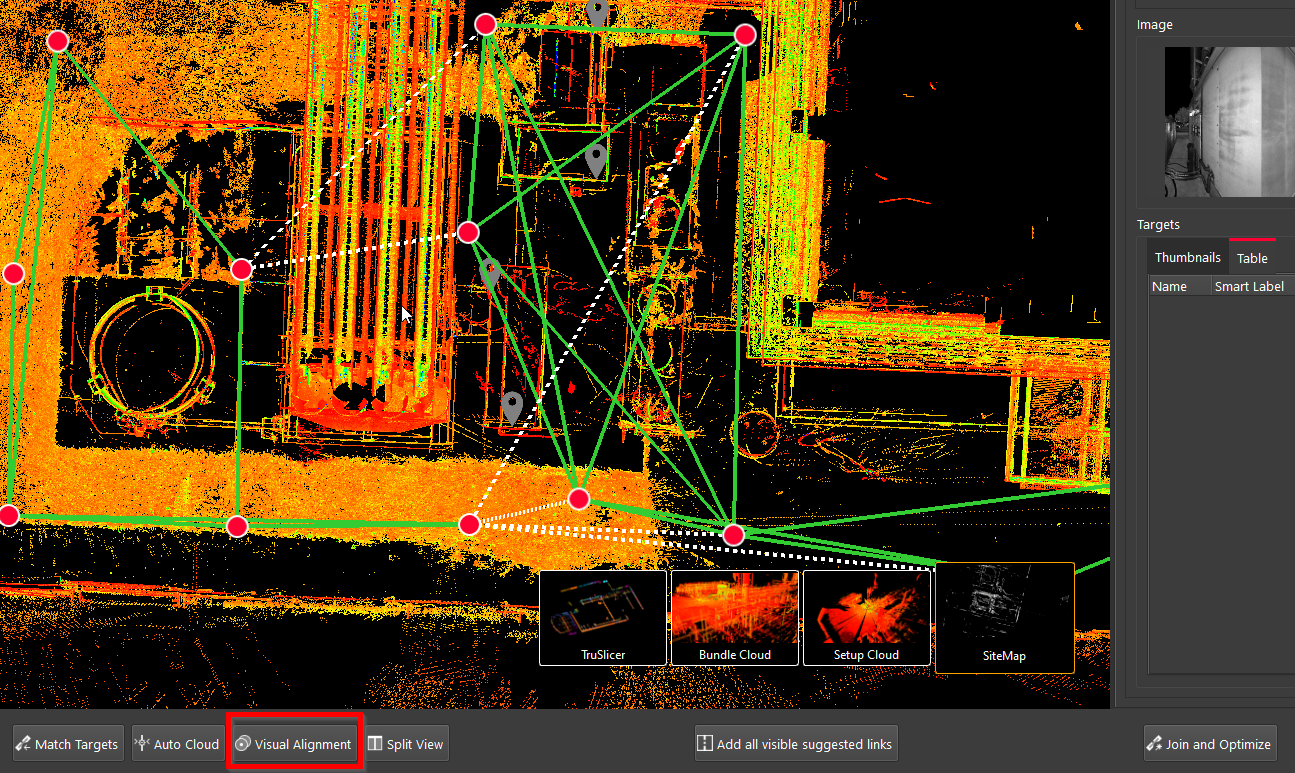
2.3. Select the Bundle, right-click it, and then click Show Suggested Links Within Bundle.
Cyclone REGISTER 360 PLUS will perform the Bundle inspection and suggest possible links that can be added to the Bundle.
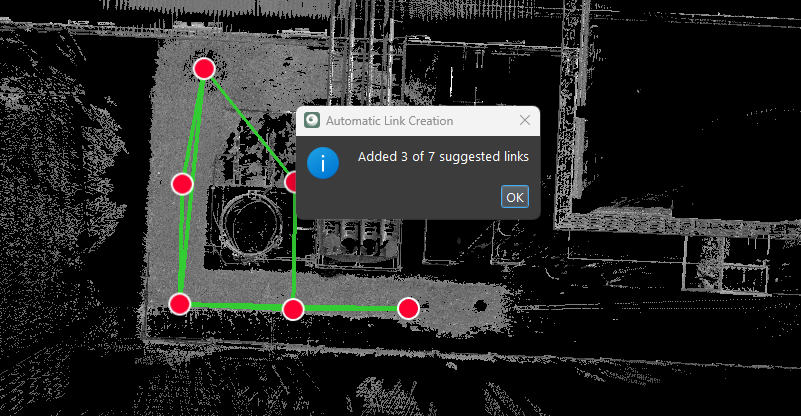
2.4. In the Graphical area, select one of the suggested links and then click the Add all visible suggested links button that will appear.
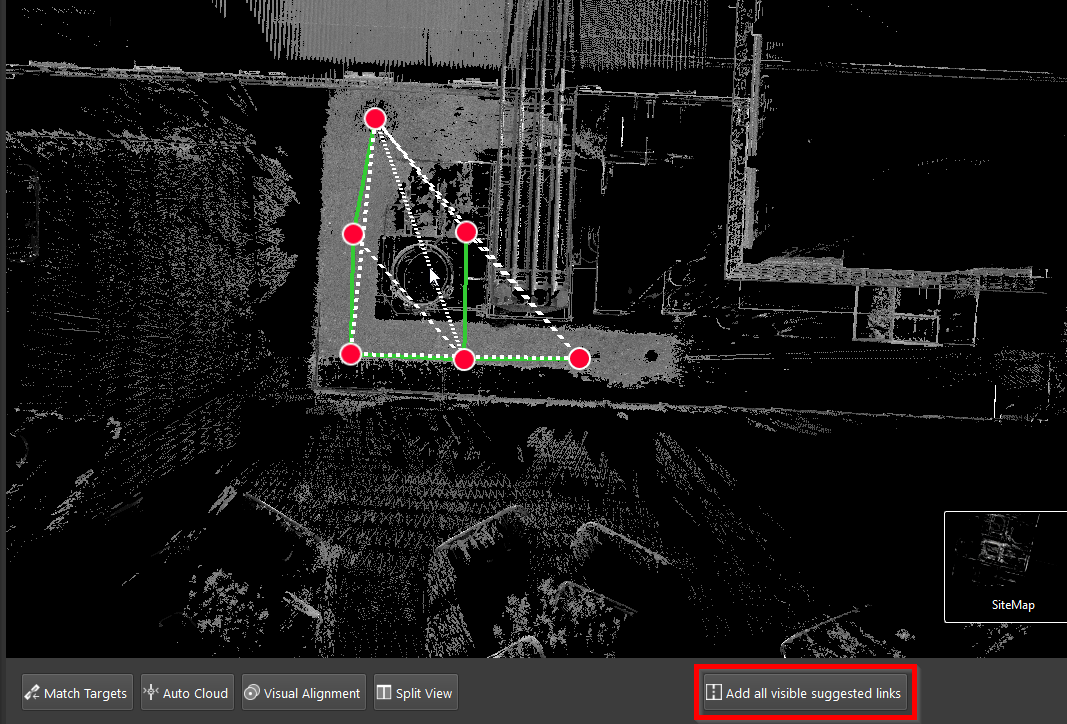
Cyclone REGISTER 360 PLUS will only add links that fulfill the specified link creation criteria and are beneficial to the Bundle.
Bundle Inspection After Adding New Links
-
Go to TruSlicer and verify the links in the created loops to ensure their quality is sufficient.
-
When you are satisfied with each Bundle's appearance—the numbers are good, and the TruSlicer inspection is satisfactory—lock the finalized Bundles to maintain their local integrity and prevent any accidental changes.
Joining Corrected Bundles into a Single Point Cloud
-
After each individual Bundle is inspected and meats the project specifications, combine the Bundles again by dragging one next to another until the overlapping area is found.
As the Bundles were locked in Step 4, they will move as a rigid body without any structural changes.

Link Visual Alignment
-
Pre-align the joined Bundles to fit together as precisely as possible.
-
If you encounter a bad suggested link, select it in the Graphical view and perform Visual Alignment before joining and optimizing it.
7.1. One effective method for visual alignment when joining two objects is to align a corner of two surfaces and then complete alignment by rotating one surface to match another.

Note: To slow down the rotation of a surface, hold the Alt key for better control during the matching process.
7.2. When satisfied with the alignment results, click Join and Optimize.
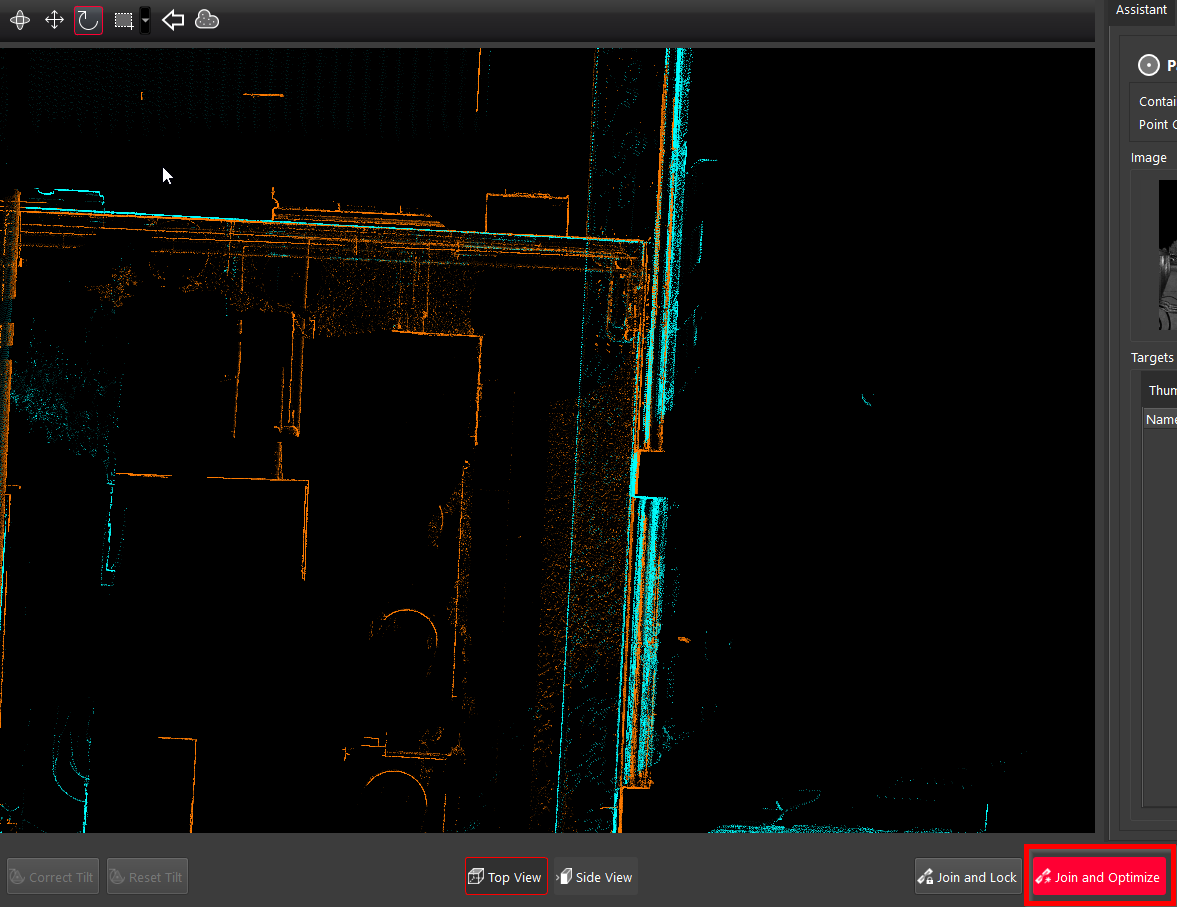
As a result of joining and optimizing the link, Bundles are combined and a single point cloud is created.
-
Add other suggested links to the Bundle (see Steps 2.3-2.4).

Final Inspection
-
As you now have a complete Bundle, conduct its final inspection to avoid any unexpected issues:
9.1. Check the error metrics.
9.2. Inspect with TruSlicer.
9.3. Decide whether you want to enable the Setup level condition that was previously disabled in Step 1.1.1. of this workflow.
Note: When the registration is leveled, additional tension can be applied, potentially increasing errors. If the level is insufficient, it may negatively impact the registration.
Summary
When reviewing and optimizing large datasets, consider the following guidelines to keep the process manageable:
-
Break the registration into smaller parts and focus on inspecting a smaller number of Setups at once.
-
When you discover a poor link, perform visual alignment to correct it.
-
Clean trees/noise if necessary to re-run Cloud-to-Cloud on individual links or on all links at once.
-
Always inspect with TruSlicer to look for offsets between Setups and ensure numbers correspond to the integrity of the fit.
-
Turn off auto-optimize and then add links to close individual loop.
-
Clean and re-optimize iteratively to reach the desired outcome.
-
Save a project version after the registration is reviewed and optimized.