This guide details the workflow of using the Window Fitter tool in CloudWorx for Revit.
Practice Data
Apartment.lgsx
PF 1 Vantail - Droite 2.rfa
Files from wall exercise- including extracted wall
Importing Project Data
-
Import the project data.
Considering that the host wall must be in place before selecting a window, it is recommended to load the project with the walls extracted during the Using Wall Fitter in CloudWorx for Revit workflow.
Loading Window Family
-
Load the appropriate window family if it is not available in the current project. Go to the Insert tab and click Load Family.

-
For this workflow, select the PF 1 Vantail - Droite.rfa Autodesk Revit family and click Open.
Note: Libraries are typically stored at C:\ProgramData\Autodesk\RVT <Year>\Libraries, but the RFA file can be loaded from any location.

-
You can verify the family loaded by clicking Families in Revit Project Browser and scrolling down to the Windows menu.
.png?cb=46bb043903201ef96ec4c778ecc12cdd)
Extracting Windows
-
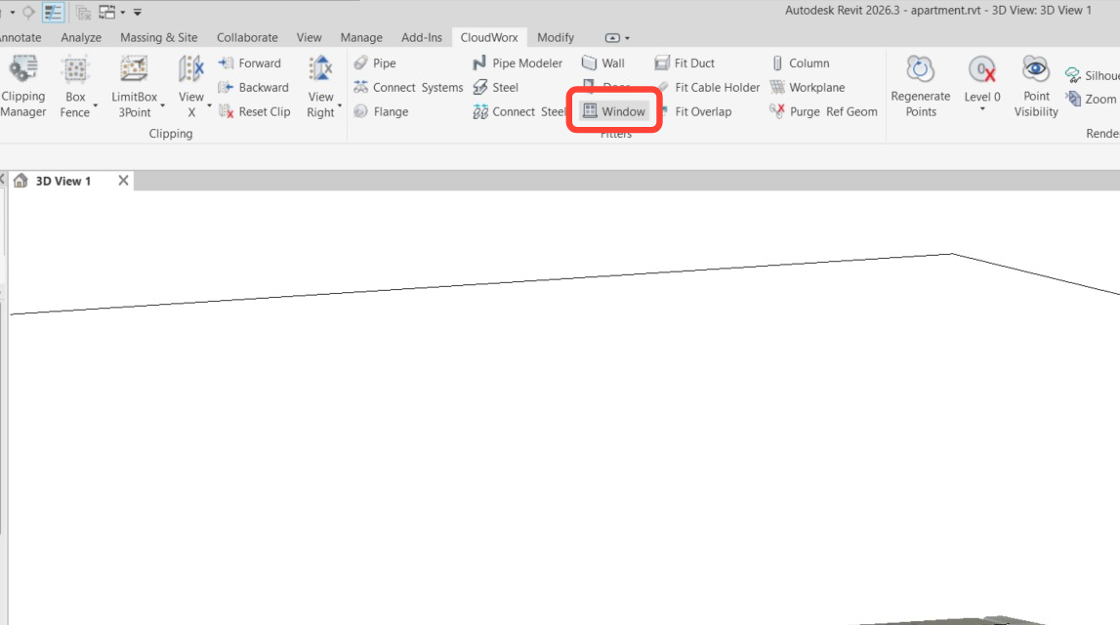
Enable the Window Fitter tool. Navigate to CloudWorx | Fitters | Window.
-
In the Fit Window dialog:
-
Select the PF 1 Vantail - Droite family from the drop-down list.

-
Keep the Use automatic window detection check box selected.
-
Selecting the Use automatic window detection check box enables CloudWorx to determine the window size automatically using the point cloud. If you deselect this option, the window will be placed based on your selection, and the point cloud will be ignored.
Automatic detection is quite effective and should generally remain enabled.

c. Click OK to save the selected configurations.
-
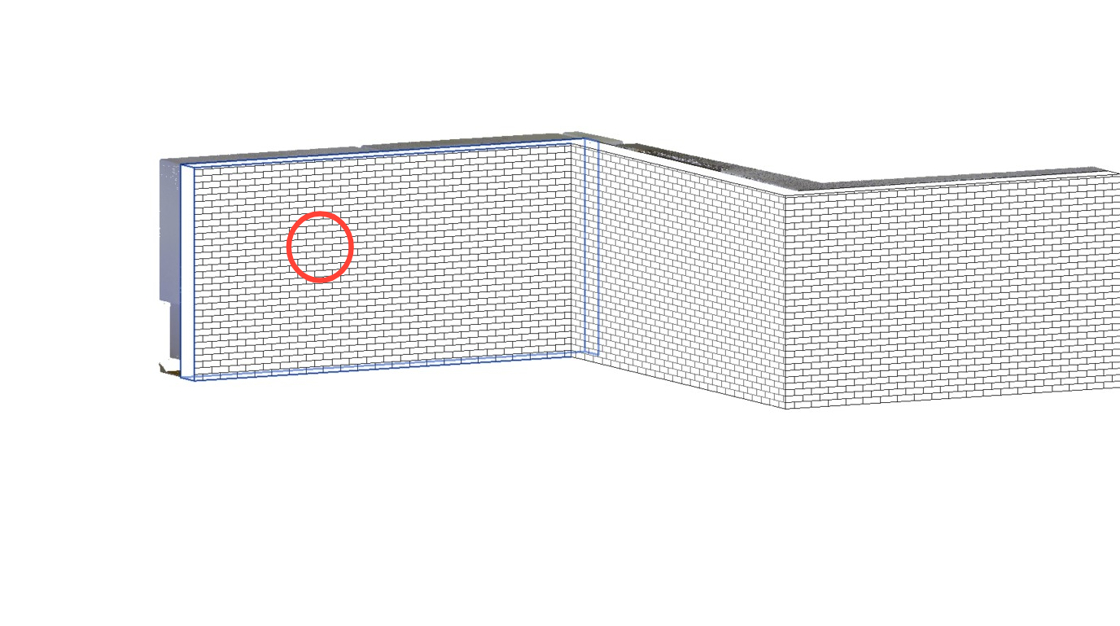
Click the host wall.
-
The tool automatically hides the wall, allowing you to use the point cloud to place the window. Using the ViewCube, orient the view to be parallel and perpendicular to the wall. While not required, it simplifies the window selection process.

-
To create a window, select two points. After selection, a rectangular area representing the window will be generated. The points may be chosen in any order, either from the bottom or the top.

-
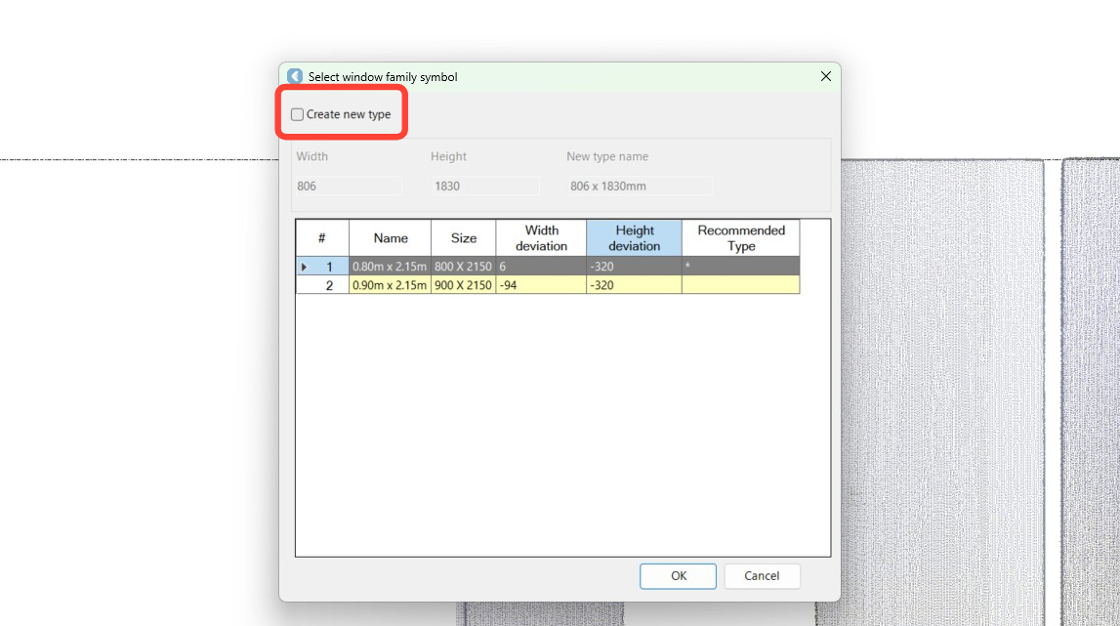
Check the calculated values for the best fit displayed in the Select window family symbol dialog.
The tool searches the loaded types to find the best fit. It calculates the optimal width and height in real time and displays them above the table. The Width deviation and Height deviation columns show the preloaded types for the extracted window.
Since the actual width and height do not match the preloaded values for the window opening, creating a new window type is recommended.

-
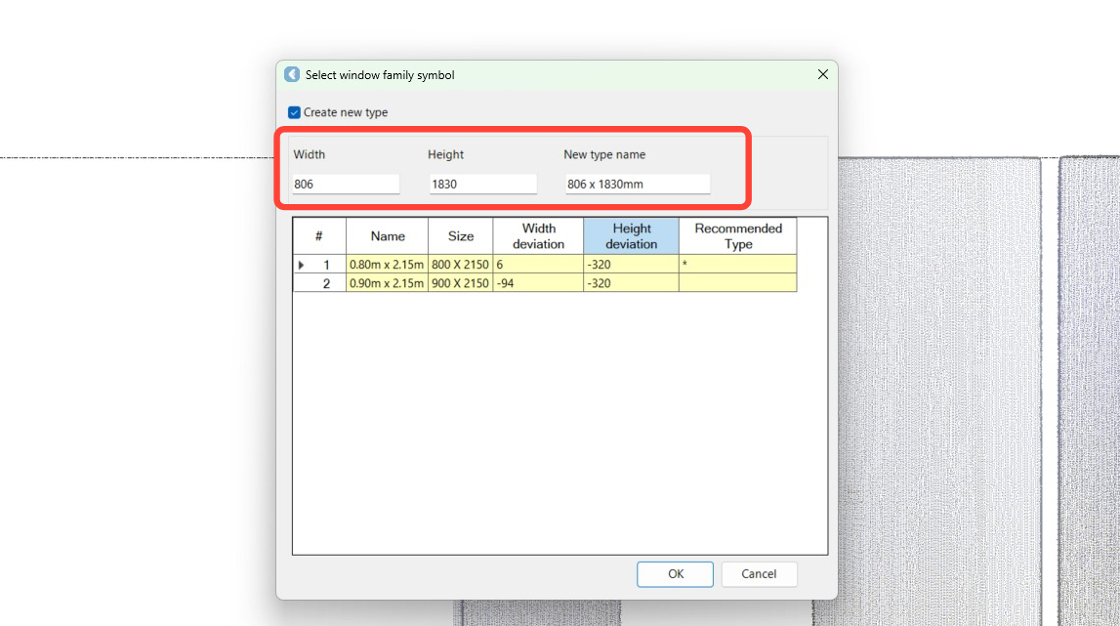
Select the Create new type check box to use the values calculated by the tool.
-
The values for the new type are now editable. Adjust them if needed and click OK to add the type to the family in the project.
As a result, the window is placed and fitted.

-
Repeat Steps 7-12 to extract another window.
Note: The Window Fitter tool remains active, but you have to click the host wall, even if it is the same one where a window was previously placed.


-
Evaluate the outcome.
