AUTOCAD BASIC AUTOCAD PRO REVIT navisworks bricscad basic bricscad pro ULTIMATE
Clipping | Clip Point Cloud | Clipping Manager
Command Line
-
AutoCAD / BricsCAD: CWCLIPMGR
This command opens the Clipping Manager dialog, which is used to create, edit, and delete clipping records in CloudWorx.
Clipping Manager Dialog
When the tool is activated, the Clipping Manager dialog opens.
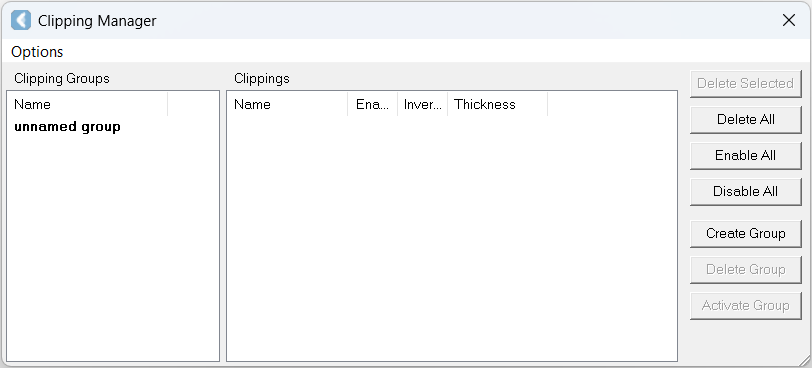
The dialog has two panes: Clipping Groups and Clippings.
The left pane is the list of clipping groups. A clipping group is a list of clipping records that are applied together to point clouds. The user can create, delete, or activate a group. At any time, there is one group activated.
When activated, the clipping records are displayed in the Clippings pane where the user can enable or disable a clipping record, invert a section view clipping or a fence clipping.
Also, the following buttons are available in Clipping Manager:
-
Delete Selected: The button that allows deleting the selected clipping record.
-
Delete All: The button that allows deleting all clipping records of the active clipping group.
-
Enable All: The button that enables all clipping records of the active clipping group.
-
Disable All: The button that disables all clipping records of the active clipping group.
-
Create Group: The button that allows creating a new clipping group. The user can click the name twice to rename a group. By creating and activating a new clipping group, the last clipping group is protected. This is because the active clipping group can be easily cleared with a reset clipping command.
-
Delete Group: The button that allows deleting the selected clipping group. It’s not possible to delete the active one.
-
Activate Group: The button allows activating the selected clipping group. Clipping records will be updated.
-
Align View: The button that aligns an active viewport to face the selected slice only.
When the user clicks the name of a clipping group or double-clicks the clipping record, it can be renamed.
All clipping records are created using the following tools:
Changing the Limit Box Parameters
The user can modify the parameters of the created limit box via Clipping Manager.
To modify the parameters of a limit box:
-
Open the Clipping Manager using any option below:
-
Click Clipping Manager in the Clipping panel.
-
Type a command line prompt specific to the preferred CAD system and press ENTER.
-
-
Right-click the limit box record in the Clippings pane and then click Modify.
-
In the Limit Box Parameters dialog that will open, change the parameters as needed.
-
Click Apply to enable changes. It activates when a change to the parameter is made.
-
Click Close to exit without saving changes. In this case, a warning will appear to discard changes.

The limit box will be displayed in the view until the dialog is closed. The user can directly change the values (Corner or Size components) and click another edit box to see the effect. It’s also possible to use the up/down keys near each edit box. However, the keys will have different effects:
-
The up/down key in the Move section will move the limit box along its axis direction.
-
The up/down key in the Resize section will enlarge or shrink the limit box along each axis in both directions.
-
The up/down key in the Resize All section will shrink or enlarge the box in all directions.
If a change in clipping exposes the new area that is previously clipped out, the user will be asked to regenerate the point cloud. This change includes clearing one or more clipping, moving a slice forward or backward, inverting a clipping, or changing a limit box. A message will be shown that includes an option to not show it again for the current session.
It’s also possible to switch the clipping scheme using the following menu items: Options | Use Single LimitBox/Slice. See Clip Scheme for more details.