This guide provides the essentials for getting started with the software, including installation, activation, and basic navigation.
Software Installation
-
Make sure your workstation meets the required specifications (see System Requirements and Compatibility).
-
Download the PinPoint installer and follow the instructions in the InstallShield Wizard to complete the installation.
Notes:
-
You must have Administrator privileges to correctly install and license PinPoint.
-
It is recommended to verify your computer's graphics card settings after installation is complete (see Graphics Card Settings).
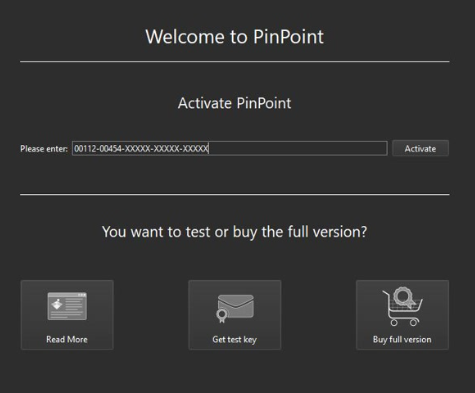
Software Activation
After successfully installing the software, the next step is to activate your license. You'll need your Leica Entitlement ID (EID), which can be found in one of the following ways:
-
Your invoice
-
The delivery note included with your BLK Essentials package
-
A separate entitlement certificate, either in printed or digital form
To activate PinPoint:
-
Open PinPoint Registration Tool or PinPoint Modeler.
-
A welcome message prompting license activation will appear.
-
-
Insert the license Entitlement ID and click Activate.
-
* You will see a prompt indicating that Client License Management (CLM) software is required. Click Yes to proceed with the installation.

*If CLM is already installed on the computer, it will be automatically detected, and this step will be skipped.
CLM software will be downloaded and installed. Once installation is complete, your license will be activated, and you'll gain access to both PinPoint Registration Tool and PinPoint Modeler.
General Navigation
Rotate
PinPoint supports two distinct rotation modes: Target Mode and Panorama Mode.
-
In Target Mode, the model rotates around a fixed 3D target point. This mode is ideal when inspecting a model from the outside or rotating around specific objects.
-
In Panorama Mode, the model rotates around the viewer's position. This mode is commonly used when navigating from inside a model and looking outward.
The default rotation mode is Target. It can be modified to Panorama by holding the Shift key.
To rotate the view, press and hold the right mouse button while moving the mouse. The rotation starts around a fixed 3D point. Rotating while holding Shift will switch to a panorama-style rotation.
Move
Clicking the right mouse button on any point in the 3D view moves the camera toward that point.
In the default mode (Target mode), this sets a new centre of rotation.
If the clicked point is a scan position, the view transitions to that position and displays a panoramic image. To rotate in the Panorama mode, hold the Shift key while using the right mouse button.
Holding the mouse wheel while moving the mouse enables panning, which allows moving the camera horizontally or vertically, in parallel to the scene.
Zoom
Zooming is the process of changing the perceived size of objects.
It can be achieved by moving the camera closer to them (dolly zoom) or by adjusting the field of view (FOV zoom). PinPoint uses both types of zooming.
Using the mouse wheel, the type of zoom applied depends on the current rotation mode:
-
In Target mode, zooming with the mouse wheel results in a dolly zoom.
-
In Panorama mode, holding Shift and using the mouse wheel zooms the field of view.
Dolly zoom can also always be performed by holding Ctrl + right mouse button, and moving the mouse forward or backwards.
Note: When using dolly zoom or target rotation in the Panorama mode, the user will exit the Panorama mode.