revit
Fitters | Door
The tool allows users to fit doors from a catalogue in a semi-automated fashion to quickly add intelligent components to Revit models.
Using the Tool
Note: Before using the tool, create a wall where the door will be fitted using the Wall fitter.
To fit the door, follow the steps below:
-
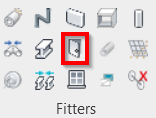
Click the Door icon in the Fitters panel.
-
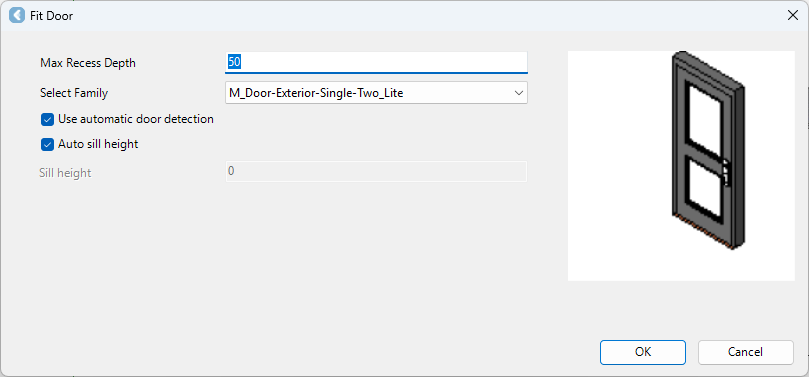
The Fit Door dialog will appear.
-
-
In the Fit Door dialog, modify the settings as follows:
-
Specify the Max Recess Depth value.
-
Select a family.
-
Select the check box for automatic door detection if needed.
-
Choose either the Auto sill height option or enter a specific value in the Sill height field.
-
Click OK.
-
-
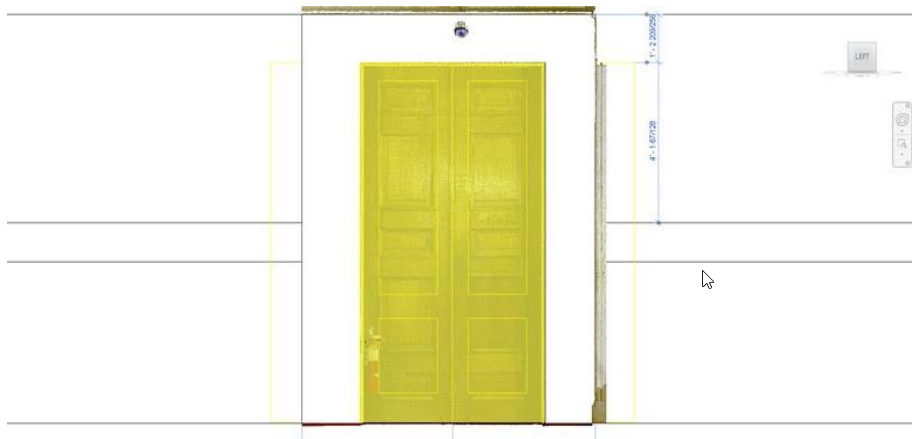
Select a region of the point cloud where the door should be fitted.
-
A new dialog will appear, suggesting the door type based on the best fit within the family.
-
Accept the suggested type.
-
Or, if the suggested type is not a close enough fit, create a new type by defining the name and adjusting the size of the new type, if needed. As a result, a new entry will be created in the family, and the new type will appear on the list for future door fitting.
-
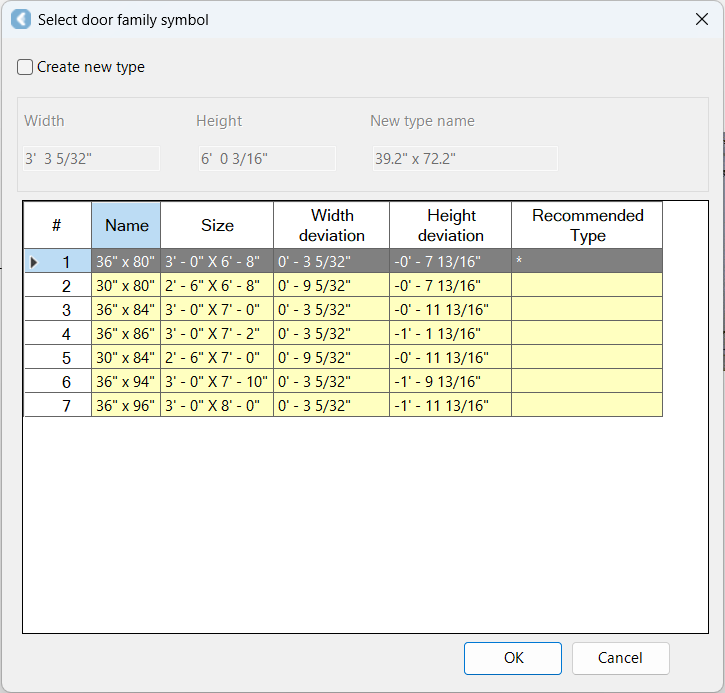
c. Click OK, and the door will be placed.