autocad pro revit bricscad pro ultimate
Fitters | Pipe Modeler
The Pipe Modeler tool helps speed up the process of creating complex piping systems. It allows users to automatically grow and extend pipes with a series of clicks and can automatically create elbows and branches. This tool extends the capabilities of the existing Pipe fitter to make it even more convenient for modelling much larger sections of pipe.
Using the Tool
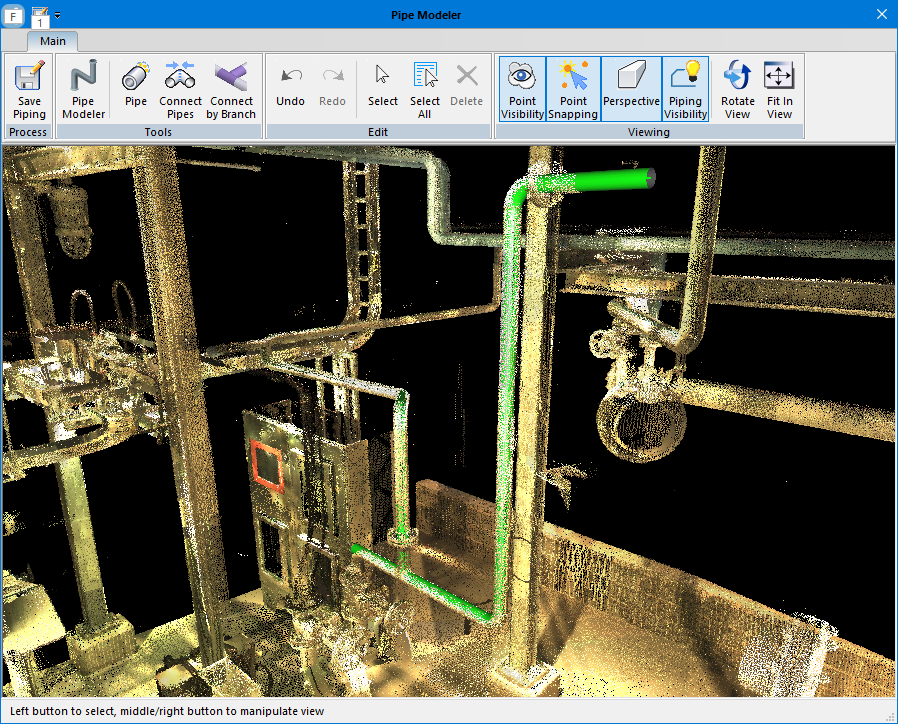
When the Pipe Modeler button is clicked in the Fitters panel, the Pipe Modeler dialog appears.
The typical workflow of using Pipe Modeler is as follows:
-
Use the Pipe

-
Use the Connect Pipes

-
Use the Connect by Branch

-
Use the Pipe Modeler

-
Click Save Piping

The Pipe Modeler Functionality
The following functions are available when Pipe Modeler is launched:

-
Save Piping: Send piping objects to CAD and remove them from the view.
-
Pipe Modeler: Use this tool to construct a pipe system, including piping segments, elbows, and tee connectors.
-
When clicked, the additional functionality appears on the Pipe Modeler ribbon.

-
Undo Segment: Undo the last piping segment created.
-
Redo Segment: Redo the previous undo operation. The redo stack will be cleared when a new segment is added.
-
Restart Tool: This will clear all intermediate piping segments and start over.
-
Finish Tool: This will finish the pipe system tool and construct the actual piping geometries, including piping segments, elbows and tees.
-
Maximum RMS Error: All fitting and region-growing algorithms need to know the quality of scan data. This represents 1-sigma of noise of measurement data. Please do not change this value for TLS scans. If you know the points are of low quality, such as data from mobile scanning or lower quality BLK360 scanner, you can increase this value. Typically, 95 percent of the points are distributed within 1-sigma from ideal/actual location. If a point is off by 3-sigma, we usually treat it as an outlier.
-
Use Catalog: When selected, a fit of piping will look up the selected standard and match the Catalog item. A dialog to select and confirm the best match will appear. Similar radius pipes will only be asked once.
-
Standard: This drop-down list includes all standards we have in our parts table library for you to choose from.
-
Elbow Bend Ratio: The elbow bend ratio is the ratio between the bend radius of the elbow centre line and the elbow diameter. Standard elbows usually have a fixed bend ratio ranging from 0.5 to 5 or more. A proper value that matches the actual piping system will help the algorithm to detect turning points more accurately.
-
Miter: It determines the number of segments in which the elbow will be divided. A miter count of 0 means the elbow is smooth.
-
Support Reducing: When selected, we allow reducing elbow or reducing tee.
-
Detect Elbow: When selected, the elbow junction will be detected and continue to grow.
-
Detect Branch: When selected, the tee junction will be detected and continue to grow.
-
Cancel Tool: Click to disable the selected tool. The intermediate piping data will be discarded without warning.
-
-
Pipe: A classic tool to grow pipe from a single seed.
-
Connect Pipes: A classic tool to connect multiple pipes with elbow connectors.
-
Connect by Branch: A tool to connect two pipes via the tee connector.
-
Undo/Redo: All created piping objects can be rolled back. When undone, a redo stack will let you redo the undone stuff.
-
Select: A default tool that allows selecting piping objects and deleting them.
-
Select All: All geometries are selected. Use this tool to delete all of them.
-
Delete: Delete selected objects. If a point of a point cloud is selected, a point cloud cannot be deleted.
-
Point Visibility: Toggle visibility of a point cloud on or off.
-
Point Snapping: Toggle selectability of a point cloud on or off.
-
Perspective: Toggle between perspective and orthographic projection modes.
-
Piping Visibility: When toggled off, the piping objects will be hidden.
-
Rotate View: A special tool to use left and right mouse buttons to manipulate the view. Note that, in all the tools used, the right mouse button can be used to pan. The mouse wheel can be used to rotate, retarget, re-centre, or zoom.
-
Fit In View: This command will fit all geometries and point cloud in the view.
Keyboard Shortcuts and Mouse Button Combinations for Pipe Modeler Tools
Most tools in Pipe Modeler allow using mouse buttons to perform various actions, such as rotating, panning, and zooming. See the table below for a detailed list of available actions.
|
Operation |
Result |
|
Click the left mouse button |
Data input or selection |
|
Move the left mouse button up/down |
Input a line or window/cross selection |
|
Move the right mouse button up/down |
Panning |
|
Click the wheel button |
Re-centering the view |
|
Move the wheel button up/down |
Rotating |
|
Press Ctrl + wheel button |
Rotating |
|
Press Shift + wheel button |
Zooming |
In addition to the ribbon layout icons in the Pipe Modeler dialog, there are some keyboard shortcuts that can be used to accelerate the process of modelling pipe runs.
|
Shortcut Key |
Action |
|
Delete |
Delete selection |
|
S |
Toggle point cloud snapping |
|
V |
Toggle point cloud visibility |
|
Esc |
Return to pick/select mode |
|
Ctrl+Z |
Undo |
|
Ctrl+A |
Select all geometries |
|
Ctrl+F |
Fit point cloud and geometries in view |