autocad pro revit bricscad pro ultimate
Tools | Ortho Image
Command Line
-
AutoCAD / BricsCAD: CWORTHOIMAGE
This command allows taking a custom orthographic image and saving it.
Using the Tool
To create an ortho image, follow the steps below:
-
Click the Create Ortho Image button in the Tools panel or type a command line prompt specific to the preferred CAD system and press ENTER.
-
Define either a rectangular or circular fence.
-
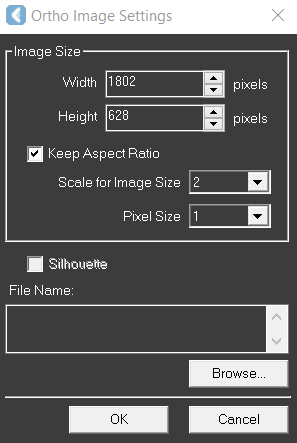
In the Ortho Image Settings dialog that will appear, adjust the following settings as needed:
-
The image Width and Height can be modified using the up and down arrows next to the corresponding field.
-
The image can be scaled from 1-10 in the Scale for Image Size field.
-
The Pixel Size can be changed from 1-5.
-
The Silhouette check box affects the transparency of each cloud point based on the orientation of that point's estimated surface relative to the viewer, thus outlines of surfaces inherent in the point cloud are revealed. Leave the Silhouette check box deselected if no normals exist for the data. Normals would need to be calculated using Cyclone.
-
Browse and save the file to the desired destination. Images can be saved as JPEG, GeoTiff, and PNG. If GeoTiff is selected, a TWF file is created. It is used as a companion file to insert a TIFF image in a CAD 3D model space. All image formats contain metadata, such as :dpi files.
-
-
Click OK to save the ortho image.