CYE SAML Single Sign-on Configuration
Configuring Single Sign-on in Cyclone ENTERPRISE should be only done once you have setup and configured an identity provider. See the SAML Signle Sign-on Identity Provider Instructions prior to configuring Single Sign-on

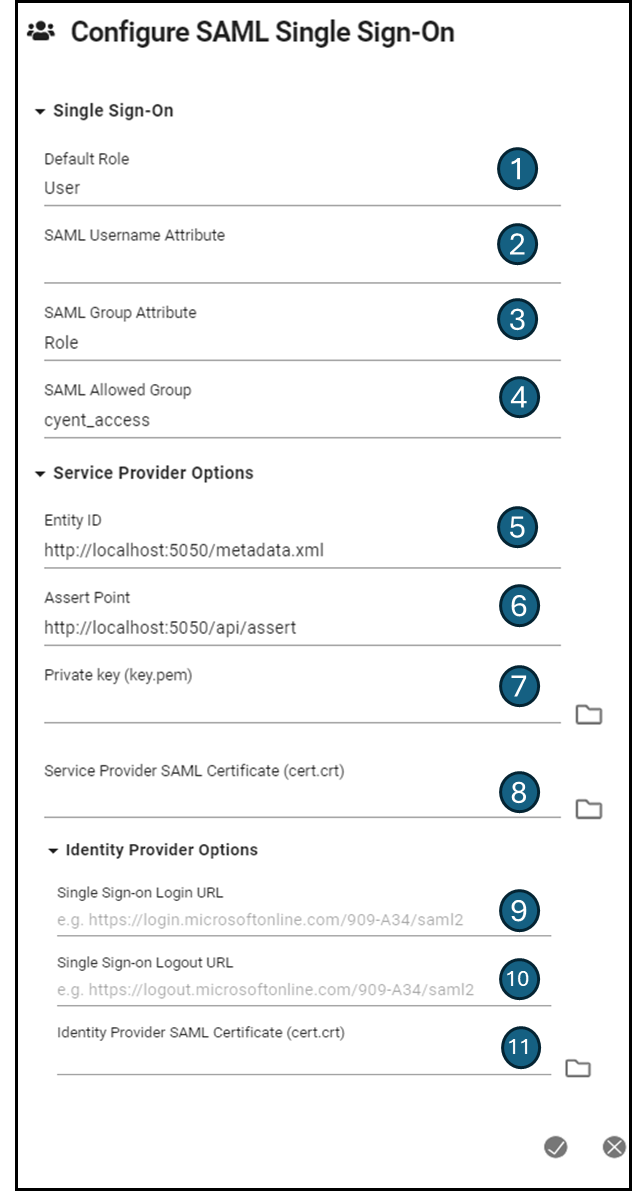
Single Sign-on
Default Role - This is the role that will be assigned to Single Sign-on users when the log in for the first time. User roles from an identity provider aren’t the same as those in Cyclone ENTERPRISE so you will need to assign them a role once they log in. If you would like to reassign roles to inidiviual users or groups of users after Single Sign-on has been setup, you can use the Batch Edit Users utility.
SAML Username Attribute - Cyclone ENTERPRISE looks for a field named “user” from the identity provider by default when a user logs in. If the identity provider uses a different field name, you can set the field being used to store the user names here.

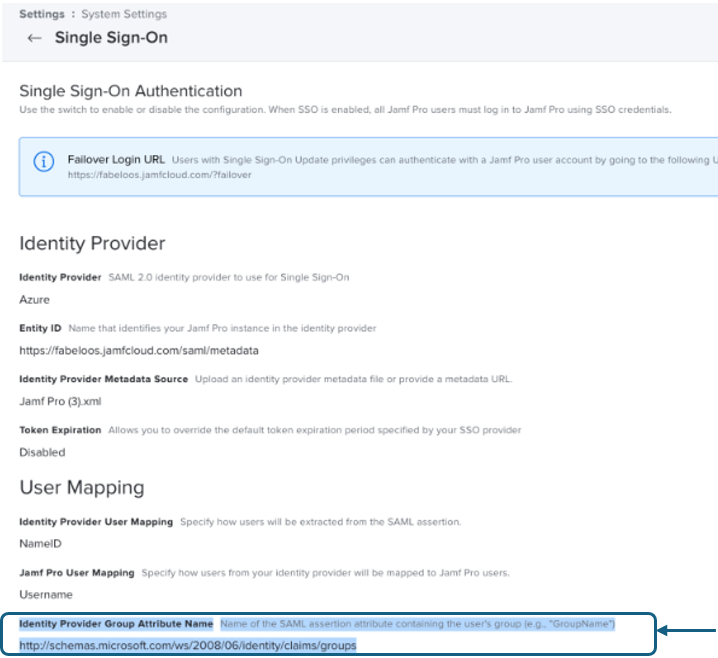
SAML Group Attribute - The SAML group attribute is a specific field name in the SAML response which indicates a group name in your identity provider. If you are using Microsoft Entra ID, in most cases this will be: “http://schemas.microsoft.com/ws/2008/06/identity/claims/groups”

SAML Allowed Group - The name of group that is allowed access to Cyclone ENTERPRISE. This is defined within your identity provider. An SSO user must be in the SAML Allowed Group in order to log in to Cyclone ENTERPRISE.

Service Provider Options
Entity ID - Unique name for the serivce provider, which in this case it Cyclone ENTERPRISE. This should be copied from the primary SSO tab in Cyclone ENTERPRISE (ie. http://localhost:5050/metadata.xml) . You will need to change the server name from “localhost” to your actual server name.
Assert Point - This URL is also referred to as the Service Provider sign-in or reply URL. This is the URL to which the Identity provider will send the SAML response or SAML assertion after successful authentication. This should be copied from the primary SSO tab in Cyclone ENTERPRISE (ie.http://localhost:5050/api/assert) . You will need to change the server name from “localhost” to your actual server name.
Private Key (key.pem) - Private key is used for encryption and decryption of data. This can be generate several ways. One option for creating a private key can be done using OpenSSL. OpenSSL is a cryptography software library or toolkit that makes communication over computer networks more secure. The OpenSSL program is a command-line tool for using the various cryptography functions of OpenSSL’s crypto library from the shell. It is generally used for Transport Layer Security(TSL) or Secure Socket Layer(SSL) protocols. OpenSSL is licensed under an apache-style license, which means that under some simple license conditions, one can use the toolkit for commercial or non-commercial purposes. The following are the steps required to create a private key:
Download OpenSSL’s required libraries from here.
Run the .exe file and install OpenSSL in the system.
Open the command prompt (cmd) and redirect the path to the bin folder.

Creating a Private Key
Type command openssl, hit enter and then use the following command to create private key:
genrsa -out myprivatekey.pemThis command generates 512 bit long private key and stores it into a file having .pem extension
Output:

Service Provider SAML Certificate - This allows it allows the service provider, Cyclone ENTERPRISE and the browser to communicate safely. This can be generate several ways. One option for creating a service proivder can be done using OpenSSL. The following are the steps required to create a Service Provider SAML certificate using OpenSSL. This assumes you have downloaded OpenSSL as suggested in step 7. Please reference this first if you haven’t downloaded OpenSSL:
Open Windows File Explorer.
Navigate to the OpenSSL bin directory
Right-click the openssl.exe file and select Run as administrator.
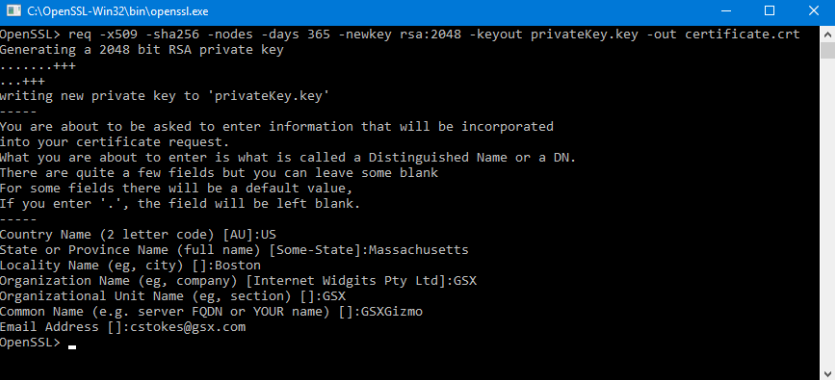
Enter the following command to begin generating a certificate and private key:
req -x509 -sha256 -nodes -days 365 -newkey rsa:2048 -keyout privateKey.key -out certificate.crtYou will then be prompted to enter applicable Distinguished Name (DN) information, totaling seven fields:

Once completed, you will find the certificate.crt file created under the \OpenSSL\bin\ directory.
Identity Provider Options
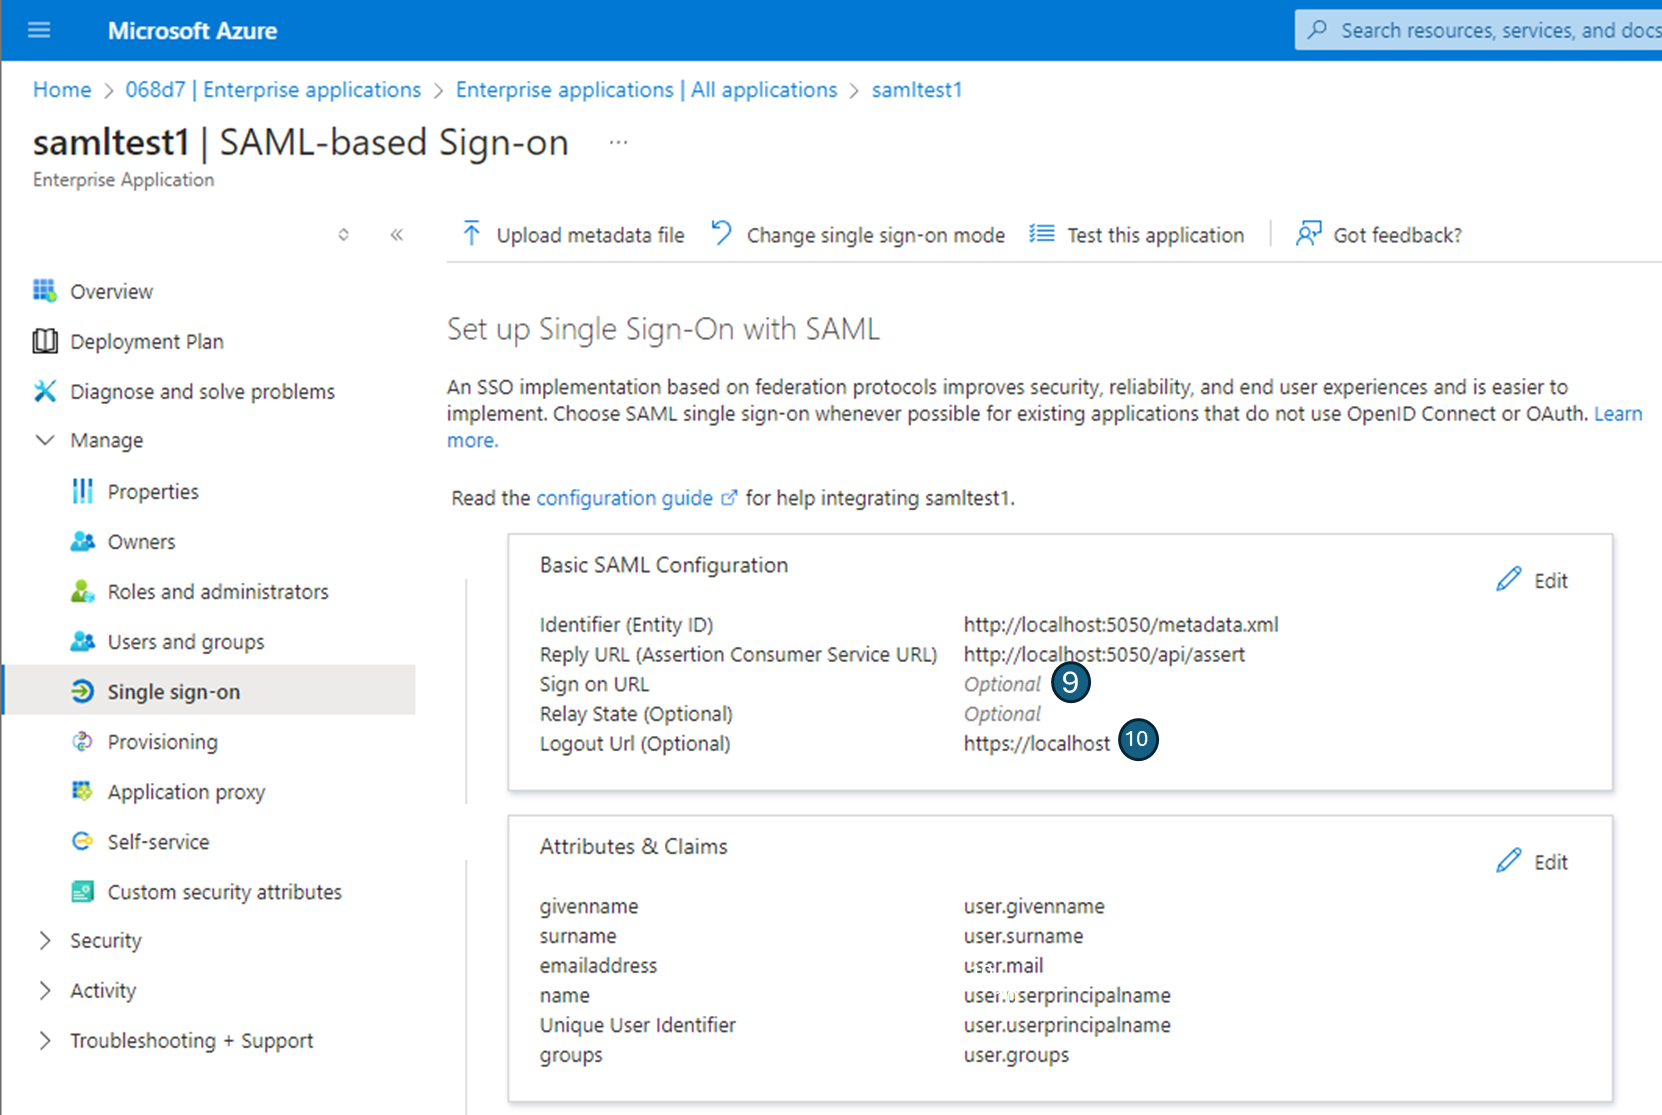
9. Single Sign-on Login URL - This is a URL provided by your Identify Provider and should be the address where our system will redirect users to for authentication.This parameter is specific to the configuration in your identity provider.
Sigle Sign-on Logout URL - This is a URL provided by your service provider the address where our system will redirect users for a logout response. This parameter is specific to the configuration in your identity provider

Indentity Provider SAML Certificate (cert.crt) - This allows it allows the identity provider, Cyclone ENTERPRISE and the browser to communicate safely. This step will vary depending on which identiy provider you are using. If you are using Microsoft Entra ID, use the following stpes to generate the SAML certificate:
Log in to the Microsoft Entra admin center as a Cloud Application Administrator or higher.
Navigate to Identity > Applications > Enterprise applications > Microsoft Entra SAML Toolkit > Single sign-on.
Choose SAML on the Select a single sign-on method page.
Click the pencil icon to edit the Basic SAML Configuration settings.
In the SAML Signing Certificate section, locate Certificate (Raw) and select Download.
