Point
REVIT
Set Level By | Point
Using the Tool
To set a level at a specific point, follow the steps below:
Click the Point icon in the Set Level By panel.
Position the crosshairs over the selected point on the point cloud to define a level and click on it.
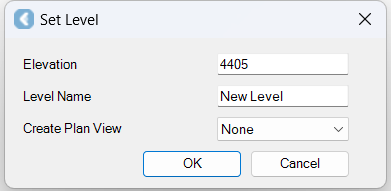
The Set Level dialog appears.
In the Set Level dialog, do the following:
Notice that the Elevation will be set from the pick point.
Enter the Level Name.
From the Create Plan View drop-down menu, select how to save the associated plan view in the Revit project browser.
Click OK, and the associated plan view will appear in the Revit project browser.


