
CloudWorx Viewer for ArcGIS: Guide to Opening and Analyzing Point Cloud Data
This step-by-step guide will assist new users in opening LGSx files in CloudWorx Viewer for ArcGIS Pro, using the tools in the CloudWorx menu and opening the TruSpace viewer.
Opening LGSx Files
1. Start with opening an ArcGIS Pro with a Local or Global Scene

2. Choose your project name and press OK.

Alert: Define the coordinate system accordingly in ArcGIS for it to match the reality capture data being loaded.
3. Right click Scene.

4. Click Properties.

5. Click Map Properties: Scene.

6. Use the search if necessary to filter the results.
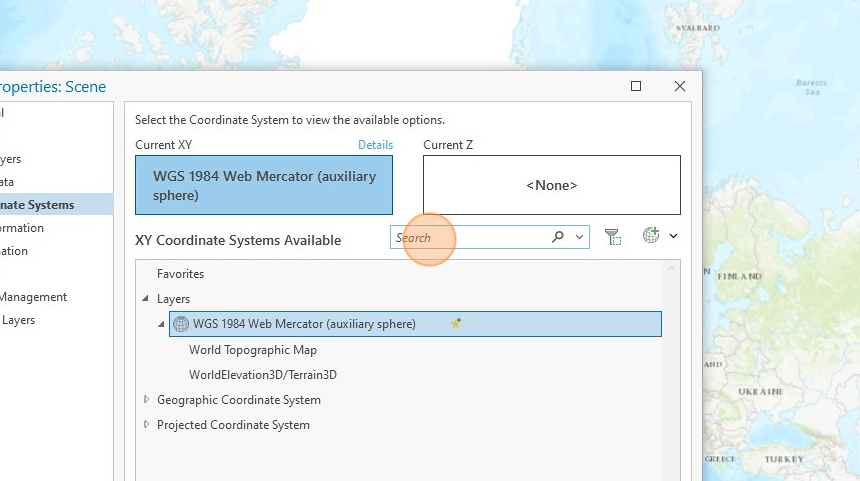
7. Expand and navigate to the required Coordinate system.

8. Select accordingly.

9. Click OK.

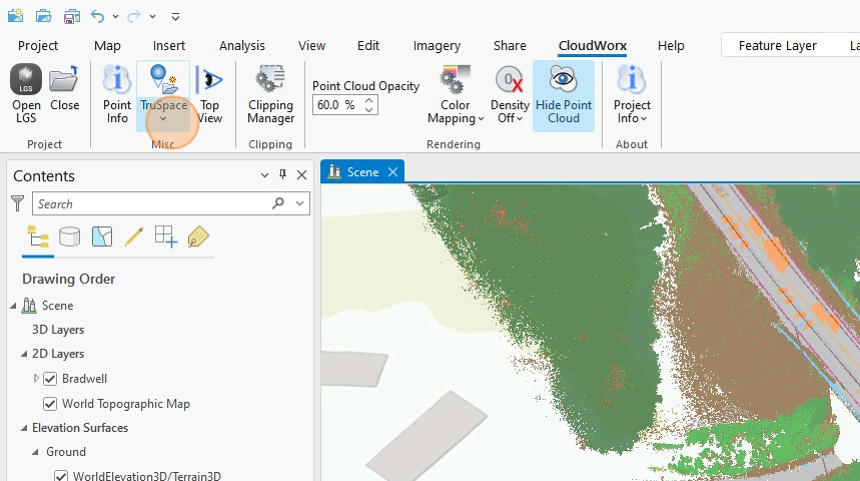
10. For loading reality capture data, click on the CloudWorx ribbon.

11. Click Open LGS.
At this time, only LGSx is supported in CloudWorx Viewer for ArcGIS Pro.

12. Click ... to navigate and select the LGSx path and file.
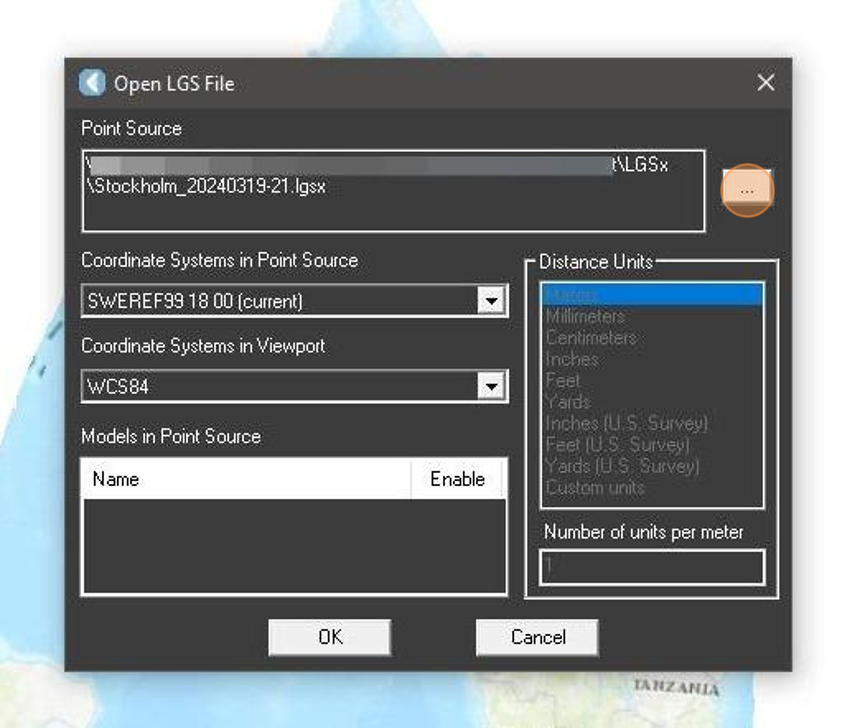
13. Select the file required and press Open.

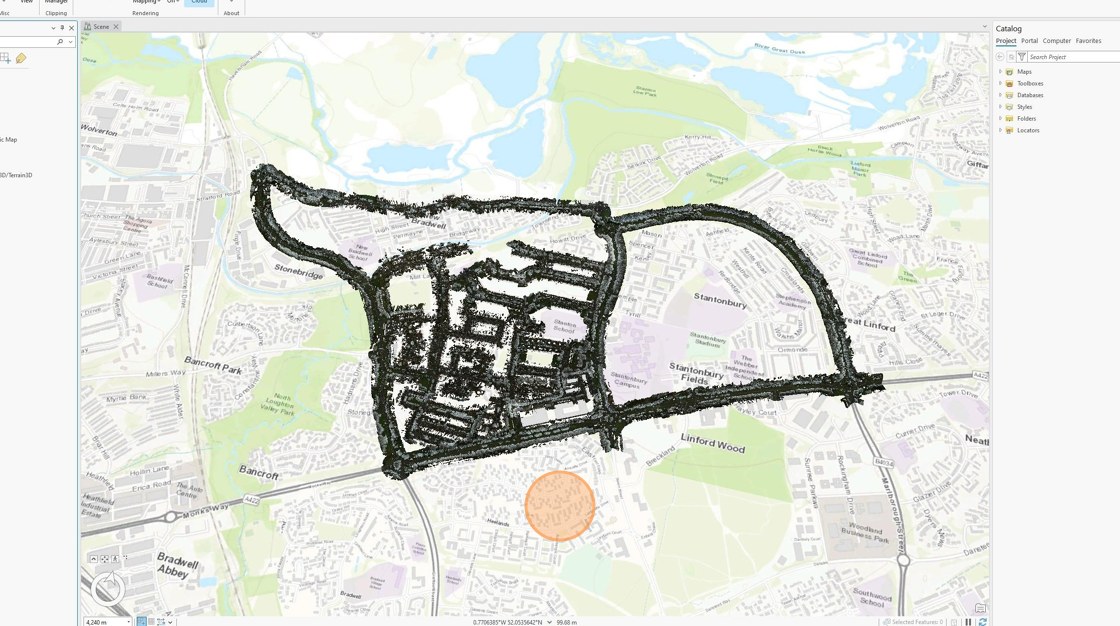
14. Reality capture data will load and zoom extend in a few seconds.
This data acts as a non-selectable layer, meaning it cannot be interacted with directly in the map.
The navigation follows standard ArcGIS patterns, allowing for seamless integration with other data layers including visibility toggles from the content explorer.
However, it’s important to note that it’s not possible to zoom or pan while hovering over the lidar data, as it is a non-selectable layer.
Project Info
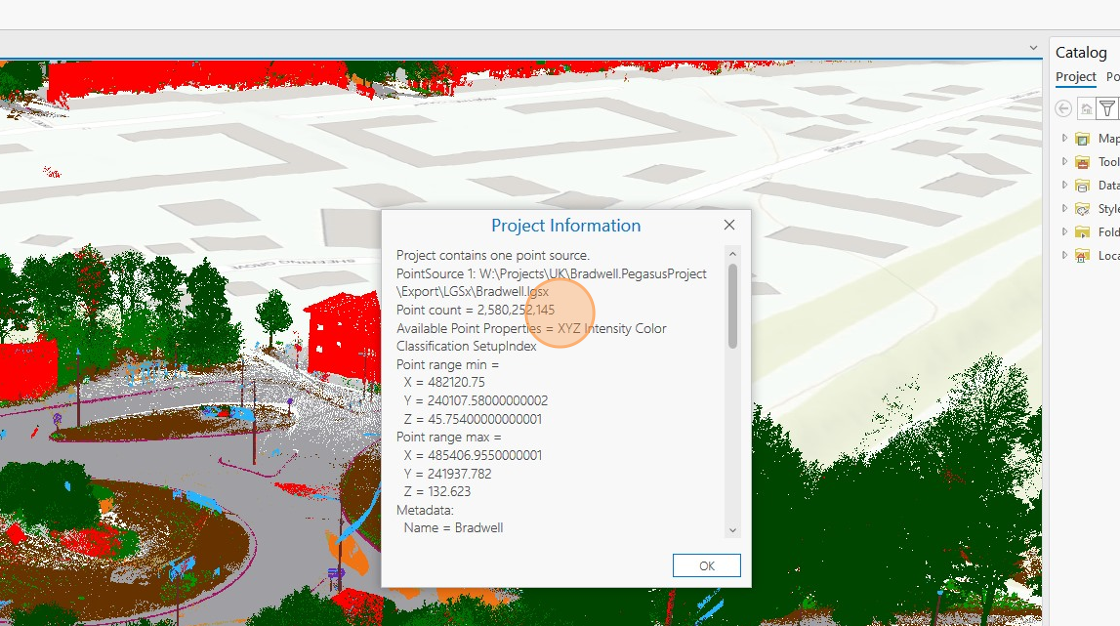
15. Use the menu About and Project Info for details of the coordinate system and number of points used.
Information about coordinate system is in WKT format.
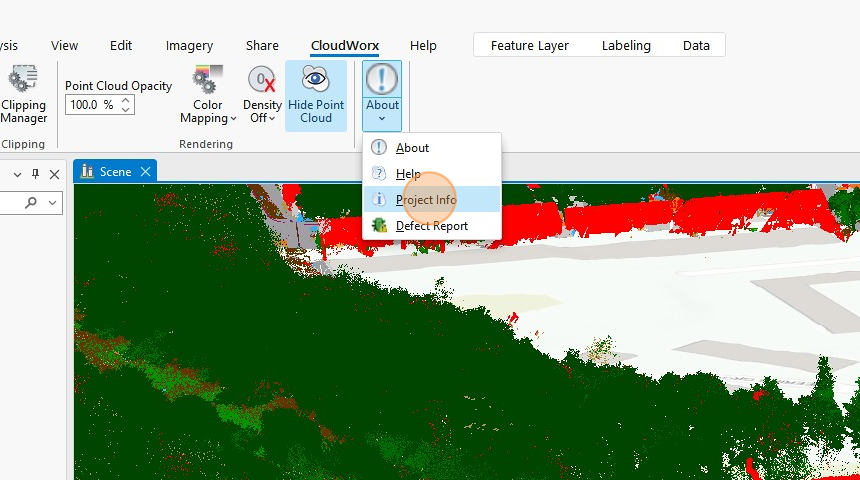
16. To view the WKT, click Project Information.
Point Cloud Coloration
17. Use the Coloration button to switch between True Color (default, if present), Intensity, Grayscale or Color Mapping.

18. For more customization and color display options, chose Color Mapping.

19. For example, Classification can be used when the data was previously classified.

20. Click Apply.

21. Click Close. The data will now be colored according to its classification. For more guidance on modifying the color by class coloration, please refer to https://rcdocs.leica-geosystems.com/cloudworx/latest/cw-point-cloud-visibility-settings .

Point Cloud Density, Opacity and Orientation
22. By default, reality capture opens with the full project density.
Click the Density button (default is Density Off to display the project in its native density).
A lower density version can be displayed, however, High Density will allow for easier navigation in the ArcGIS environment.


Example of Lidar density set to "High"
23. Use the Opacity tool to adjust the opacity of the reality capture data. This tool is useful to allow underlying map features to be seen without need to bring either object forward or send it backward.

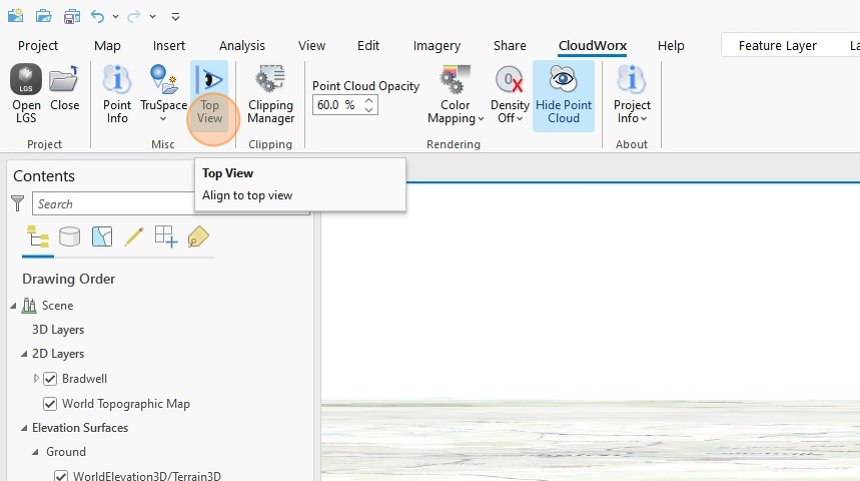
24. A convenient Top View button is available for pairing with ArcGIS navigation.
Point Info
25. The Point Info option allows the user to query information from points in the reality capture data.
This information is one way streamed and it's not saved.

26. Click Pick Points >>
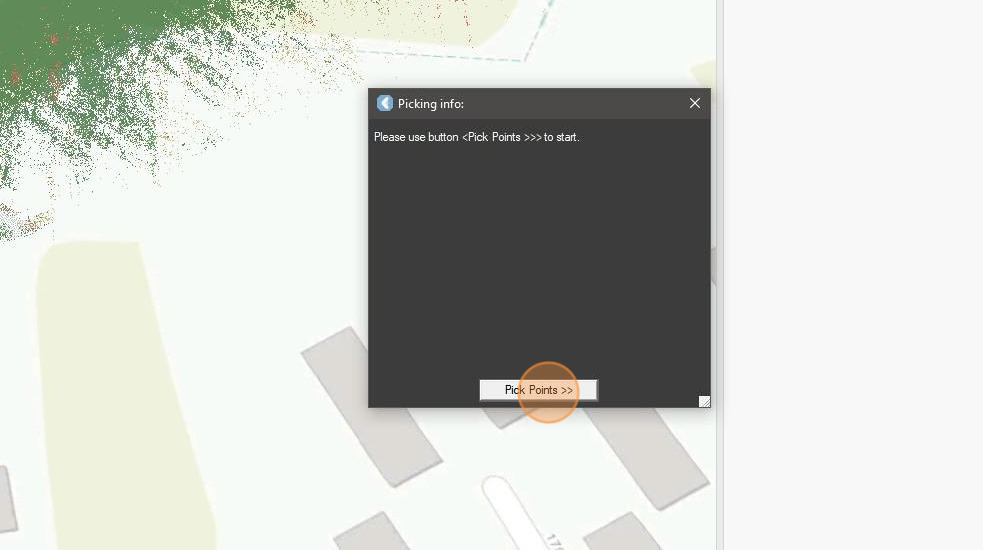
27. Click on the desired point.

28. The picked point info will be displayed.
Each point picked will update the result.

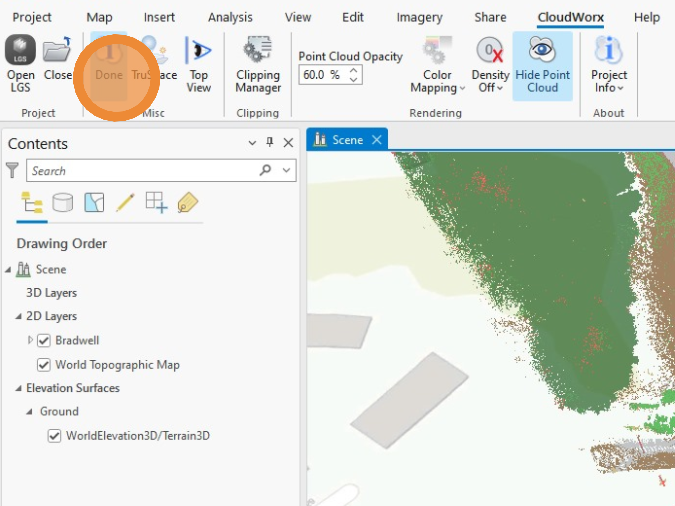
29. Press Done on the Point Info button when finished.
TruSpace
30. Click the TruSpace button to load the TruSpace viewer which allows native reality capture navigation, measurement, clipping and visualiation.
31. There are two options for opening TruSpace.
Click TruSpace | Open TruSpace, which requests a user position for the TruSpace to open.
Alternatively, Click Open KeyPlan, which will open TruSpace in extended top view.
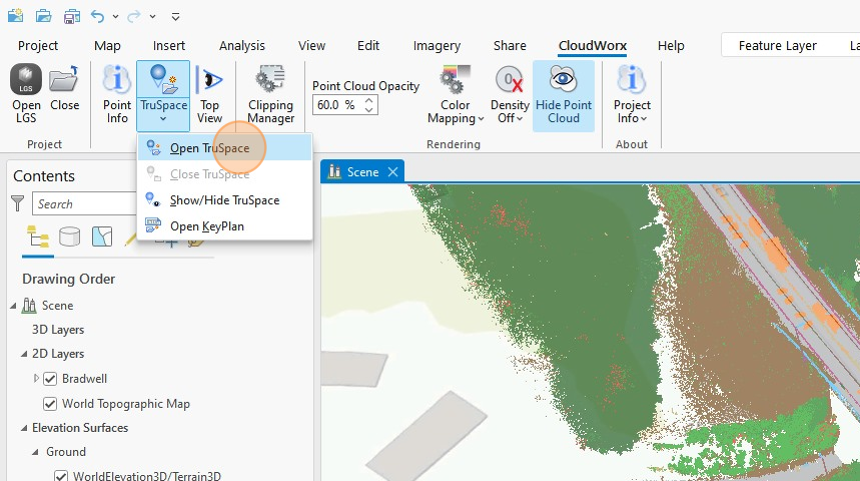
32. Pick a point on the point cloud at which to open TruSpace viewer.

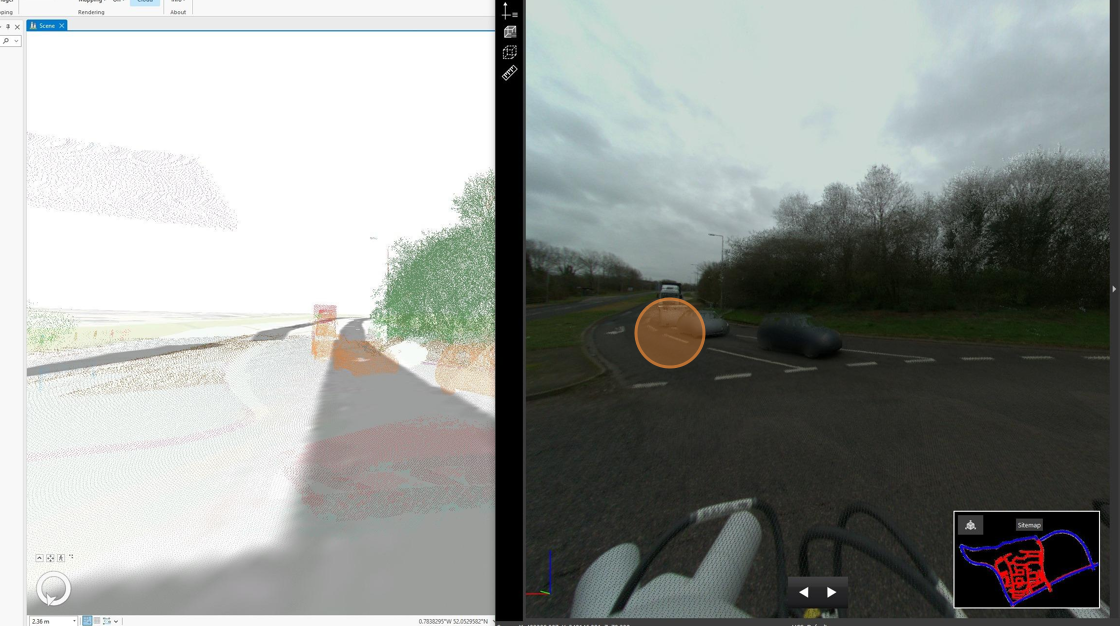
33. "TruSpace" opens in the selected position.
The views are synced in real-time.
Minor delays might exist in very large datasets (150GB+)
34. For more, information, refer to https://rcdocs.leica-geosystems.com/cloudworx/latest/help-truspace-explorer