Adding Levels to a SiteMap
SiteMap Levels
When a project asset consists of a complex 3D space with many floors (levels) or areas of interest (rooms, corridors, groups of rooms, etc.), navigation can be improved by using the SiteMap Levels feature to create a customised visual orientation guide of the space.
This guide provides step-by-step instructions for creating sub-areas of an asset using the Levels SiteMap feature. Levels act as both a filter and a navigation aid.
Add new level
Adding new levels
On the left navigation bar, find the “Levels” tab. Initiate the “Add Level” command to create your first level.
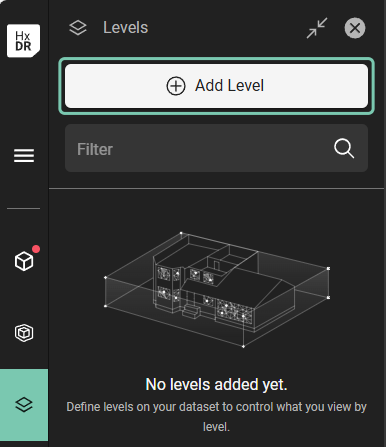
Add Level tab
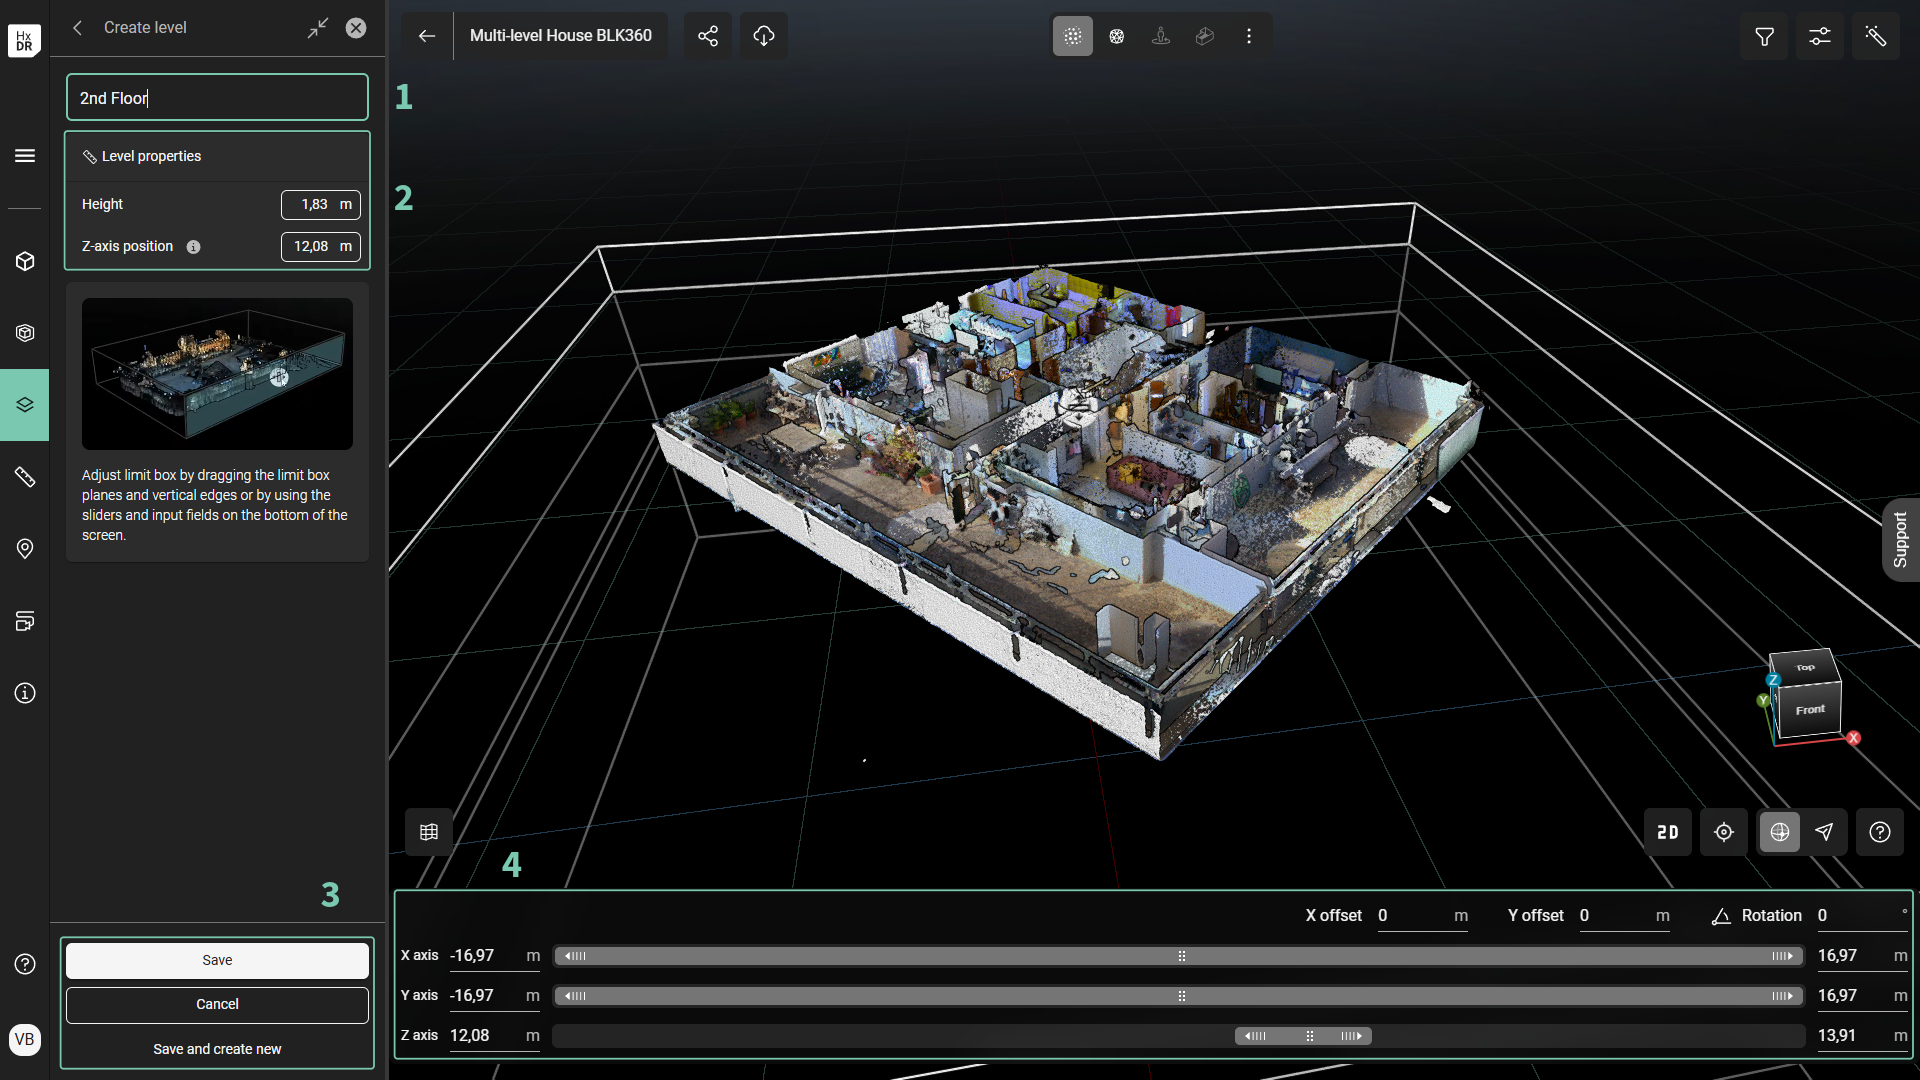
While in the “Add Level” mode,
In the left menu’s “Create level” form, enter a name for the first level being created (1).
Define the Level’s area by indicating its bounding limits in either:
The left menu’s form fields for Height and Z-axis position (2)
Or, the familiar Limit Box controls at the bottom of the 3D canvas (4).
When the first Level (or area of interest) is defined, click either
“Save” (3) to save and exit the level creation mode
Or, “Save and create new” (3) to save the currently defined Level and automatically advance to the next level.
When choosing “Save and create new”, the UI will automatically create a new Level. The new Level will be the same height as the previous Level and placed directly on top of it.
Repeat steps 2.a. through 3.a. or 3.b. as needed.
Add level mode
Edit levels
.png?inst-v=189e9461-c622-4ec9-8b74-6359680d1bc4)
Edit level options
Edit level dimensions and position
To edit a Level’s defined area (i.e., its dimensions) and/or its position in the asset,
Navigate to the Level list via the left menu
Click the “Options” menu icon (1)
The Options menu will offer the following: Edit, Delete or Locate in view.
Click on “Edit” (2) to open Level edit mode
Change the Level properties as needed using the Height and Z-axis position tools in the left menu, or manually adjust the values and position using the Limit Box controls.
Reorder levels
If needed, users can re-arrange the order of Levels.
Navigate to the Level list via the left menu
Drag the handle icon (3) on the left of the Level tile to drag it up or down into the correctly ordered position.
Navigation
.png?inst-v=189e9461-c622-4ec9-8b74-6359680d1bc4)
To navigate through the Levels, select one level from the left menu’s Level tab (1) or from the Level Selector list (2) in the 3D canvas' navigation tools group (bottom right).
When a level is selected, the SiteMap is updated to show:
Only the silhouetted point cloud within the defined Level
Only the Setups positions within the defined Level
To display all levels, click “Display all levels” in the Levels menu (1) or select “All levels” from the Level Selector list (2).
In the Levels menu bar, Search (3) can help filter the Levels list and locate a needed level.
Note: Levels can be defined by any rectangular limit box shape, including corridors, rooms or multiple rooms as a sub-division of a level, or vertical spaces like elevator shafts and stairwells.