To adjust the tone mapping for a Setup containing HDR images, right-click the Setup and select Edit HDR Image. This will open the Tone Map Editor.
The HDR tone map editor contains preset filters or Looks, which are designed to show how different tone map renderings appear. The default tone map is shown along with eight filter options. The user can select a Look and then modify the Look or accept it as is. Click OK to apply the Look to the point cloud.
To batch apply the tone map settings to multiple Setups:
-
Multi-select the Setups, open the Tone Map Editor, and select the Apply to Selection check box.
-
Open the Tone Map Editor and select the Apply to Project check box.
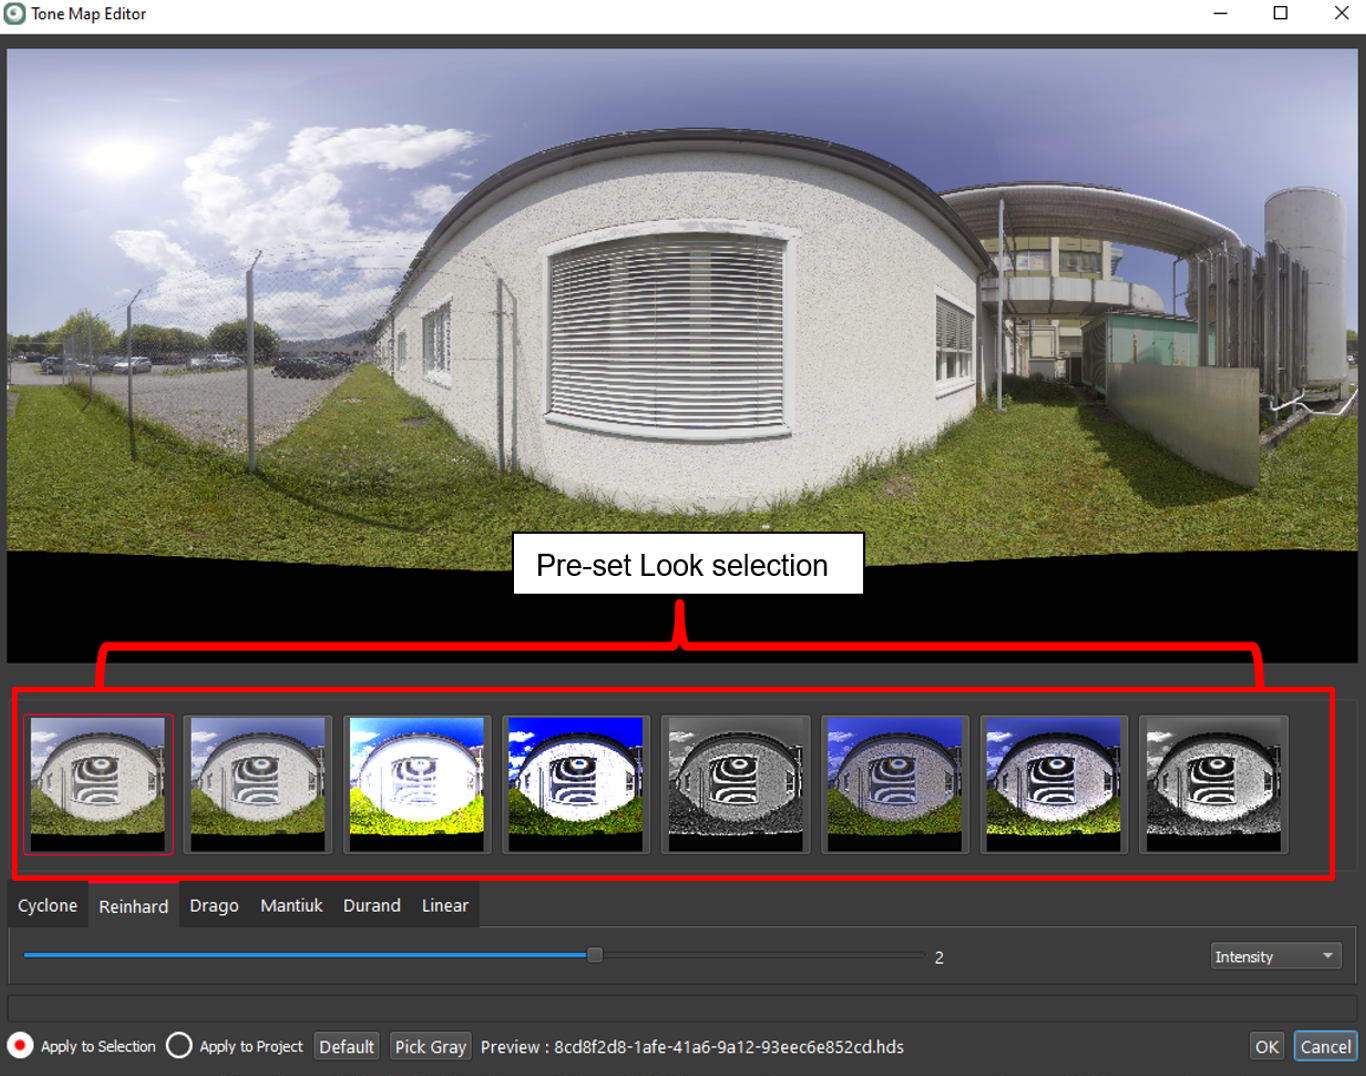
A preview of the panoramic image will appear in the editor with multiple tabs representing different tone-mapping algorithms, such as:
-
Cyclone: Leica’s proprietary tone mapper for P‑Series scanners that evens out lighting differences across images in a panoramic view.
-
Reinhard: Produces a natural and “photographic” look, with global contrast that feels similar to a well‑exposed photo. Highlights are gently compressed, shadows usually stay a bit darker, so it often looks slightly flatter than a DSLR JPEG, but rarely “HDR‑crunchy” or surreal.
-
Drago: Designed to preserve visibility in very dark regions, so shadows open up a lot and small details become visible. The overall look can become low‑contrast and a bit “washed out,” with a soft roll‑off in highlights and a sometimes dull mid‑tone contrast if parameters are not tuned.
-
Mantiuk: Aims for strong local contrast and detail visibility, so textures and edges pop, giving a crisp, “high‑microcontrast” appearance. It helps easily move toward a stylised, almost hyper‑real or “HDR‑processed” look (especially on high‑contrast scenes), though with careful settings, it can still look quite natural.
-
Durand: Uses a base/detail decomposition, generally preserving very fine detail while compressing large‑scale contrast, so small textures remain sharp and clear. Often yields pronounced local detail and compressed global contrast; skies and walls keep a lot of texture, but the image can look somewhat “cartoonish” or unnatural if compression is strong.
-
Linear: Simply rescales radiance linearly to display the range; mid‑tones look correct, but bright areas clip quickly, and deep shadows remain very dark. The look is closest to a naïve rendering: high overall contrast, blown highlights, blocked‑up shadows, and very little sense that an HDR source was used at all.
The tone Map Editor also includes a drop-down menu with selectable parameters. Once the parameter is selected, the slider can be adjusted to modify the values, which will be dynamically updated in the image.
The Pick Gray button allows the user to double-click within the image to adjust the gray tones.
Using the Default button, the user can reset all settings to their original values.
Once the values have been adjusted as desired, the OK button should be clicked to apply the new tone parameters.