2023 2022.1 | Cyclone REGISTER 360 Release Notes
What’s New
This is a major release including support for the next generation BLK360 imaging laser scanner and LiDAR data captured directly from mobile devices via Cyclone FIELD 360. From this point on the original BLK360 scanner will be referred to as the BLK360 G1.
Help documentation is now available online from the Help button within the product and here: https://rcdocs.leica-geosystems.com/
Please reference the licensing section at the end for information about CCP compatibility.
BLK360 imaging laser scanner
The all-new Leica BLK360 is the world’s fastest, smallest, and easiest to use laser scanner that speeds up and simplifies reality capture workflows. It captures complete scans within 20 seconds and even tracks its own location with a VIS system that automatically combines your scans in the field.
Please visit http://www.blk360.com for further information.
BLK360 Connect and Download
Users can now download their scans from the new BLK360 using either wi-fi or a direct connection with a USB-C cable. The new cable connection was a highly requested feature and decreases download times while increasing the stability of the downloads.
Users can download to either the Data Manager creating .blk files and a new .blkjob file or they can directly import scans to Cyclone REGISTER 360.
Any work done on FIELD 360, e.g. pre-registering & creating bundles will be synced back to the BLK360.
BLK360 Features
The VIS functionality ensures that scans are automatically correctly positioned to each other which makes the registration process easier and faster.
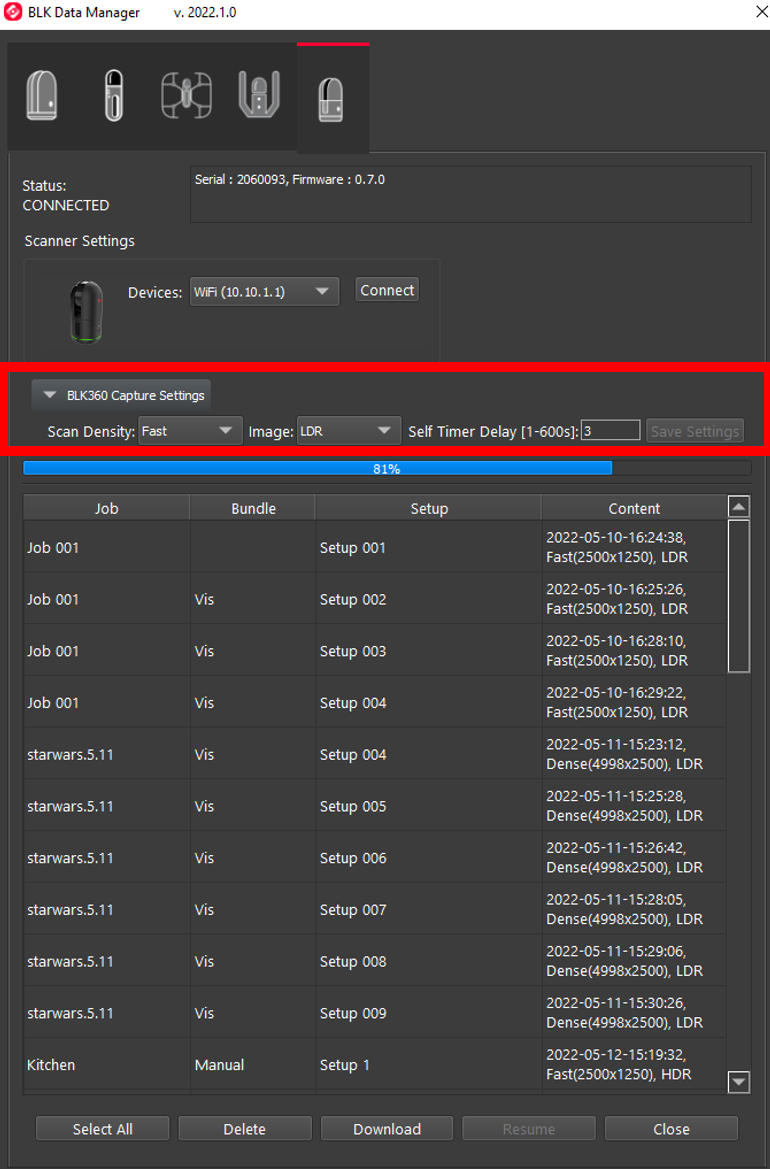
There are three settings that can be changed when the scanner is connected to a tablet using FIELD 360, BLK live app, or through the BLK Data Manager, Cyclone REGISTER 360, or Cyclone REGISTER.
Scan Settings
Fast+
Fast
Dense
Dense+
Image Settings
None
LDR (Low Dynamic Range)
HDR (High Dynamic Range)
Set Delay
1 second to 100 seconds
There are three ways to connect to and download the scans into Cyclone REGISTER 360.
Cyclone REGISTER 360
Directly connect the BLK360 to Cyclone REGISTER 360.
Thumbnails not supported. The Thumbnail is a small picture of the images taken from the scanner that pops up when the icon in the left panel is hovered over.
BLK Data Manager
Connect the BLK360 to the BLK Data Manager to download and create a .blkjob and .blk files.
Import the .blkjob and .blk files into Cyclone REGISTER 360.
Thumbnails not supported.
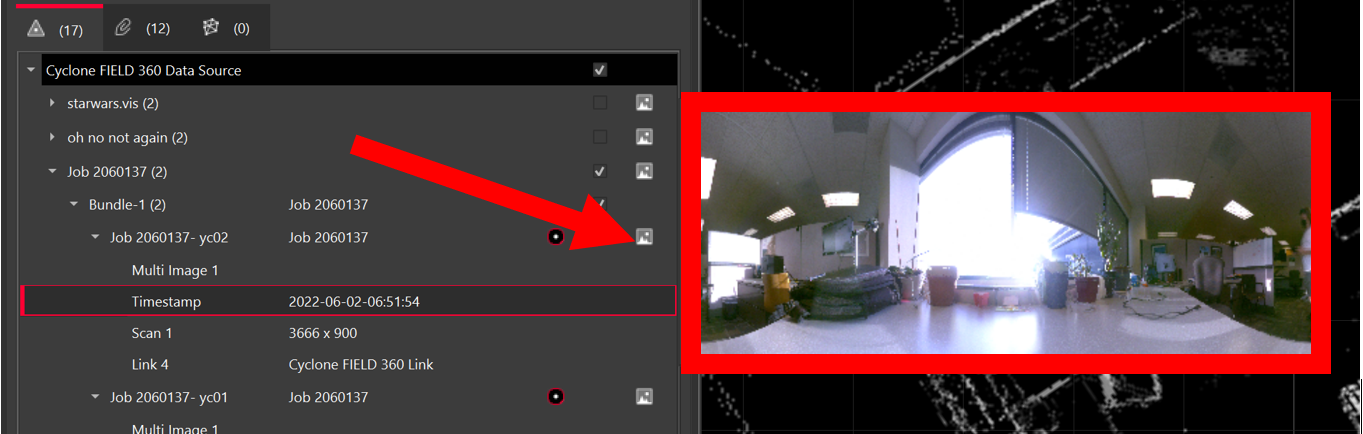
FIELD 360
The BLK 360 can be controlled using the FIELD 360 app wi-fi connection.
The scans can then be downloaded from the tablet or directly from the scanner.
Any work done on FIELD 360, e.g. pre-registering and creating bundles will be synced back to the BLK360. Importing from the BLK360 will have the updated information.
Thumbnails are supported.
Cyclone REGISTER 360
Users can either choose wi-fi or connect directly to the scanner.
When connecting directly to the scanner, there are 2 modes, full power, and low power.
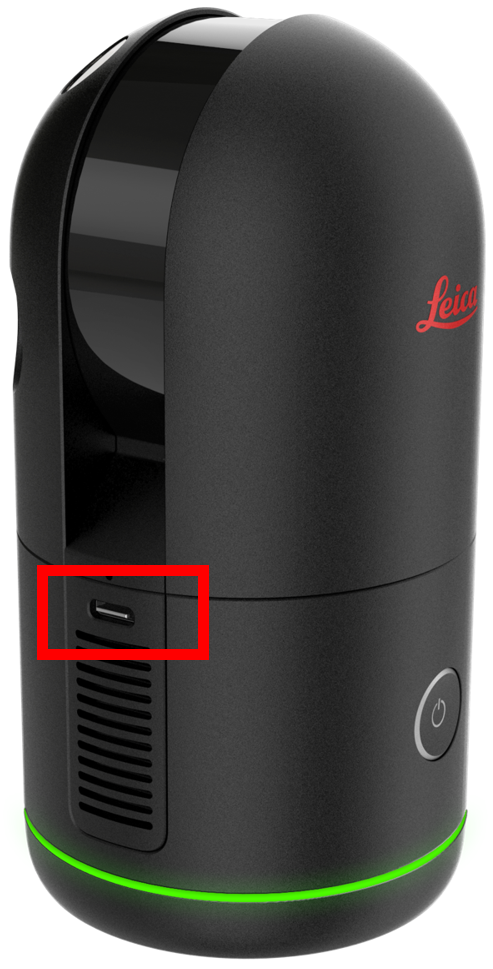
Full Power
Turn on the scanner first, wait for the green light to turn on, then connect to the computer by USB-C.
This uses the internal battery and is good for importing smaller projects.
Low Power
Connect to the computer by USB-C first, then turn on the scanner.
As this does not use the internal battery, it can be used to transfer larger projects taking hours.
Low Power is approximately 90% of the Full Power data transfer speed.
Cable connection import workflow:
Open Cyclone REGISTER 360 Standard or BLK Edition and create a project.
Connect the included USB-C cable to the scanner, using either Full Power or Low Power.
Select the BLK360 from the drop-down list to open the Import/Manage BLK360 dialog:
Note the original BLK360 scanner is now called the BLK360 G1.
The available scanners will be listed by serial number.
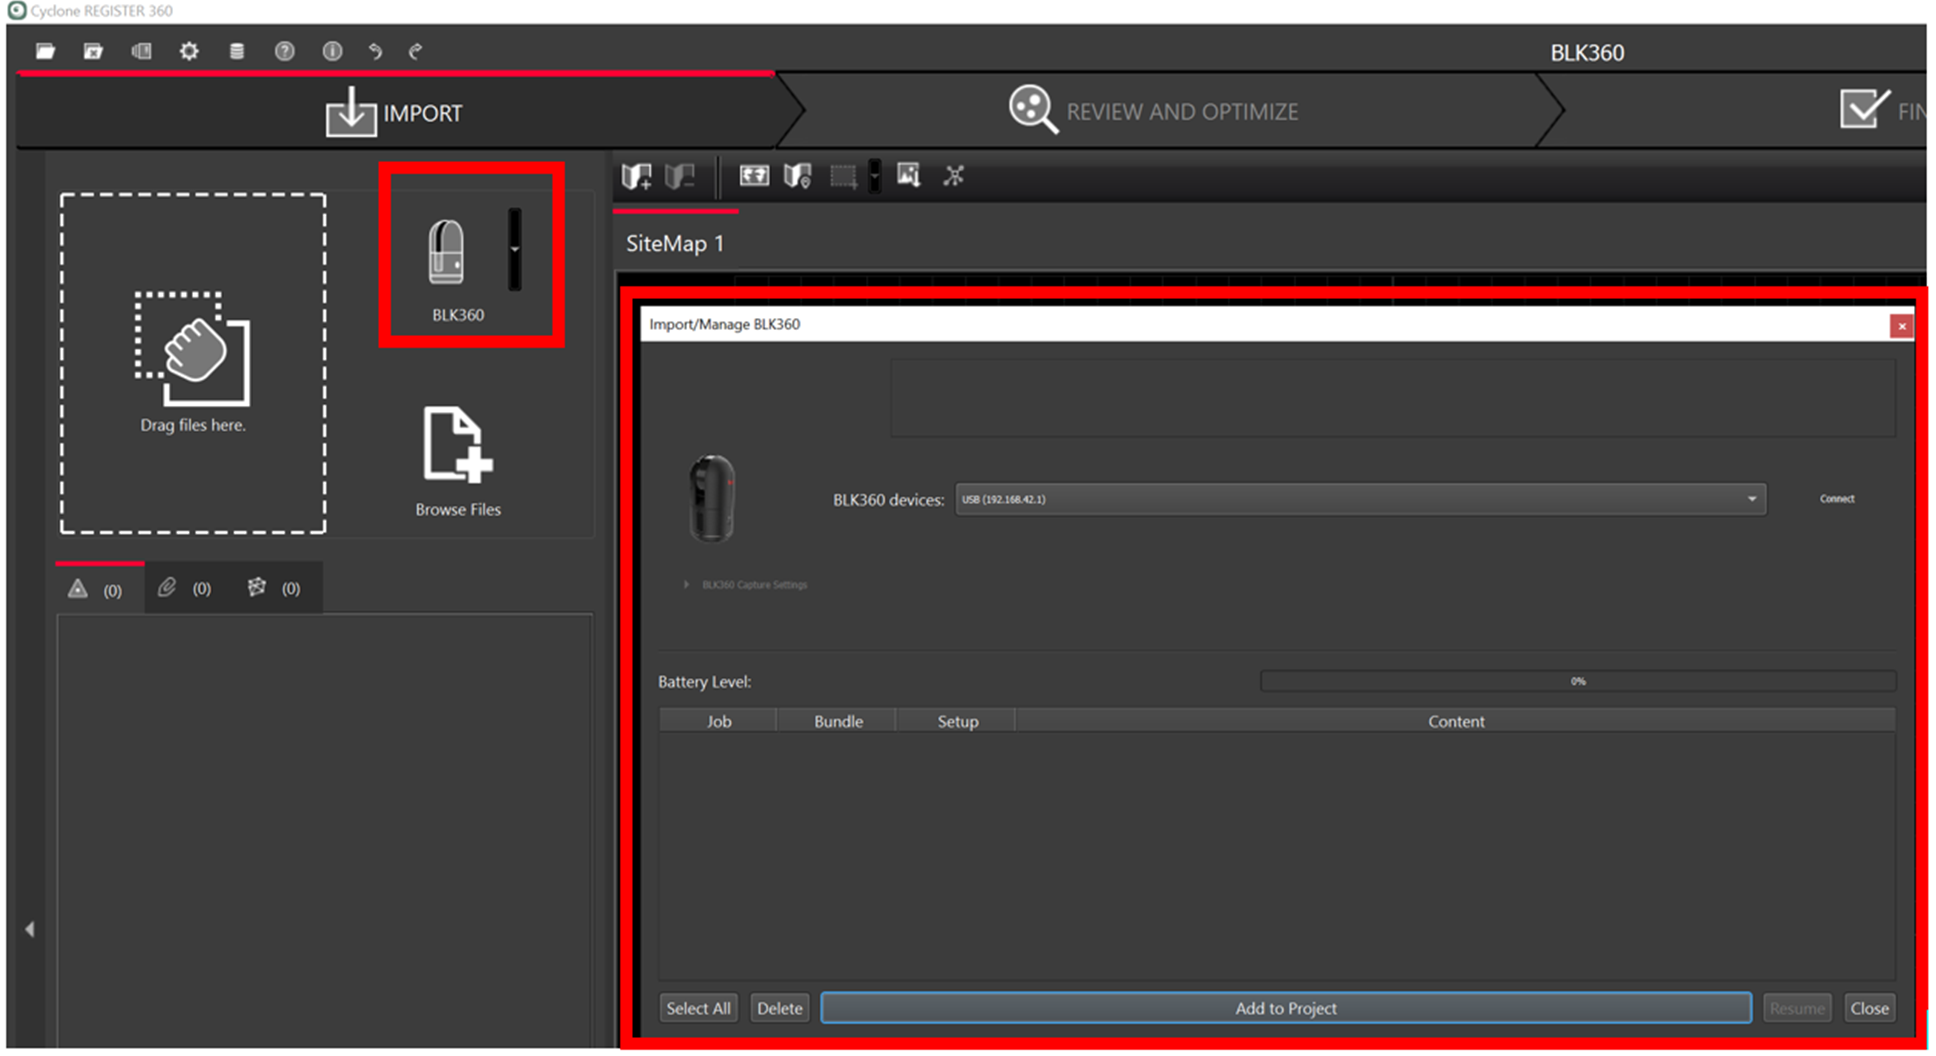
Select USB-C connection type.
Select the Connect button to establish a connection to the scanner.

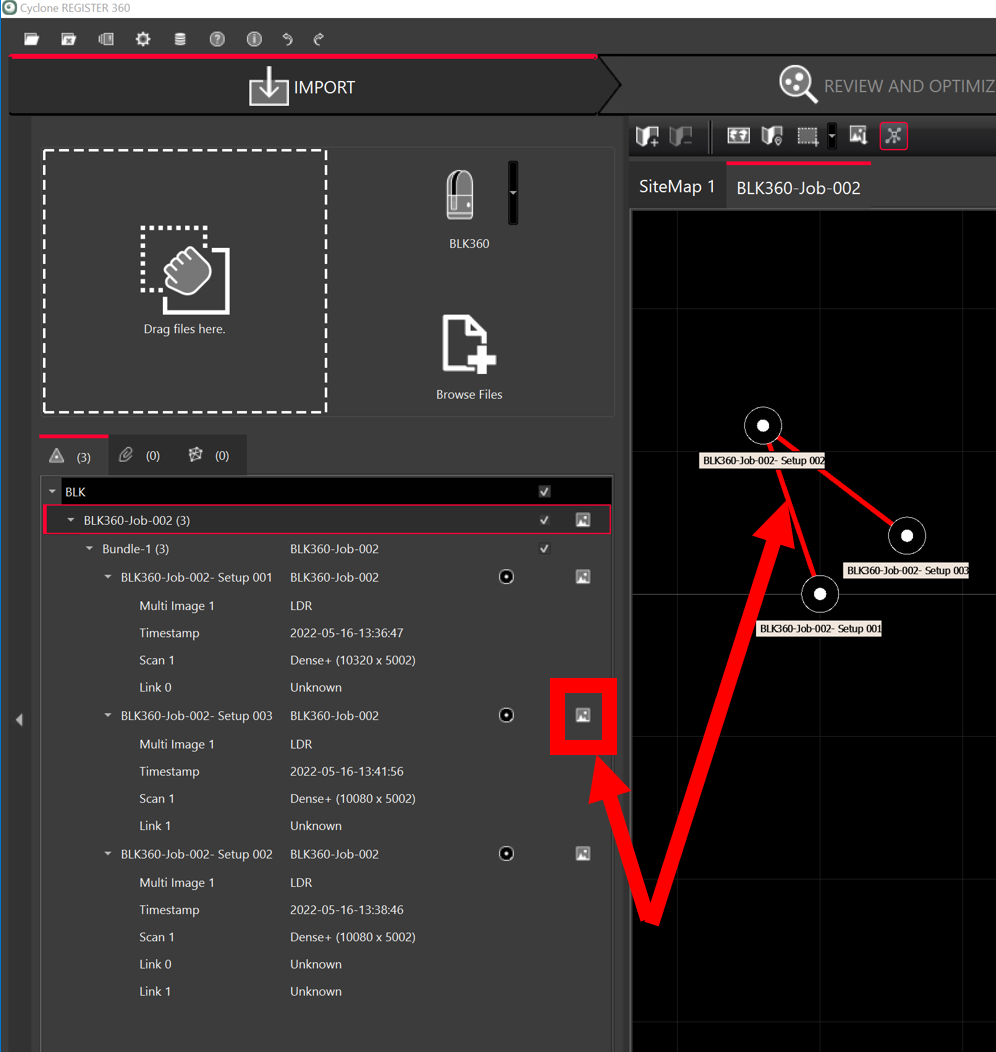
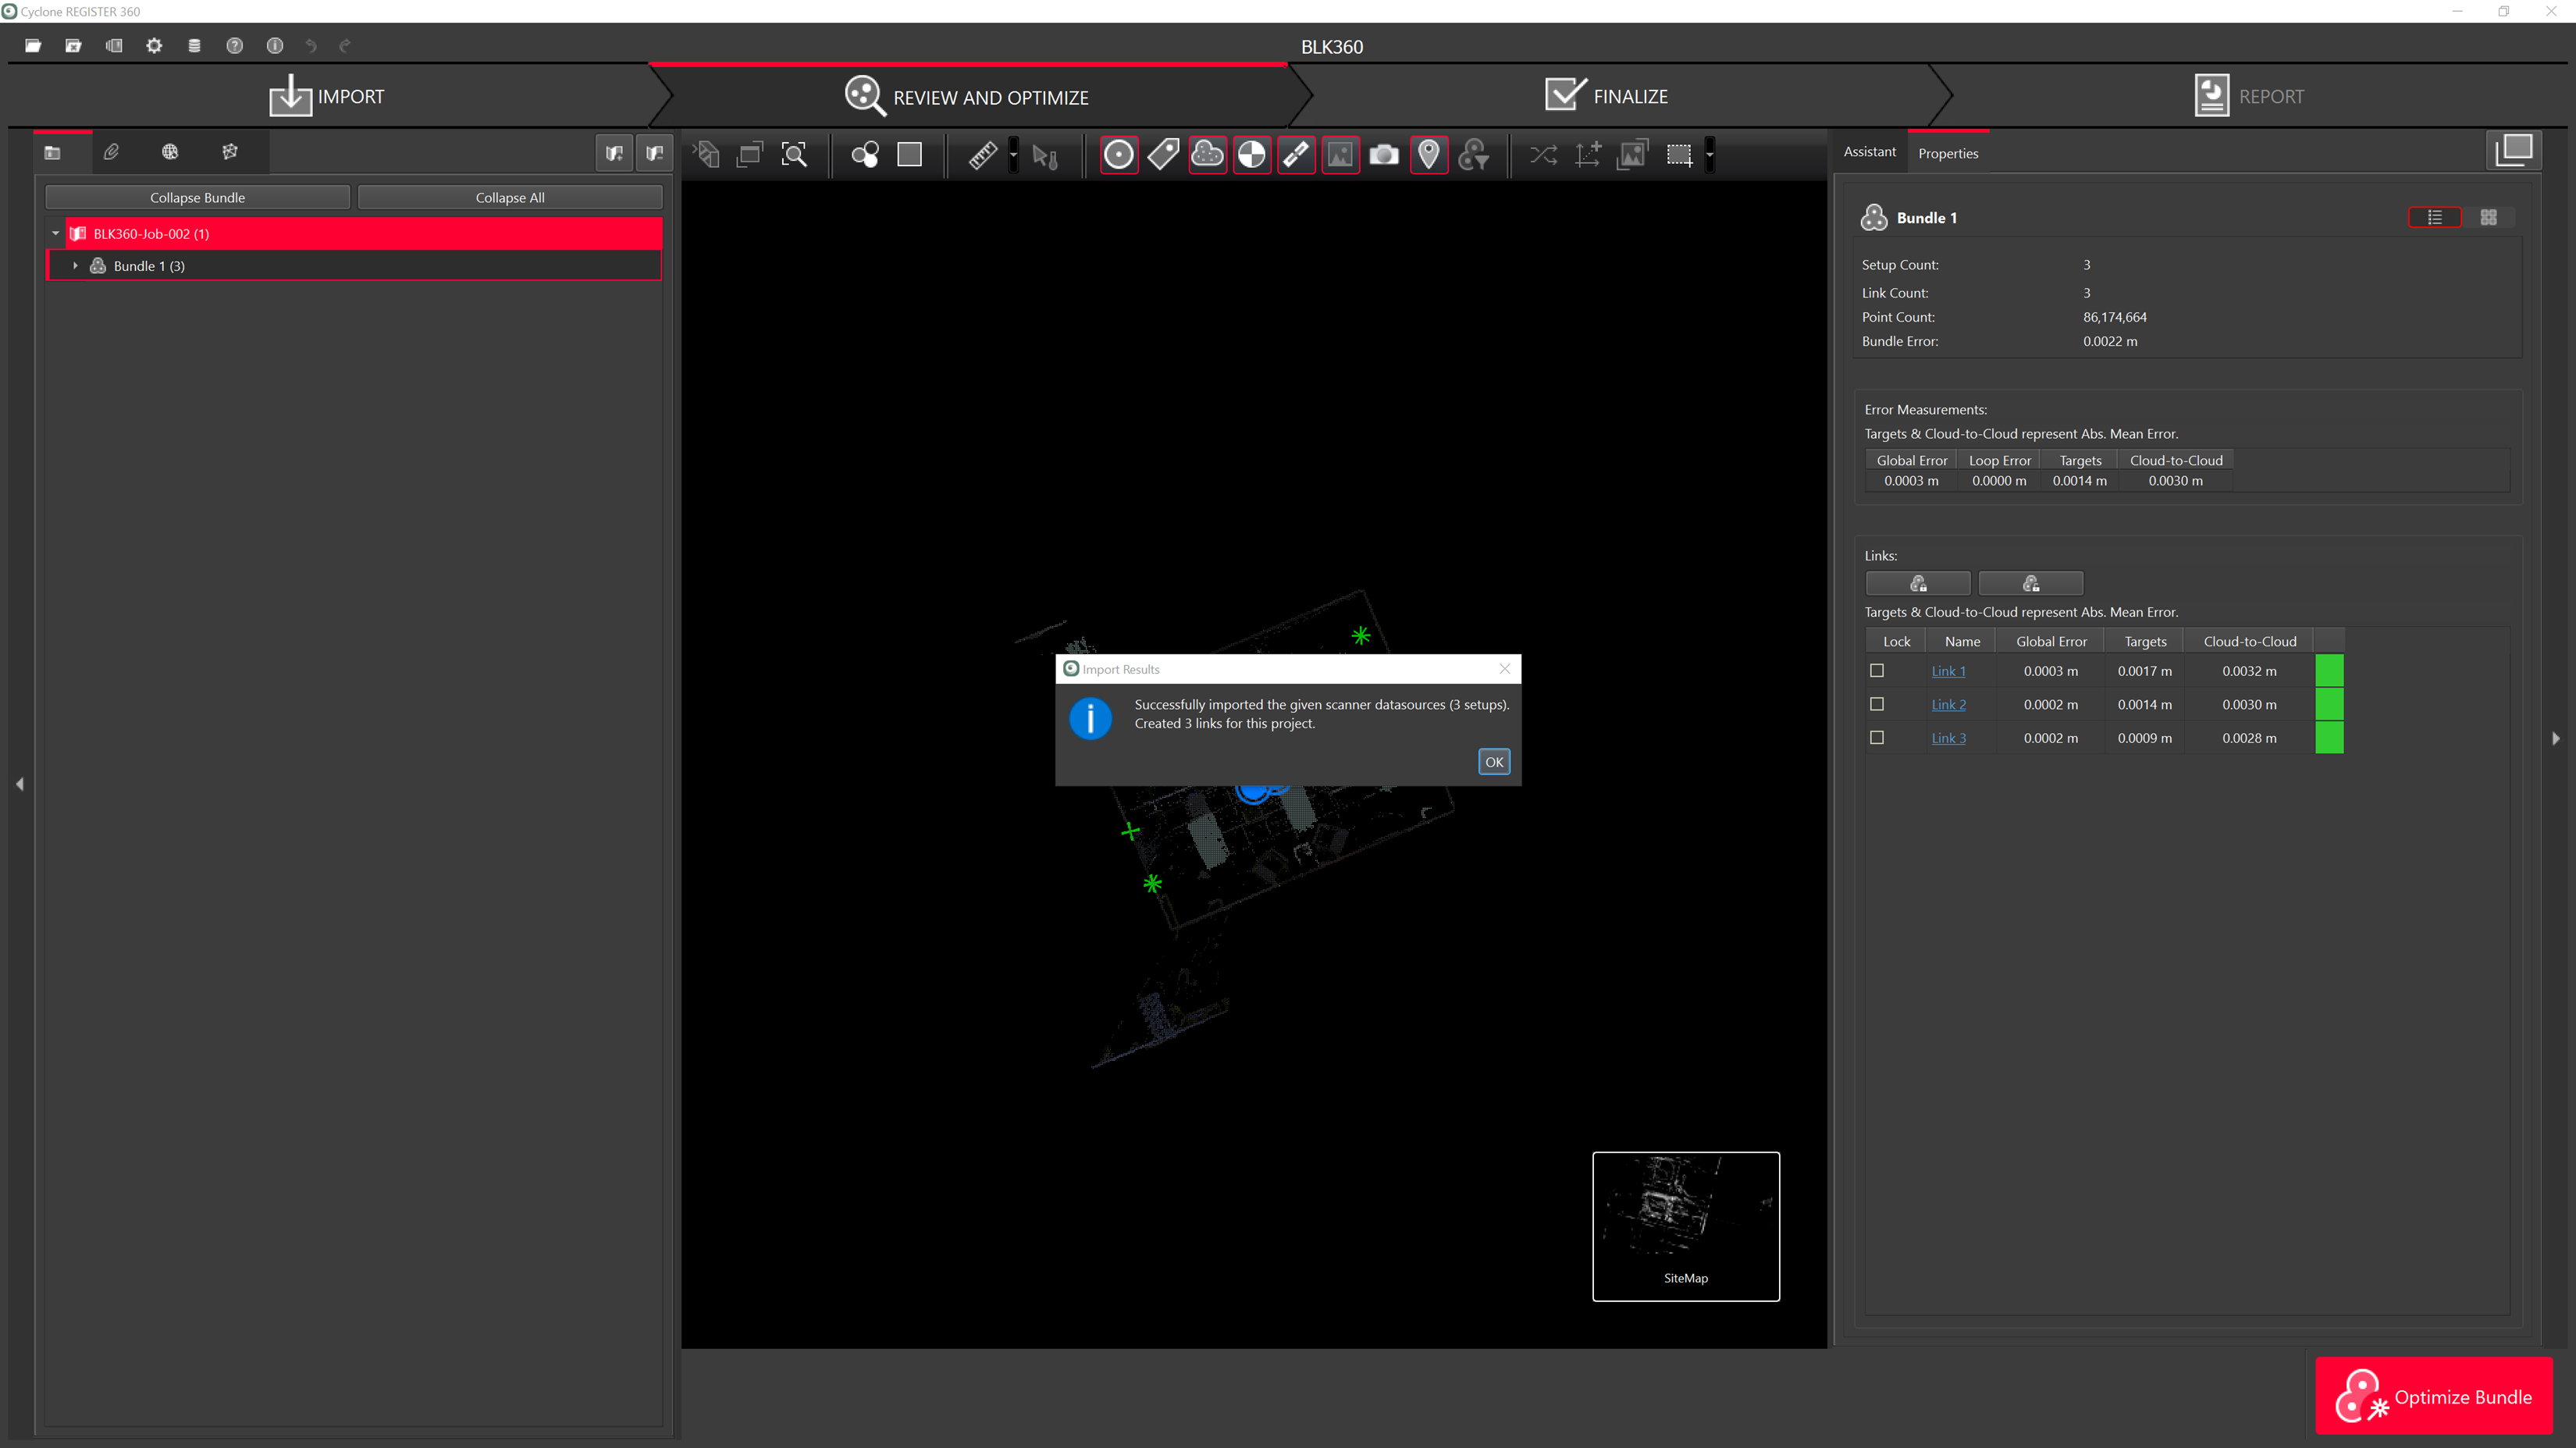
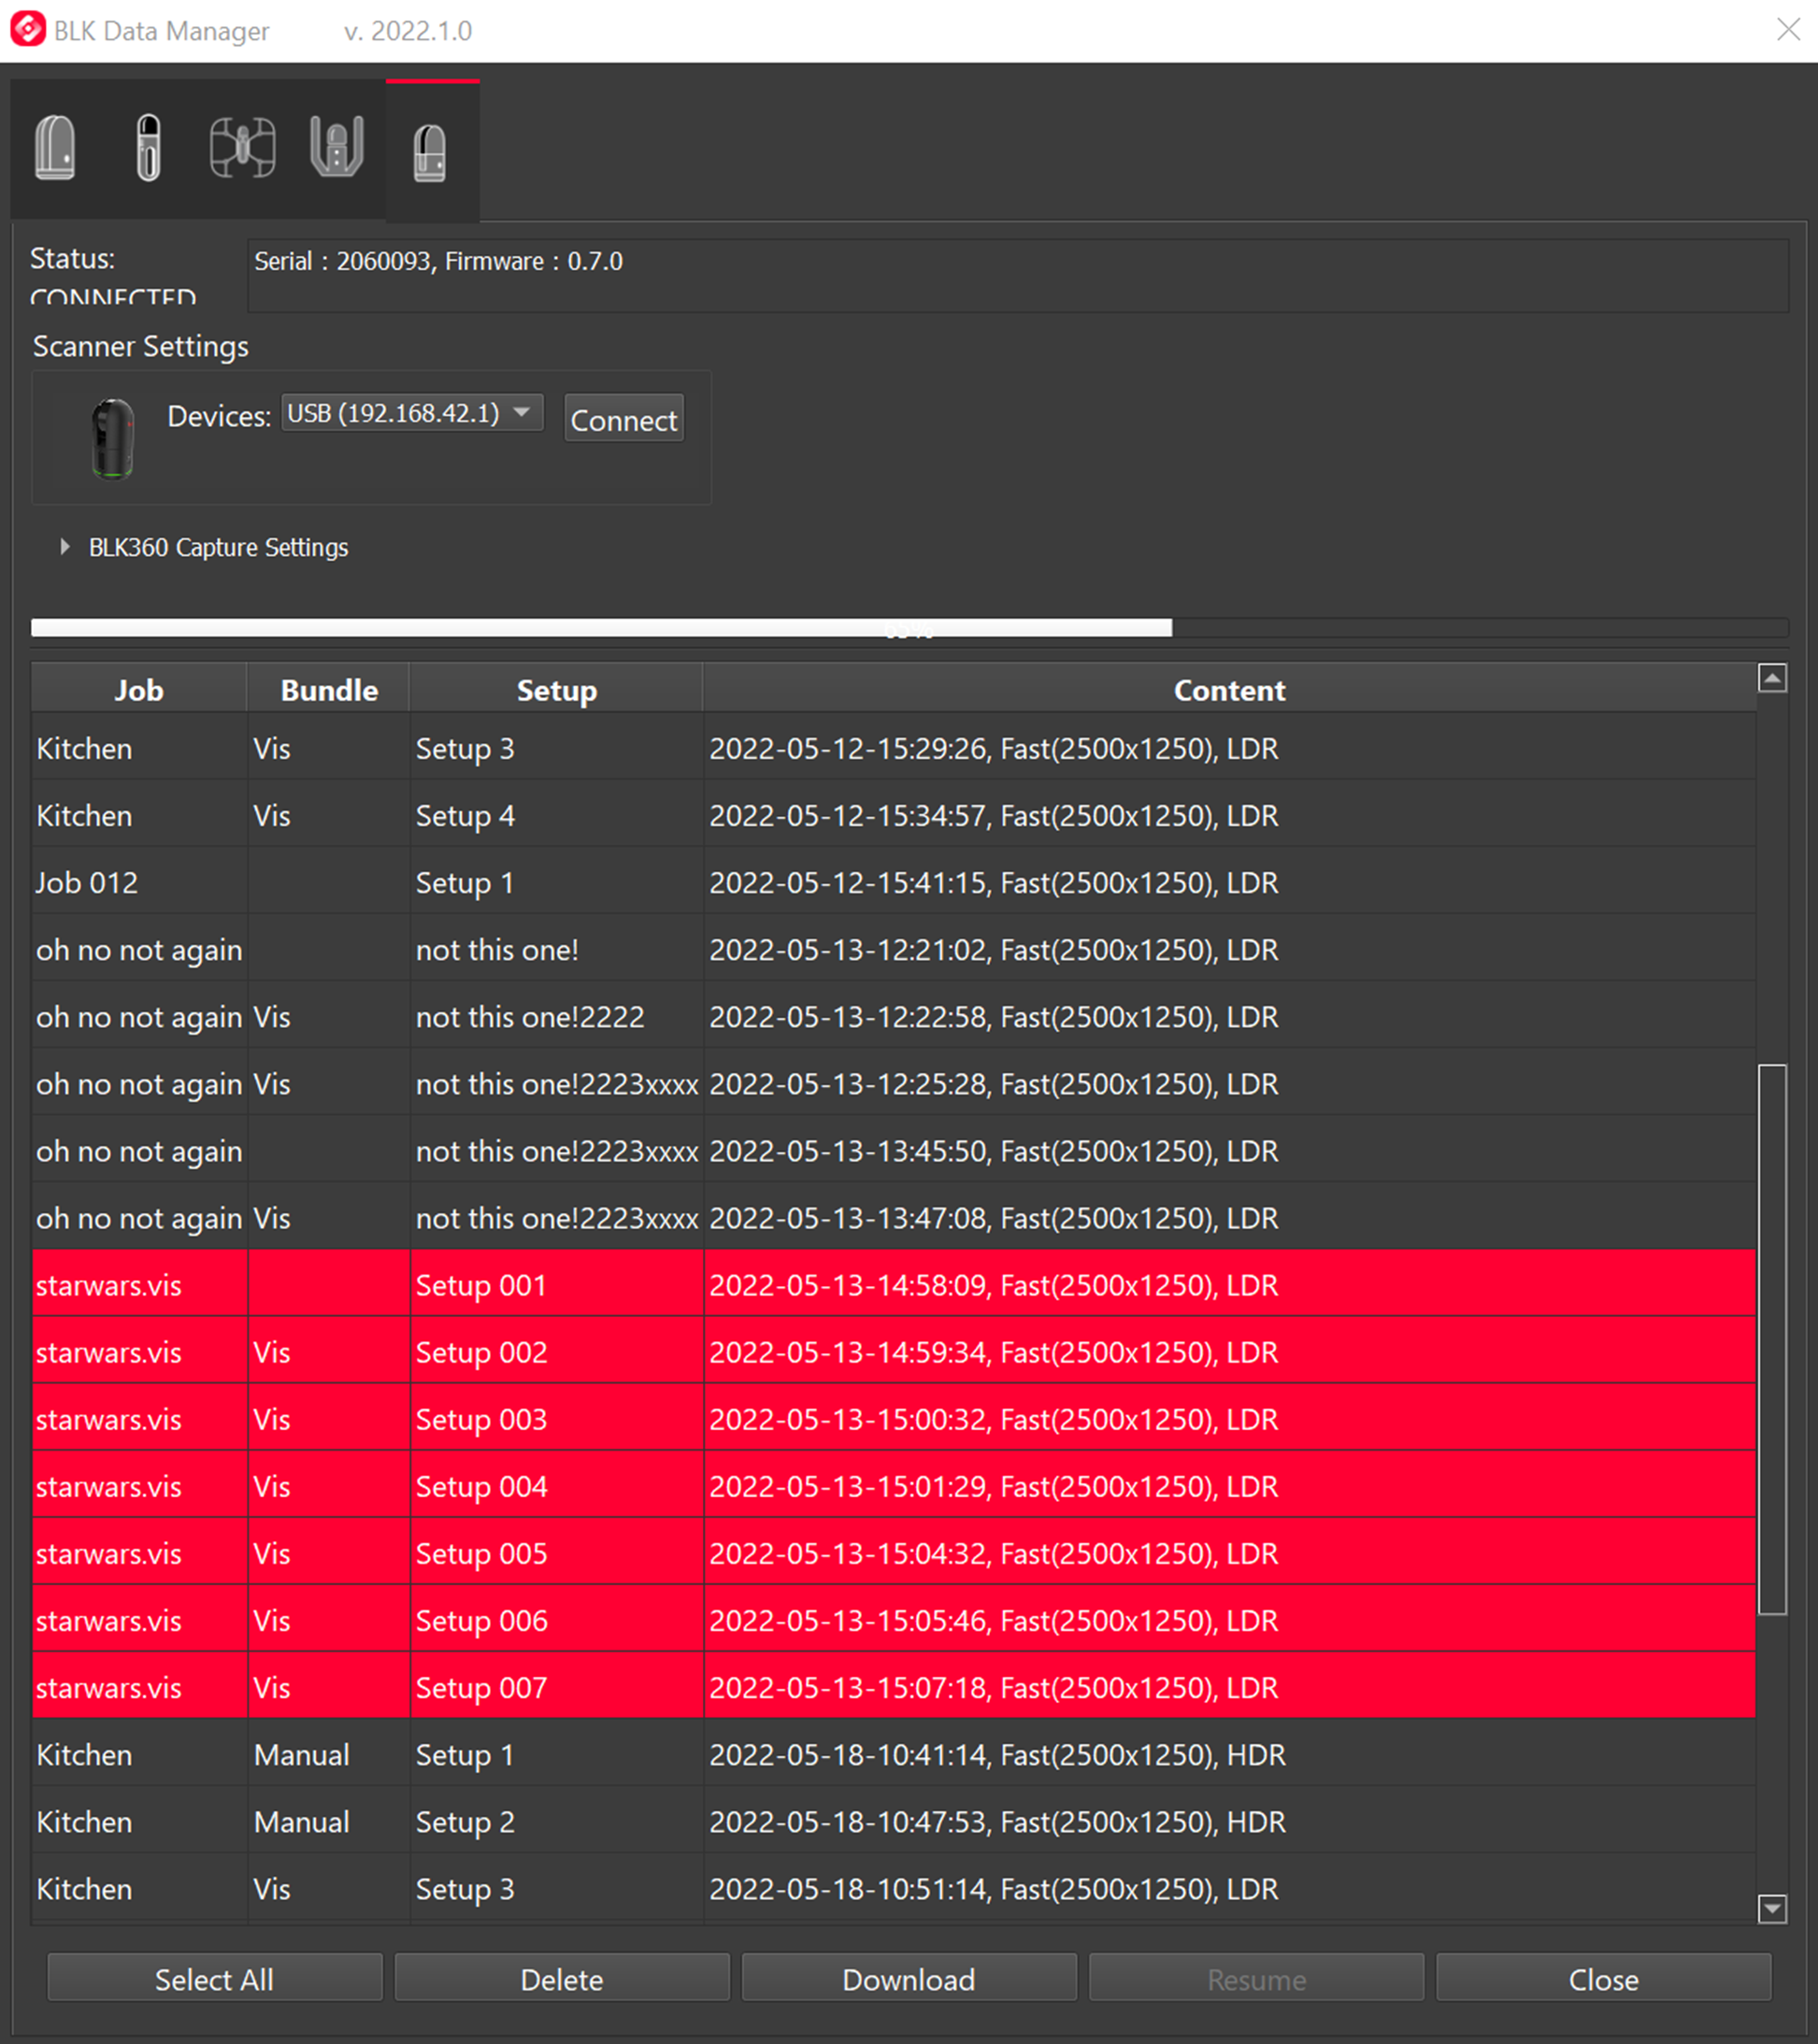
Select the scans you would like to import and click on Add to Project.
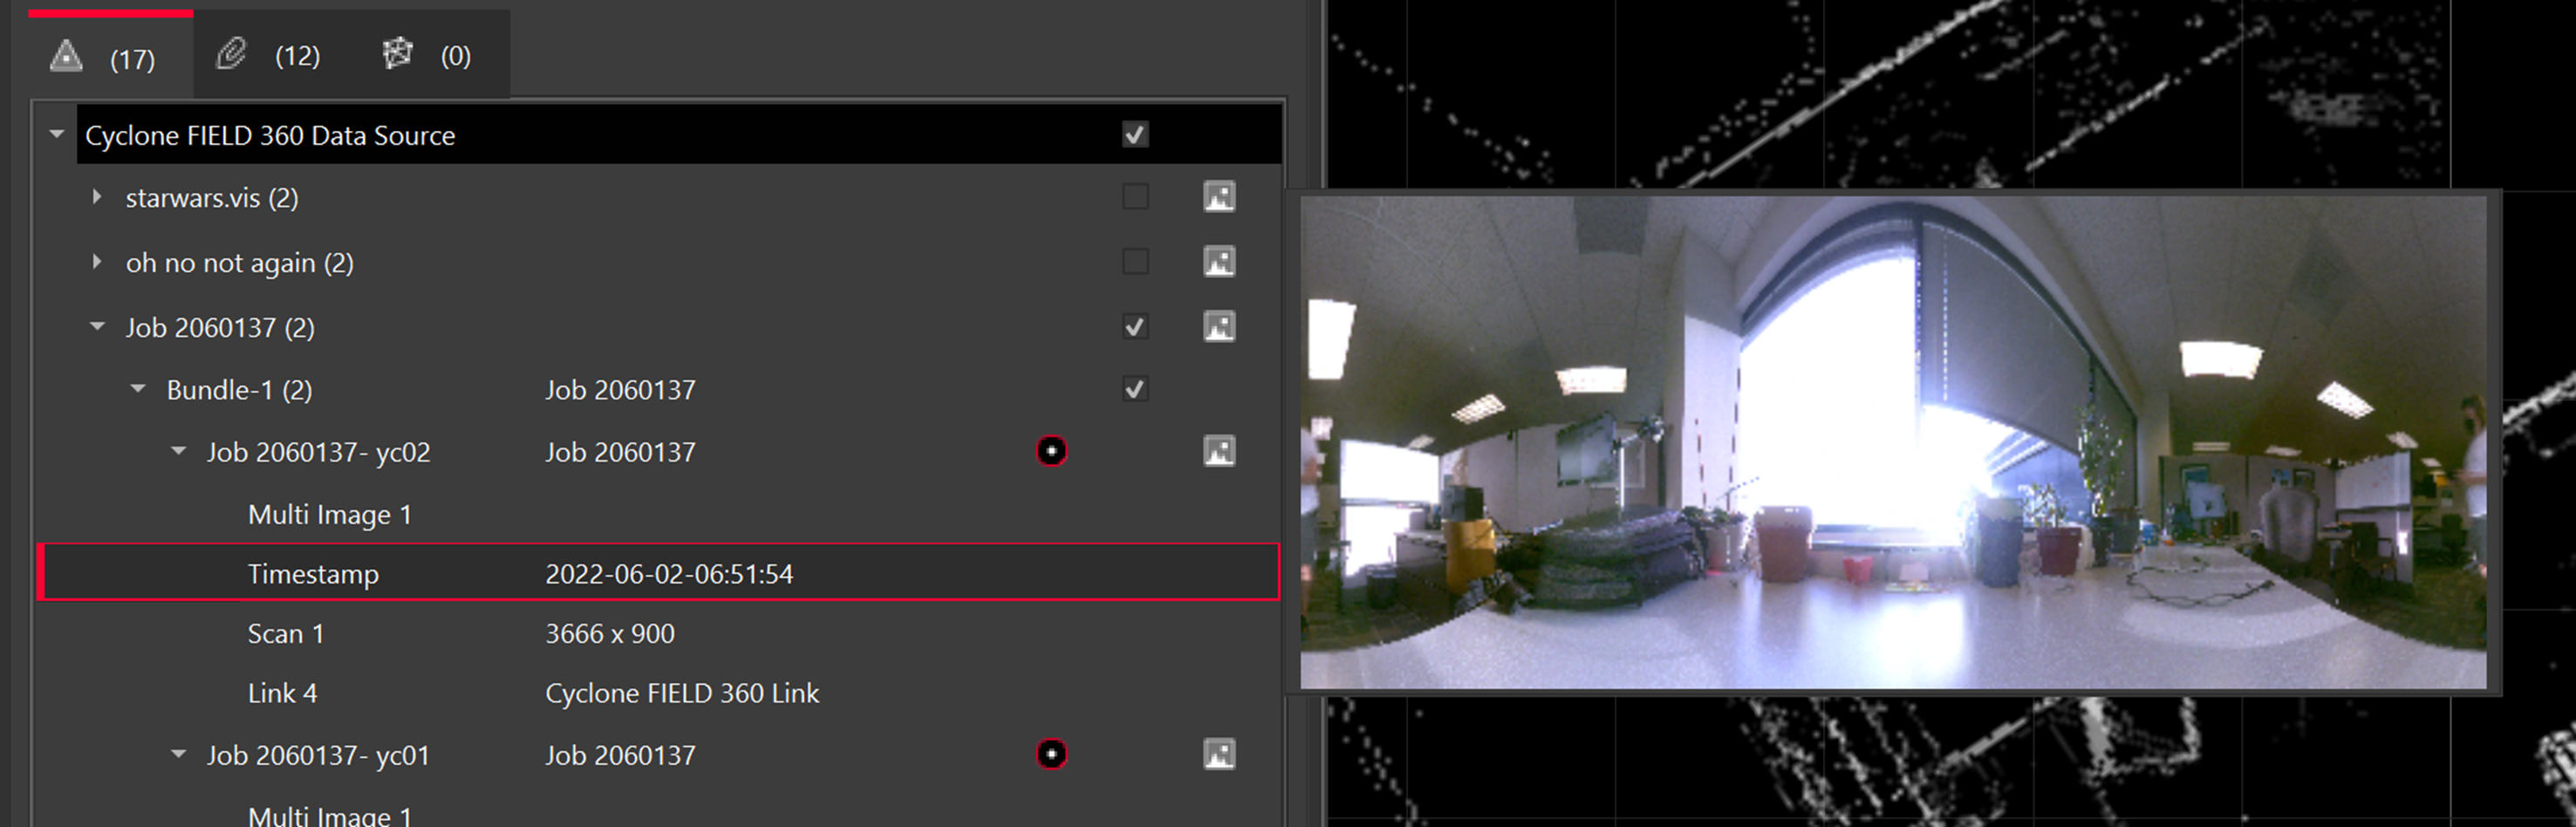
This will display all the available scans in the import panel and show any links that were created in the field.
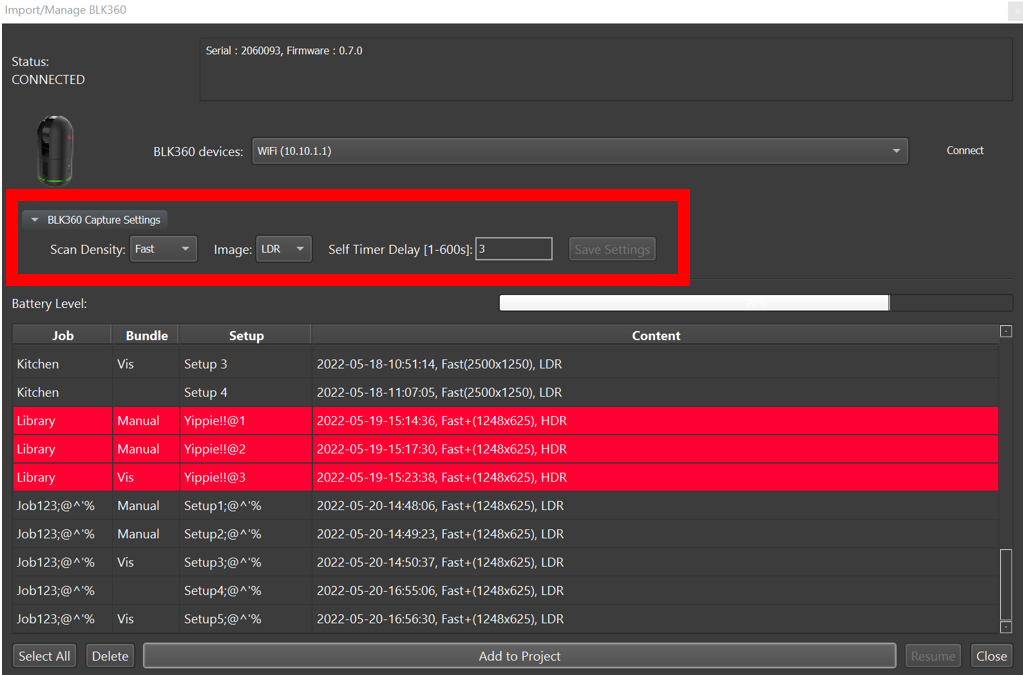
By selecting on Job, all the Setups in that job will be selected, and selecting on the Setups will choose individual Setups.
Users may also set the options for future scans by selecting BLK360 Capture Settings.
The BLK360 has VIS links like the RTC360, but there are no LWPOs (Light Weight Preview Objects) that allow a preview of the scan to be seen before importing when using this method of import.
If links were created using FIELD 360 manually, they will be red, if they were created using VIS, there will be yellow dashed lines.
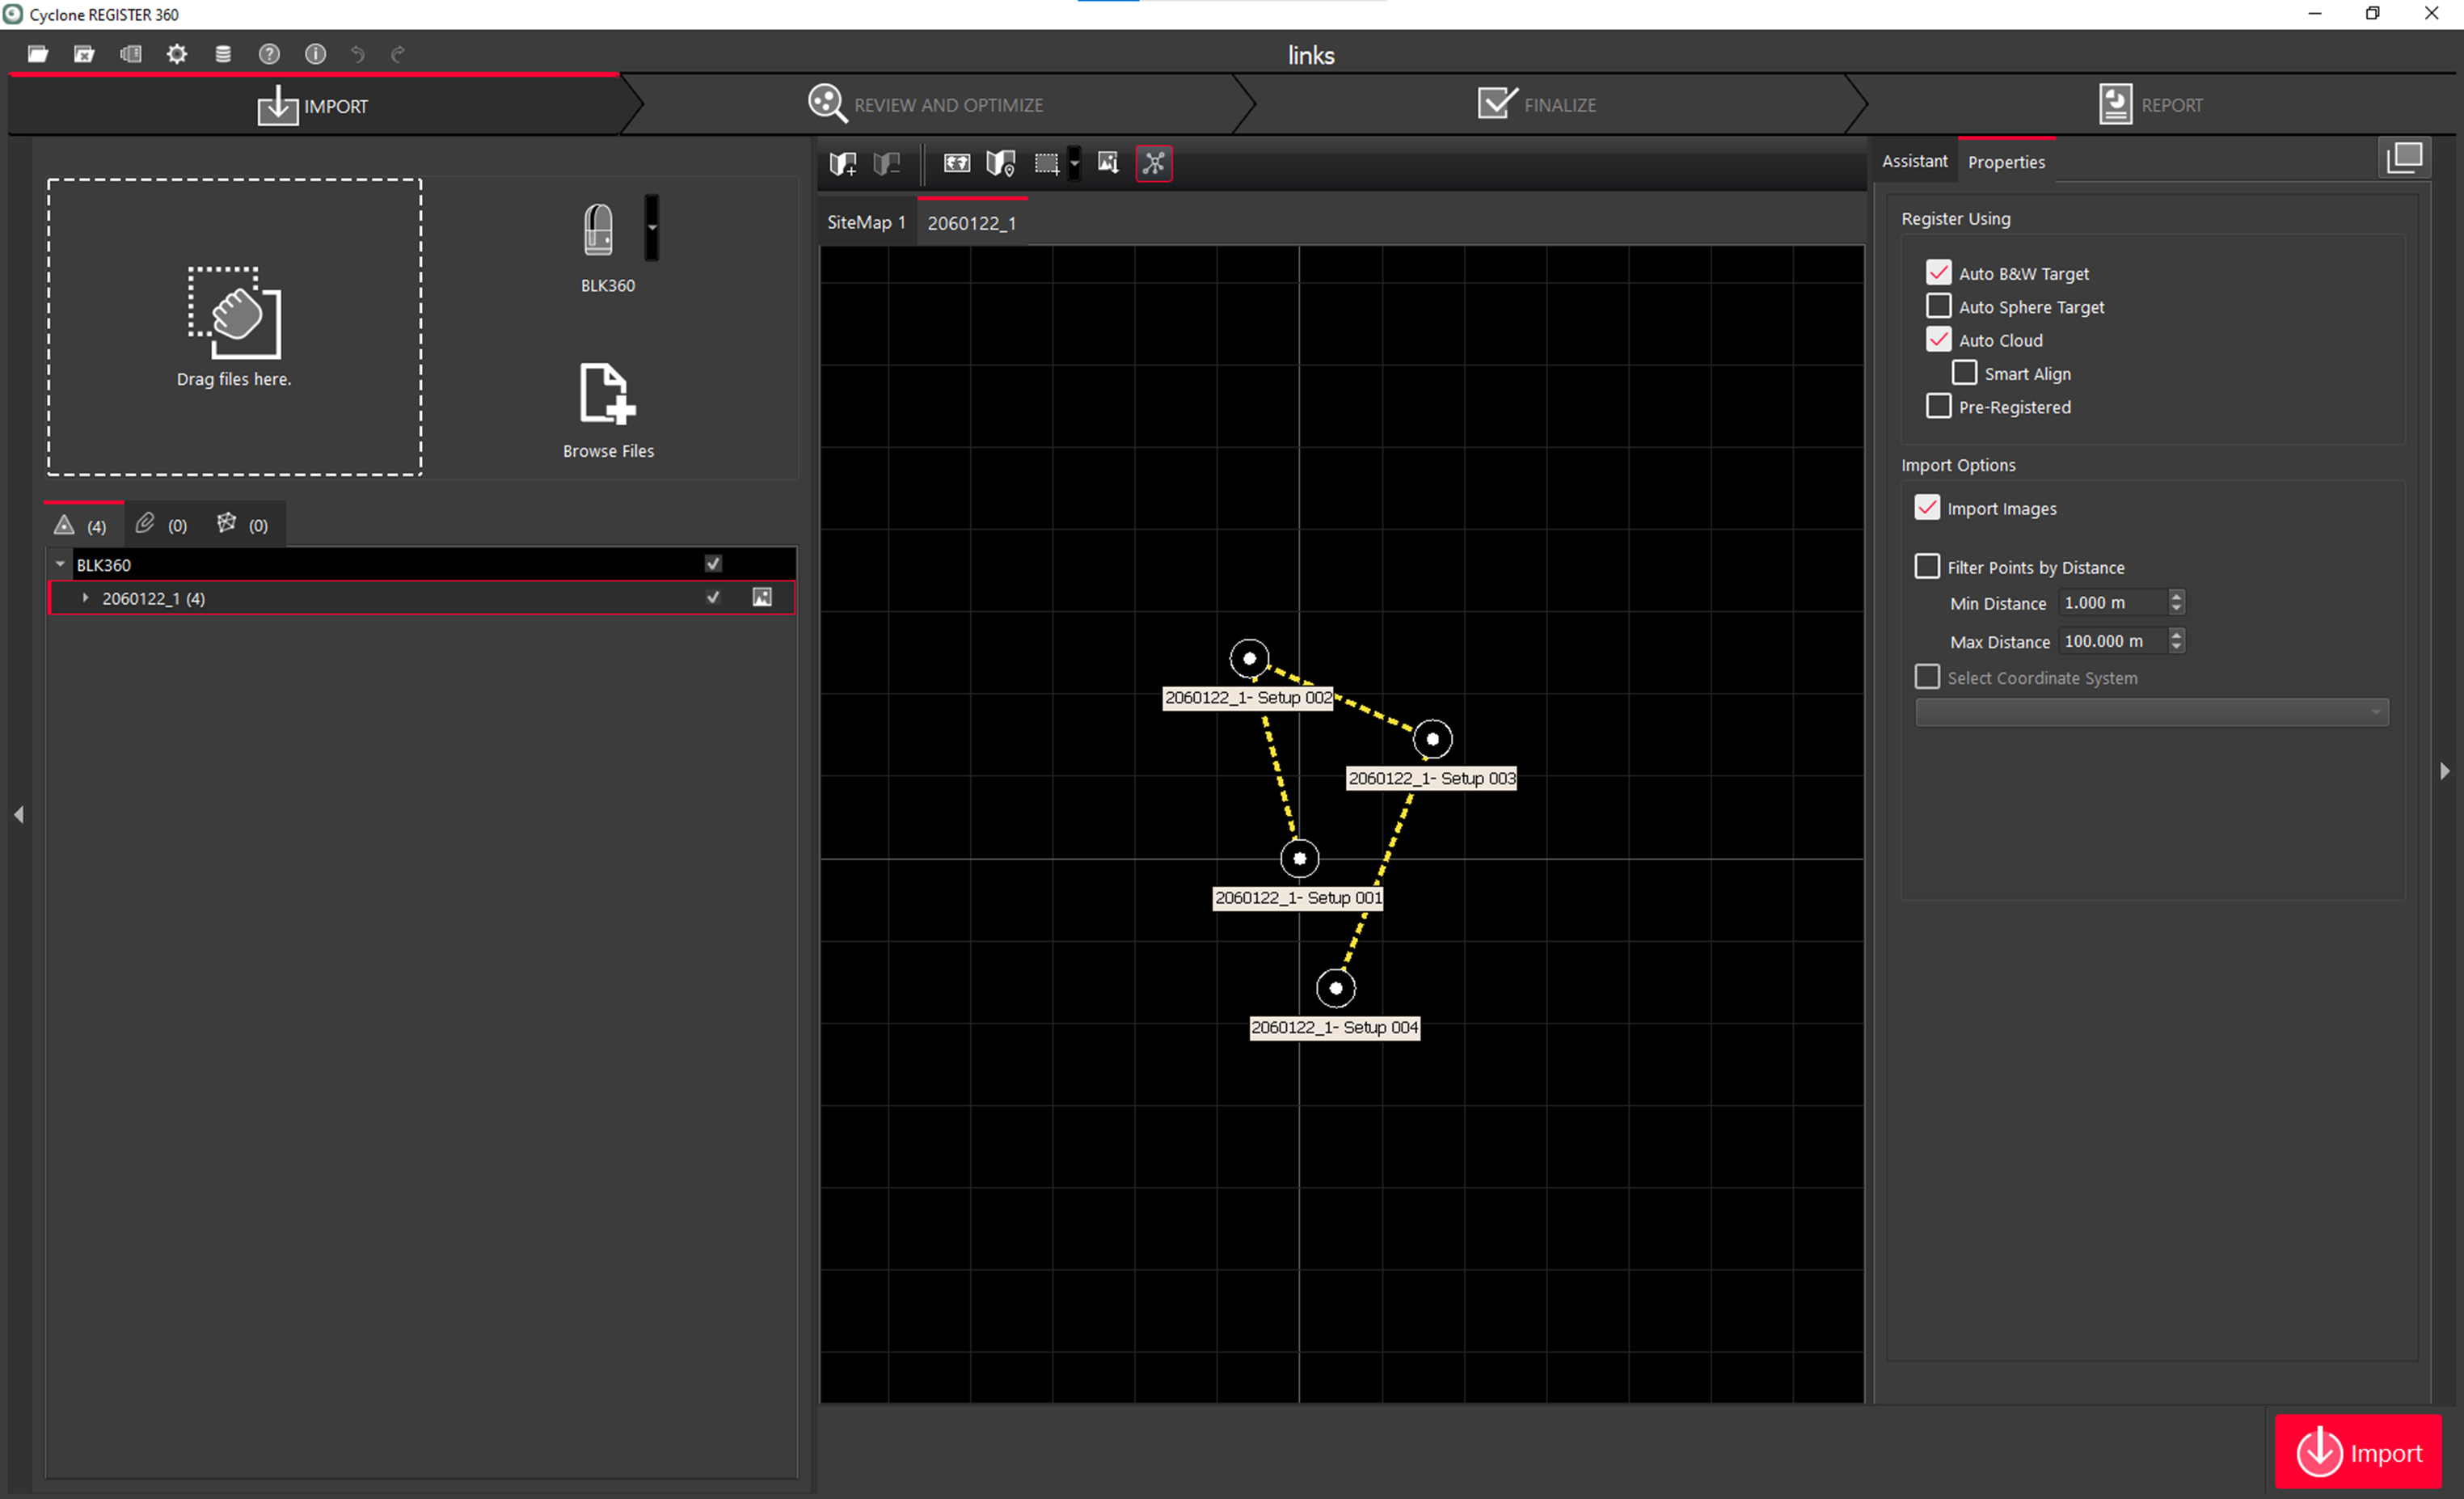
Select the Register Using and Import Options and then click on Import.
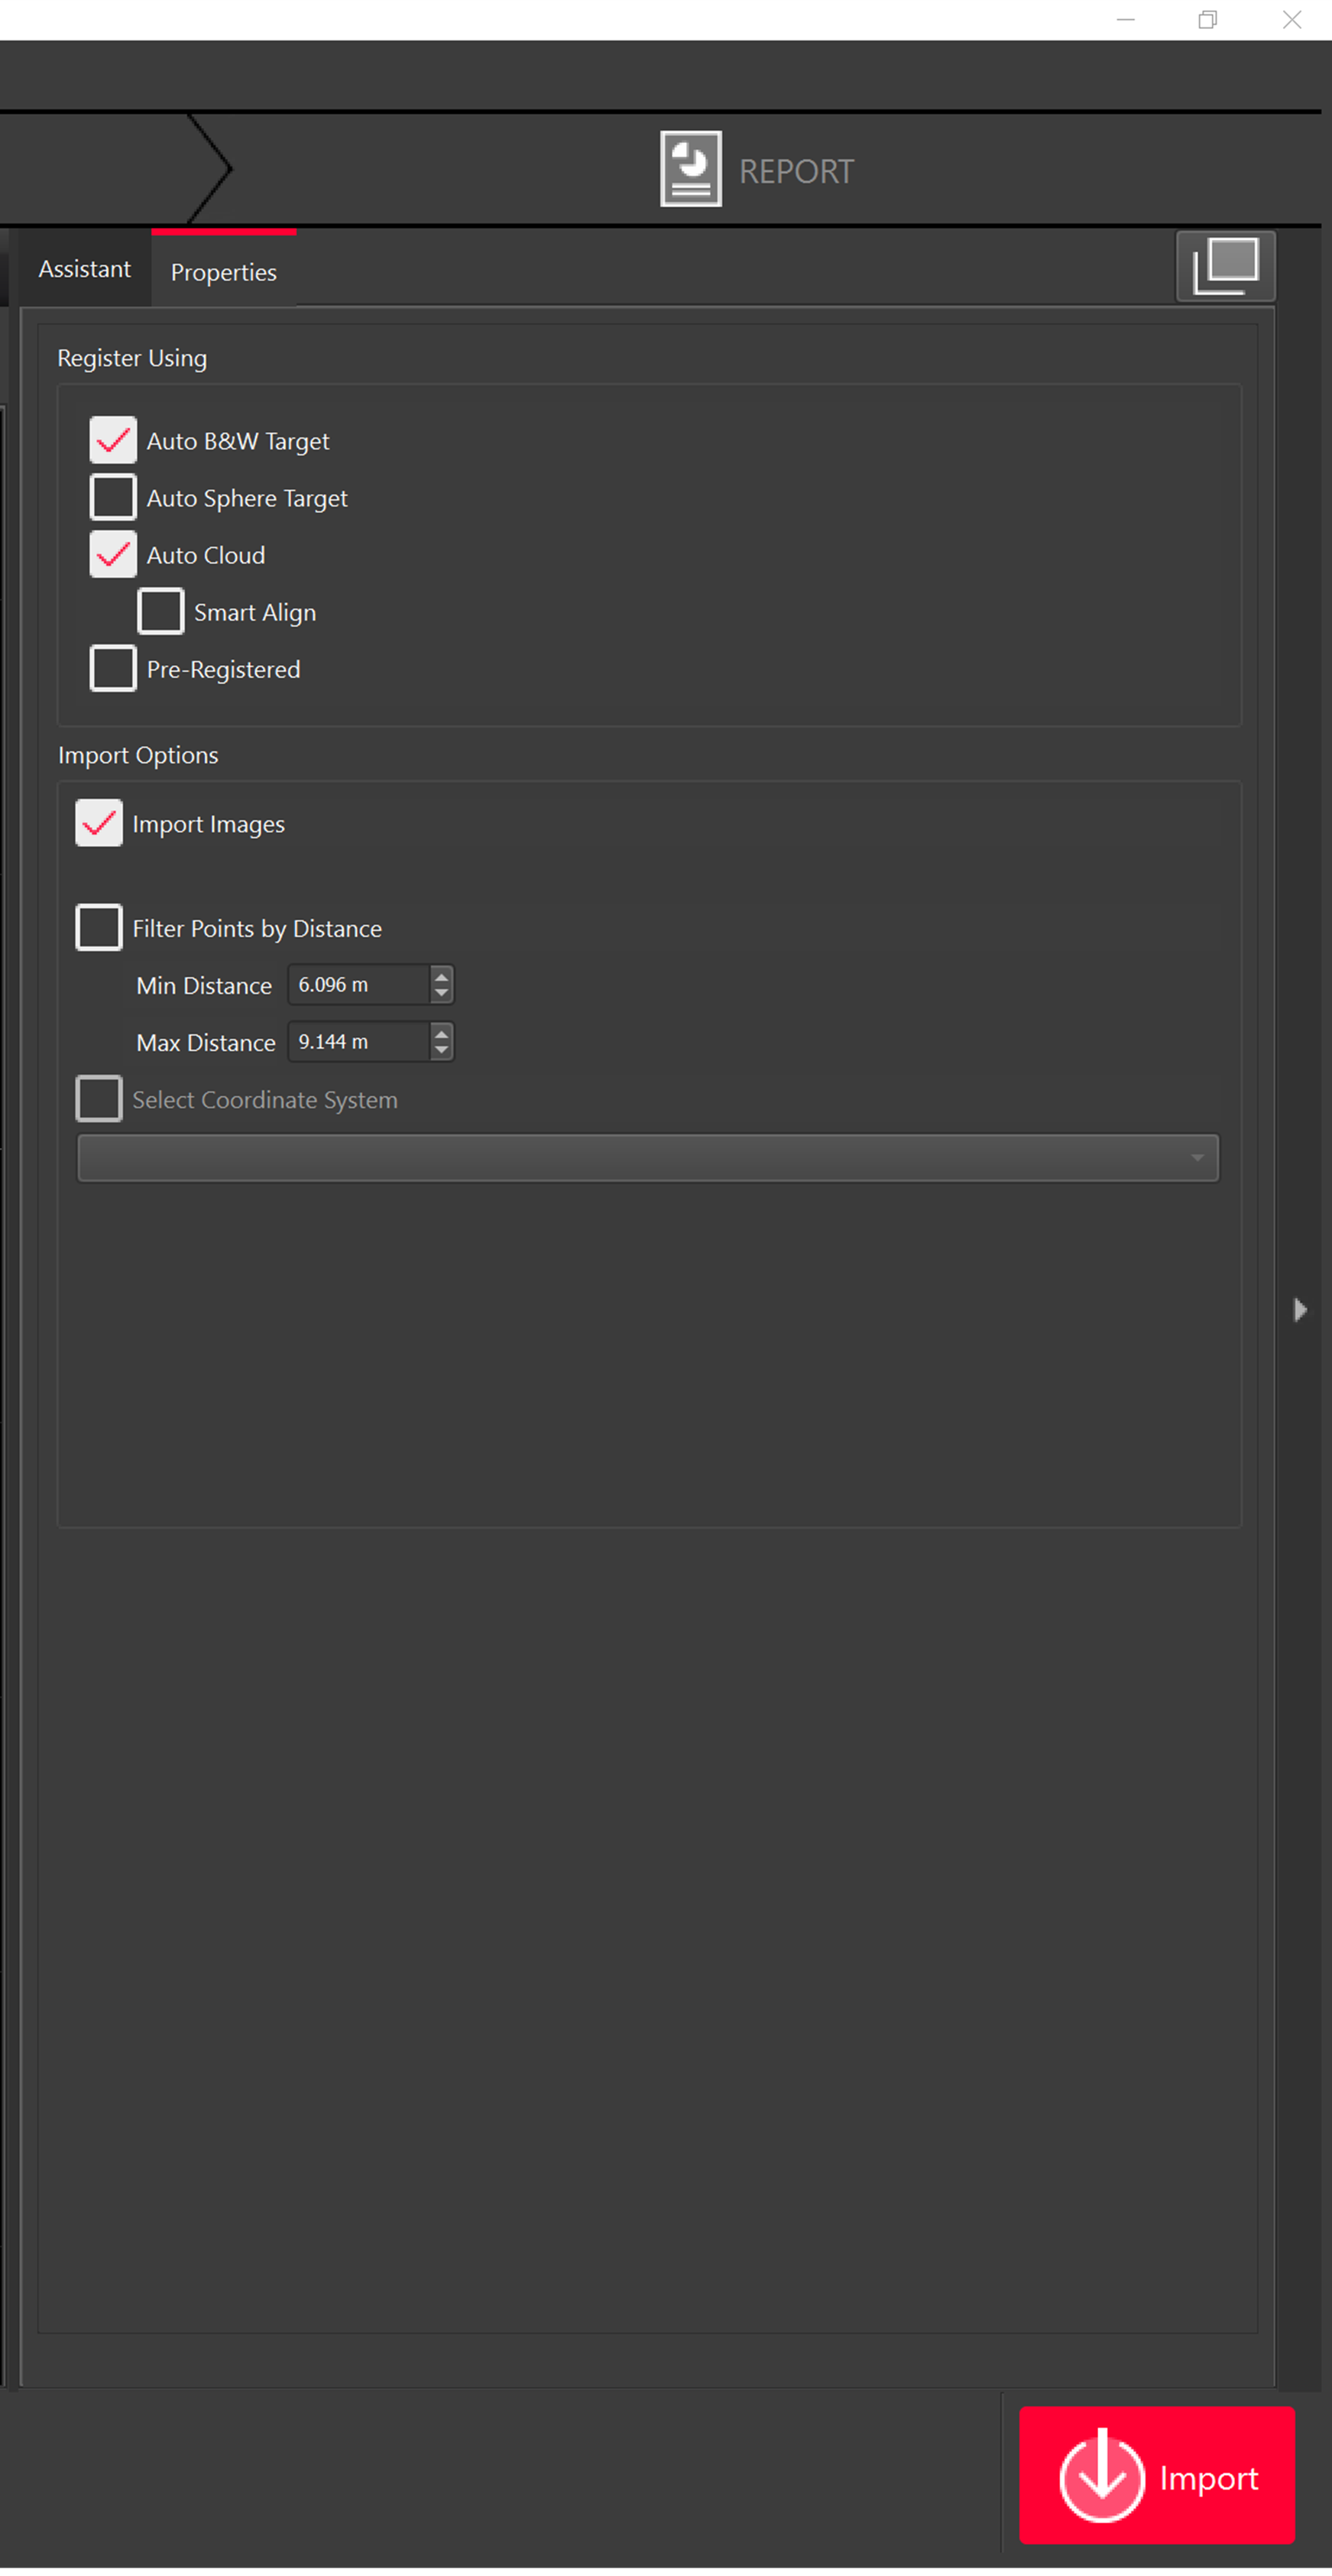
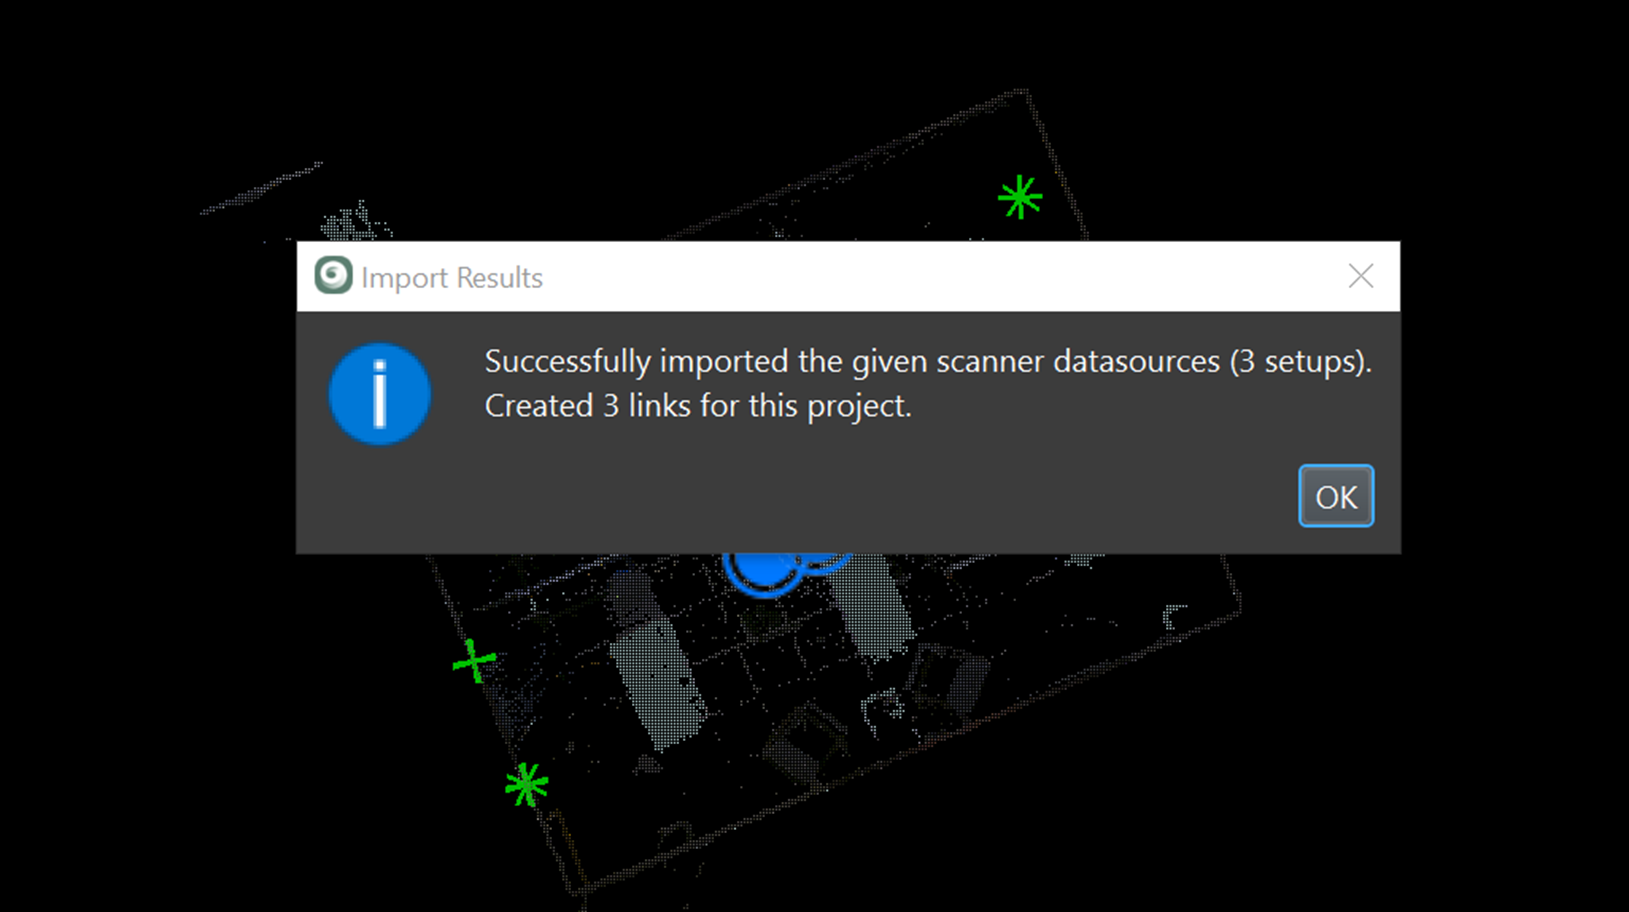
Scans will then be imported.
Wi-Fi connection import workflow:
Connect to the wireless network of the BLK360 scanner.
The SSID and password can be found on the bottom of the scanner as well as the connection card which is part of the starting package.
Open Cyclone REGISTER 360 Standard or BLK Edition and create a project.
Select the BLK360 Option to open the connection dialog:
The older generation of BLK360 scanners is now called the BLK360 G1.

Select Wi-Fi from the drop-down and continue with the data download and import beginning with step 5 in the cable connection import workflow above.
BLK Data Manager
Turn on the BLK360 and wait until the green light is on and not blinking.
Open the BLK Data Manager.
Use the included USB C to connect the scanner to the computer.
Select the BLK360 from the icon at the top of the BLK Data Manager.
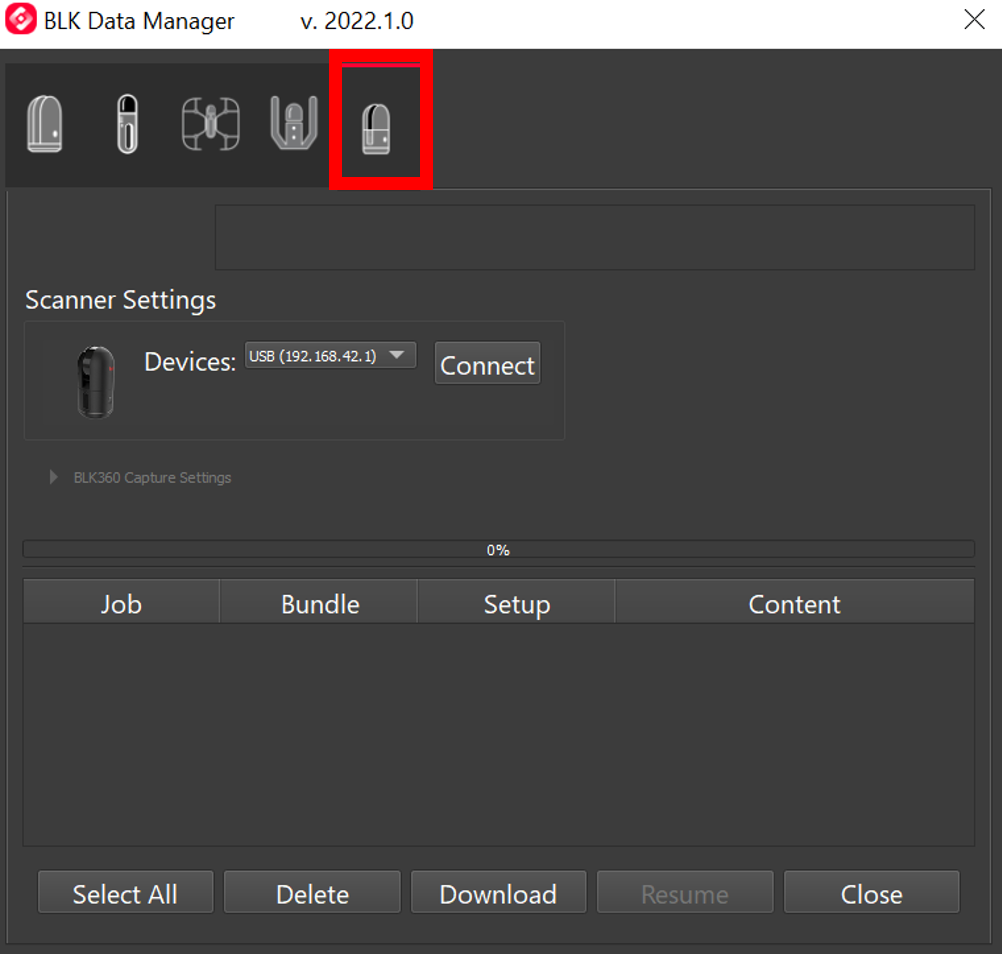
Note the original BLK360 scanner is now called the BLK360 G1 and is located on the left.
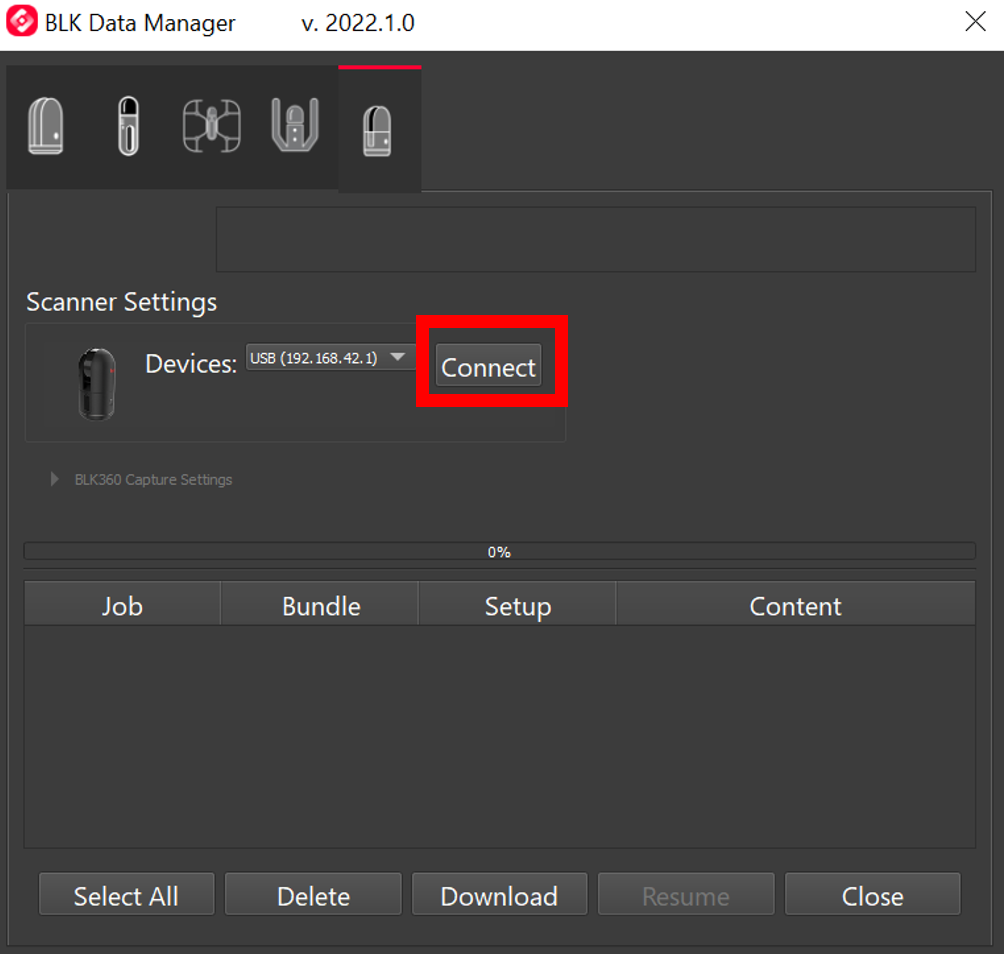
Select the connect button.
Select the scans you want to download.
Selecting a Job will select all the scans in that job, selecting a Setup will only select that setup.
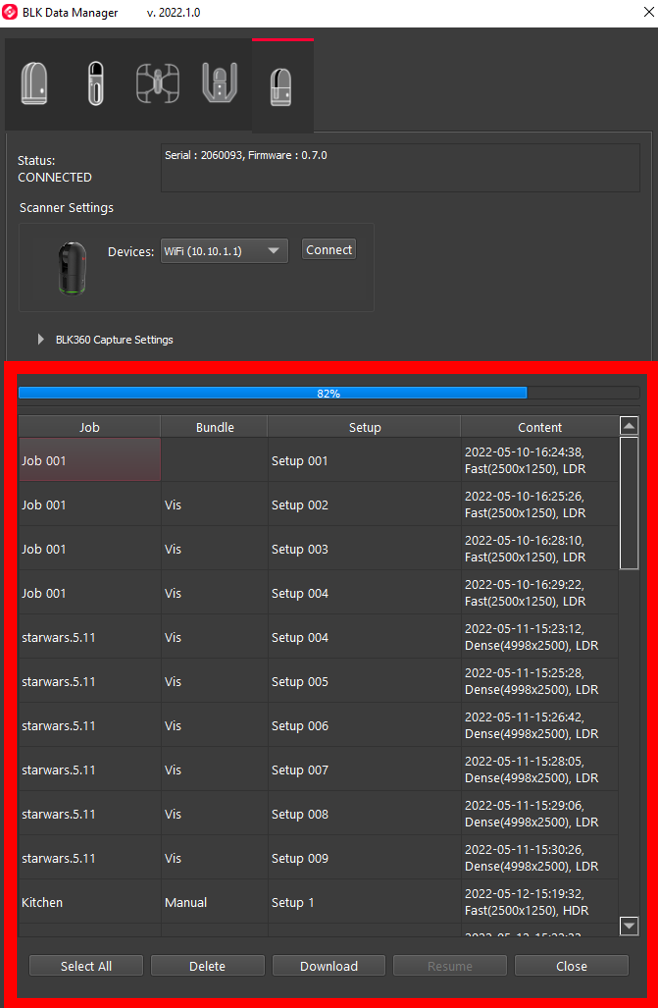
Users can also set the options for future scans.
Users can download to a local drive creating a .blkjob file and .blk files. This .blkjob file allows links that were created in the field to be brought in when the scans are imported into Cyclone Core or Cyclone REGISTER 360.
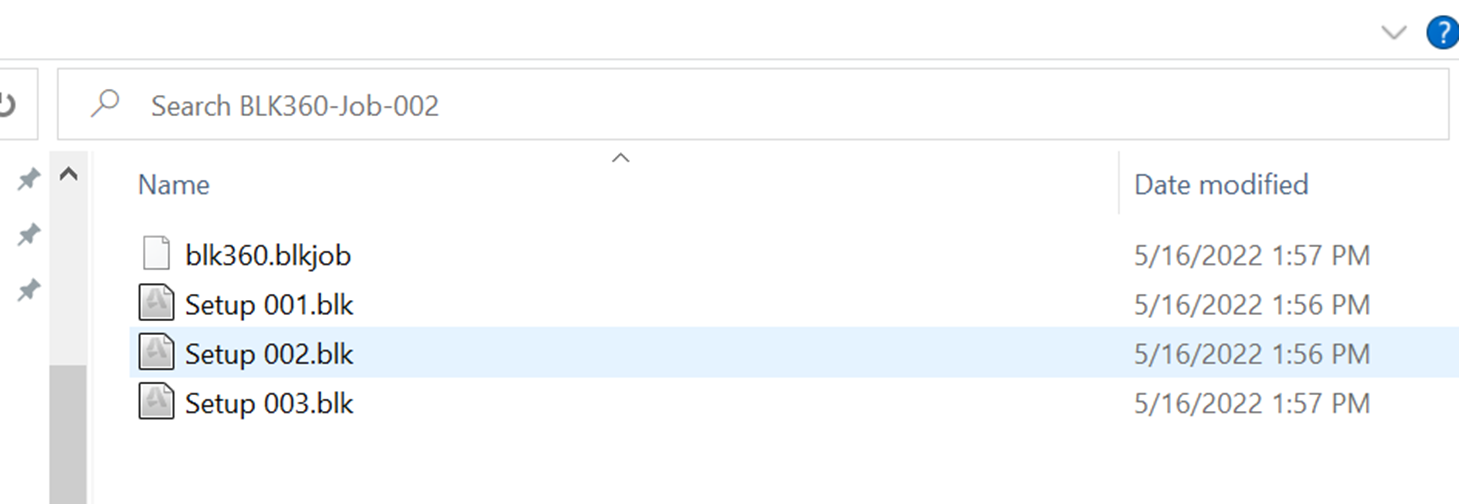
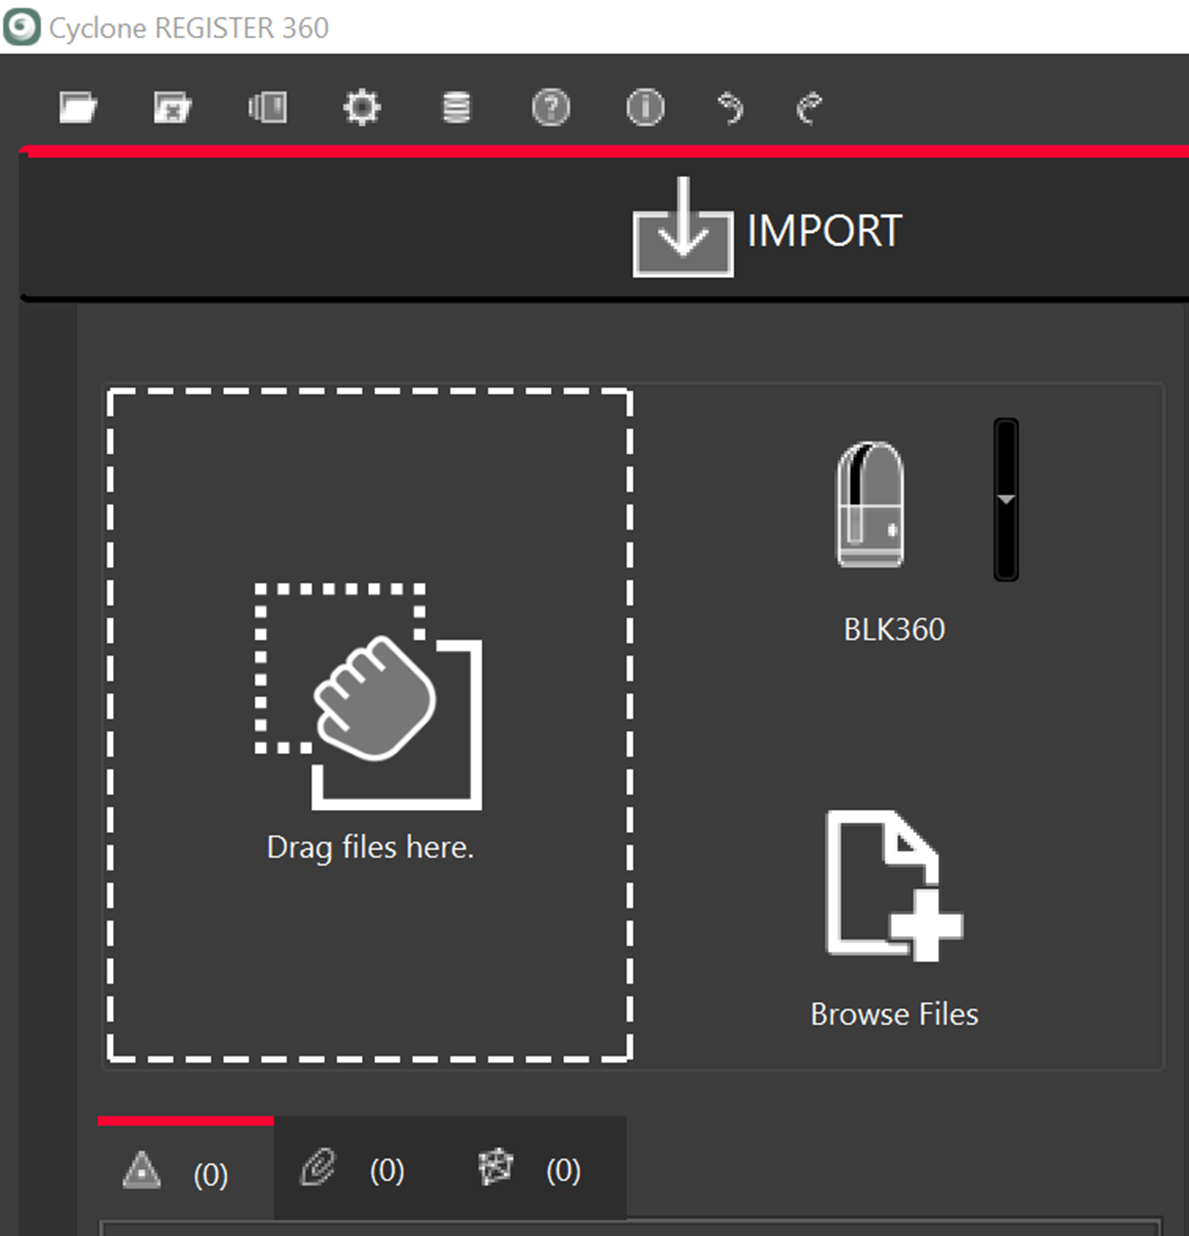
Drag and Drop the folder containing the .blkjob and .blk files into the Drag files here area.
Cyclone FIELD 360
Open Cyclone REGISTER 360 Standard or BLK Edition and create a project.
Connect your tablet and computer to the same network.
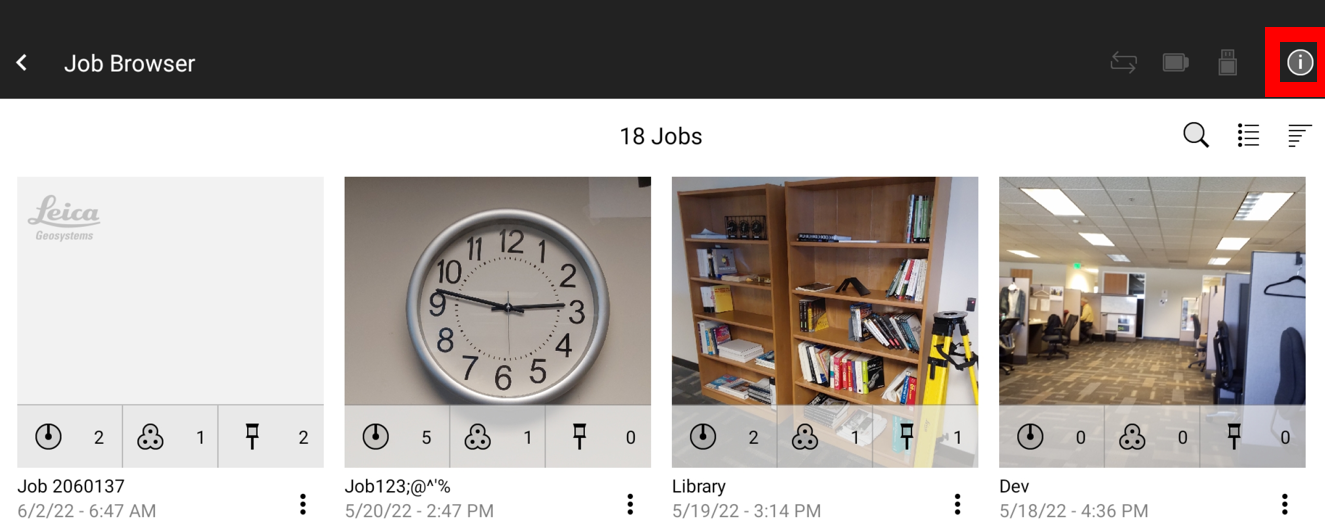
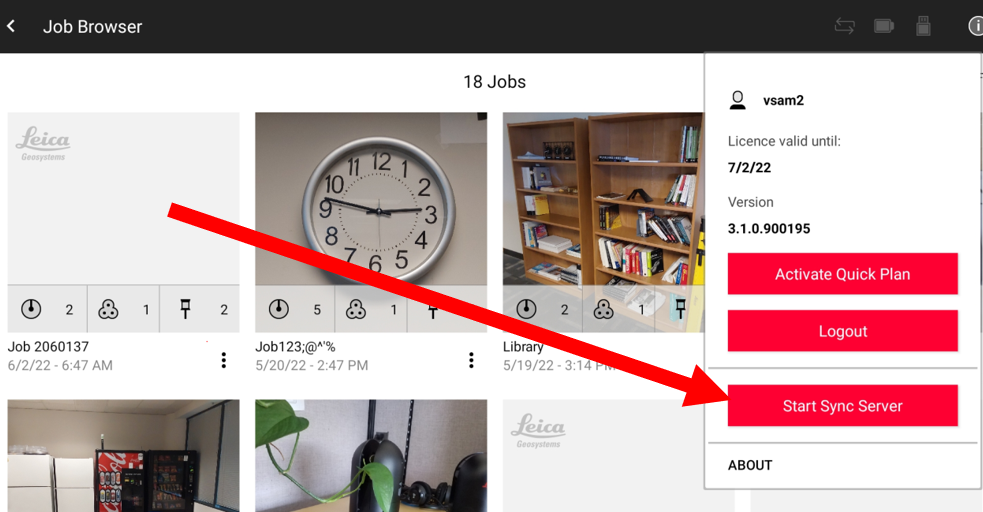
On the Tablet, select the

icon in the top right and select Start Sync Server.
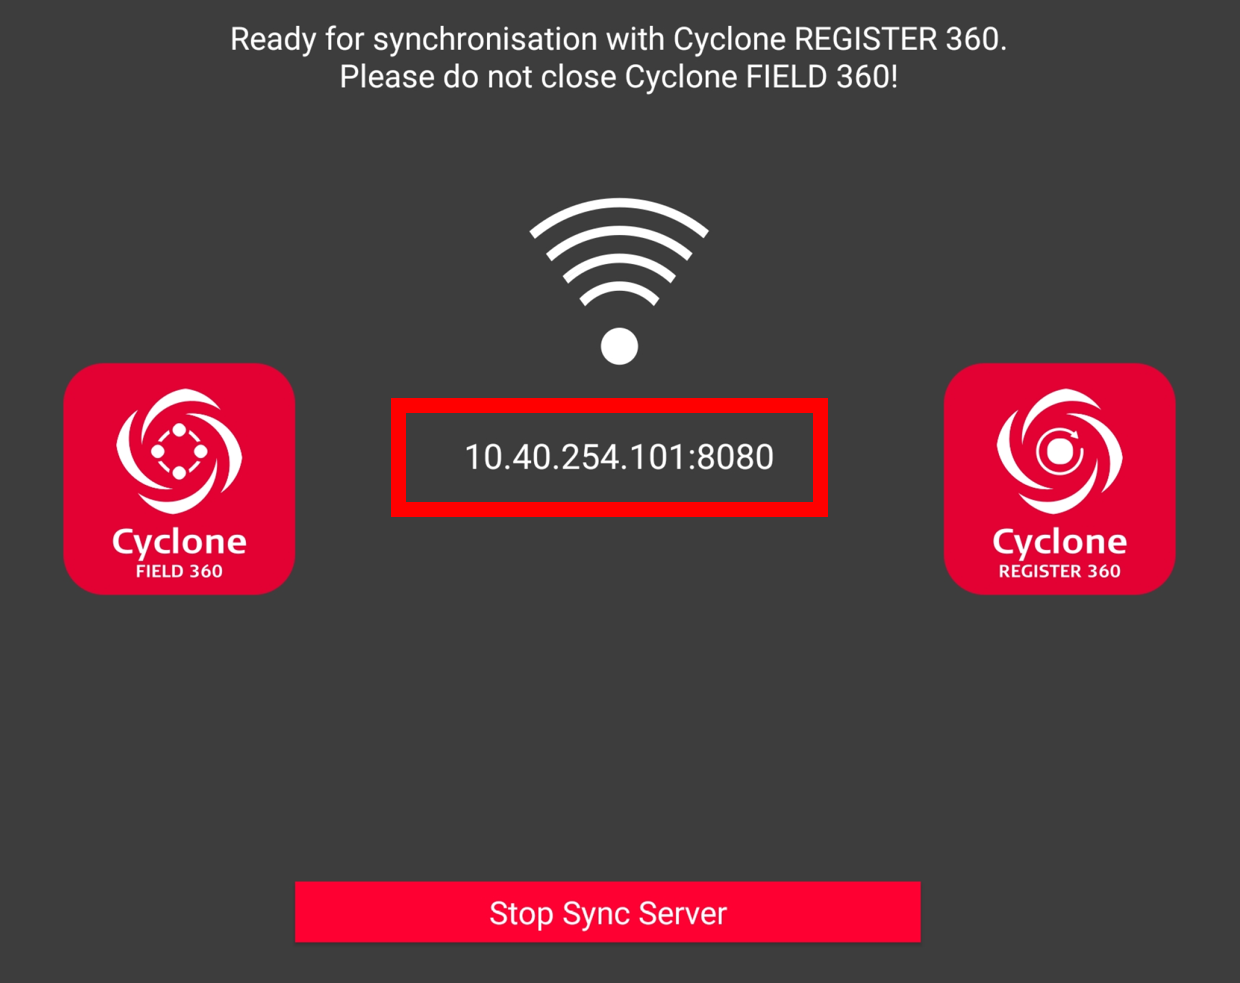
Get the IP address and Port from the tablet.
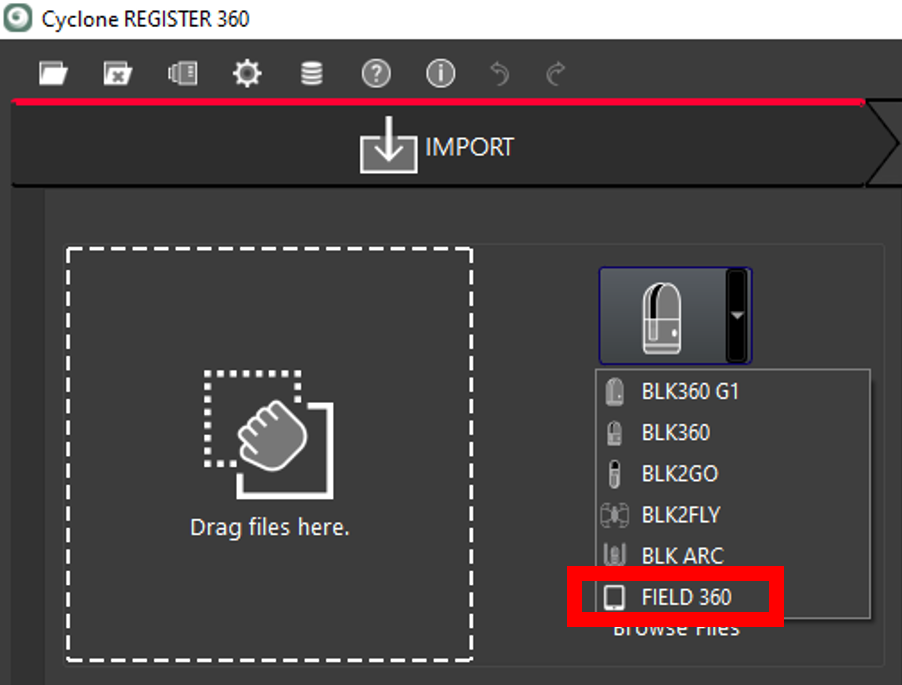
From the dropdown in the import area, select FIELD 360.
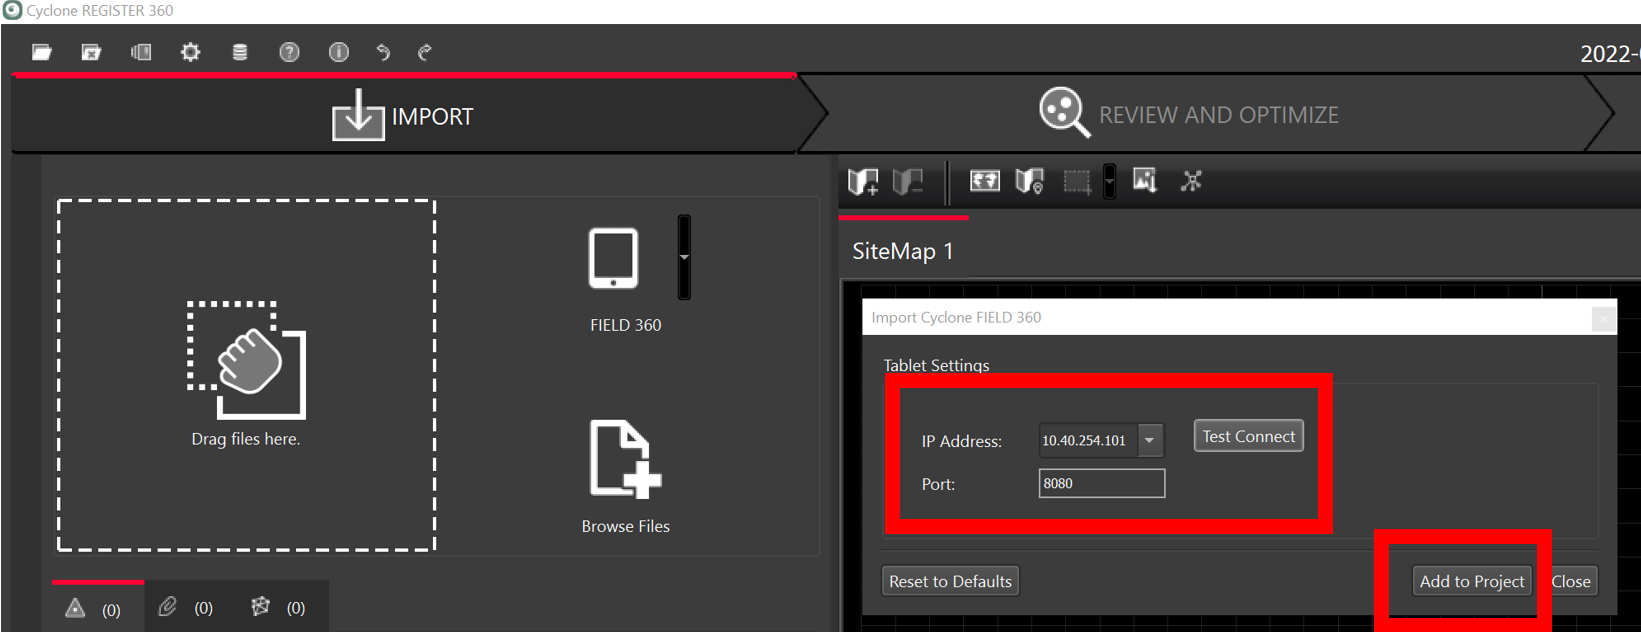
Check the IP Address and Port from the tablet and select Test Connect and Add to Project.
Select the scans you want to import.
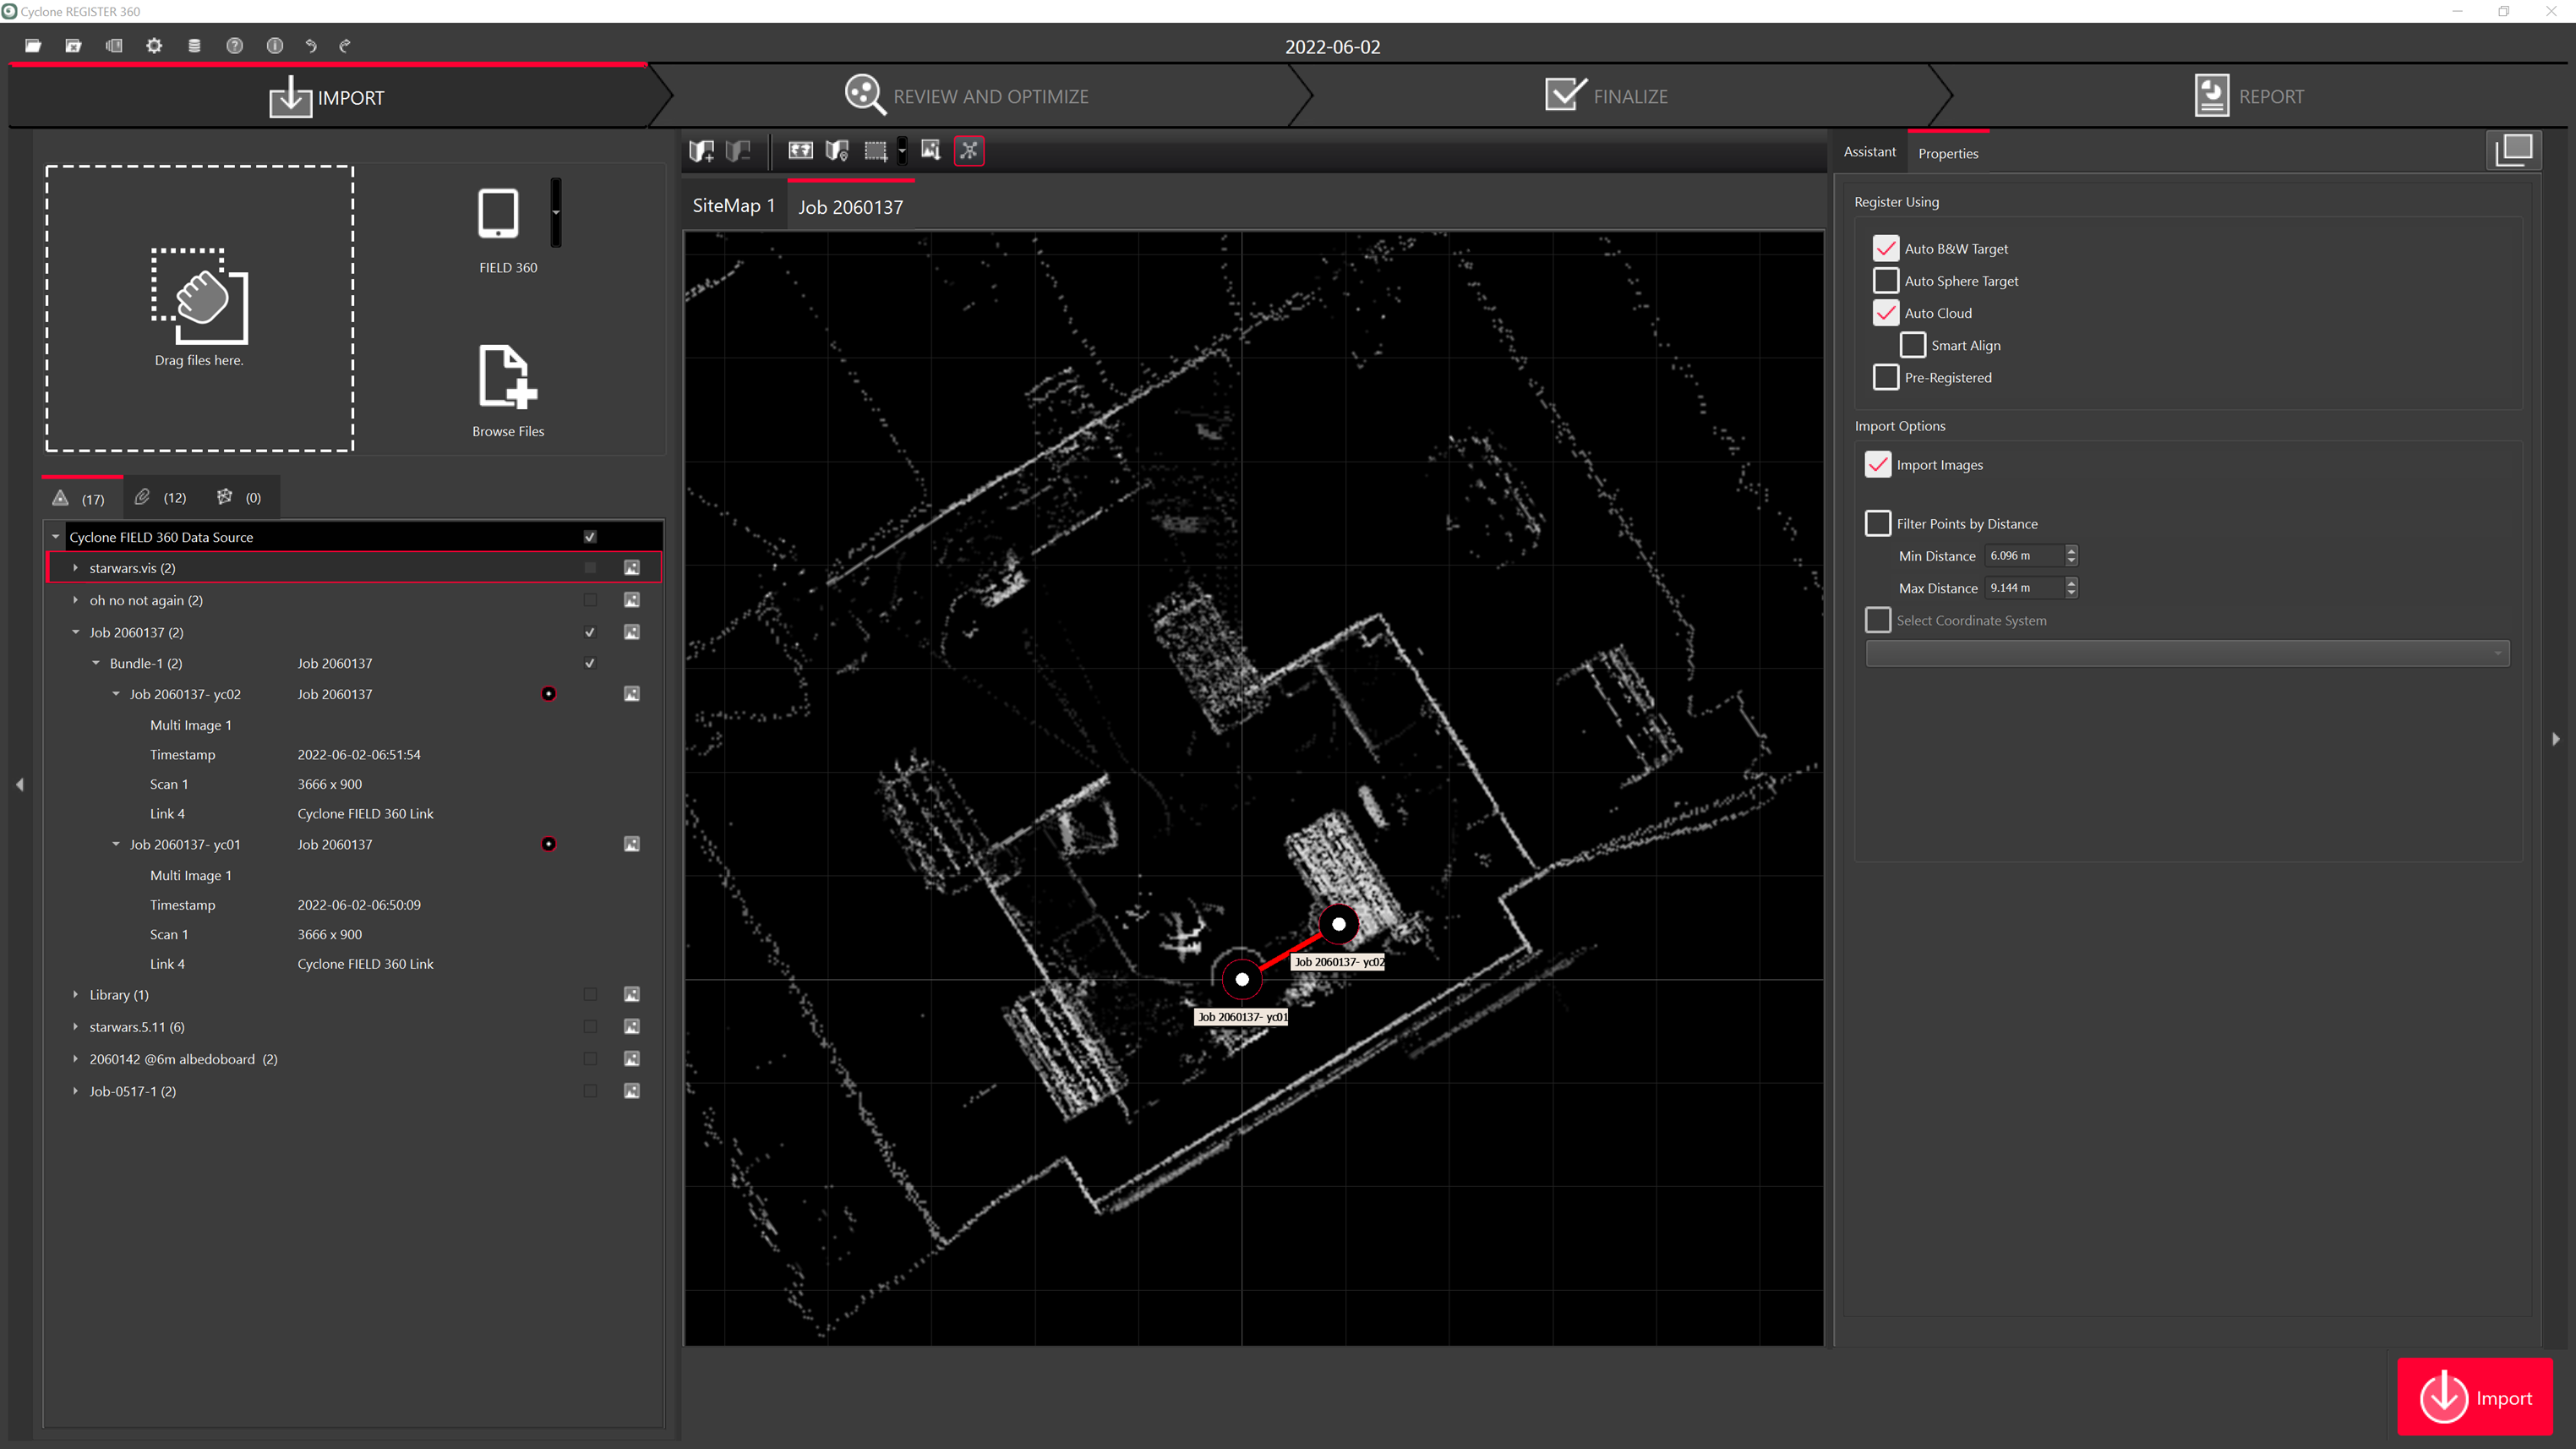
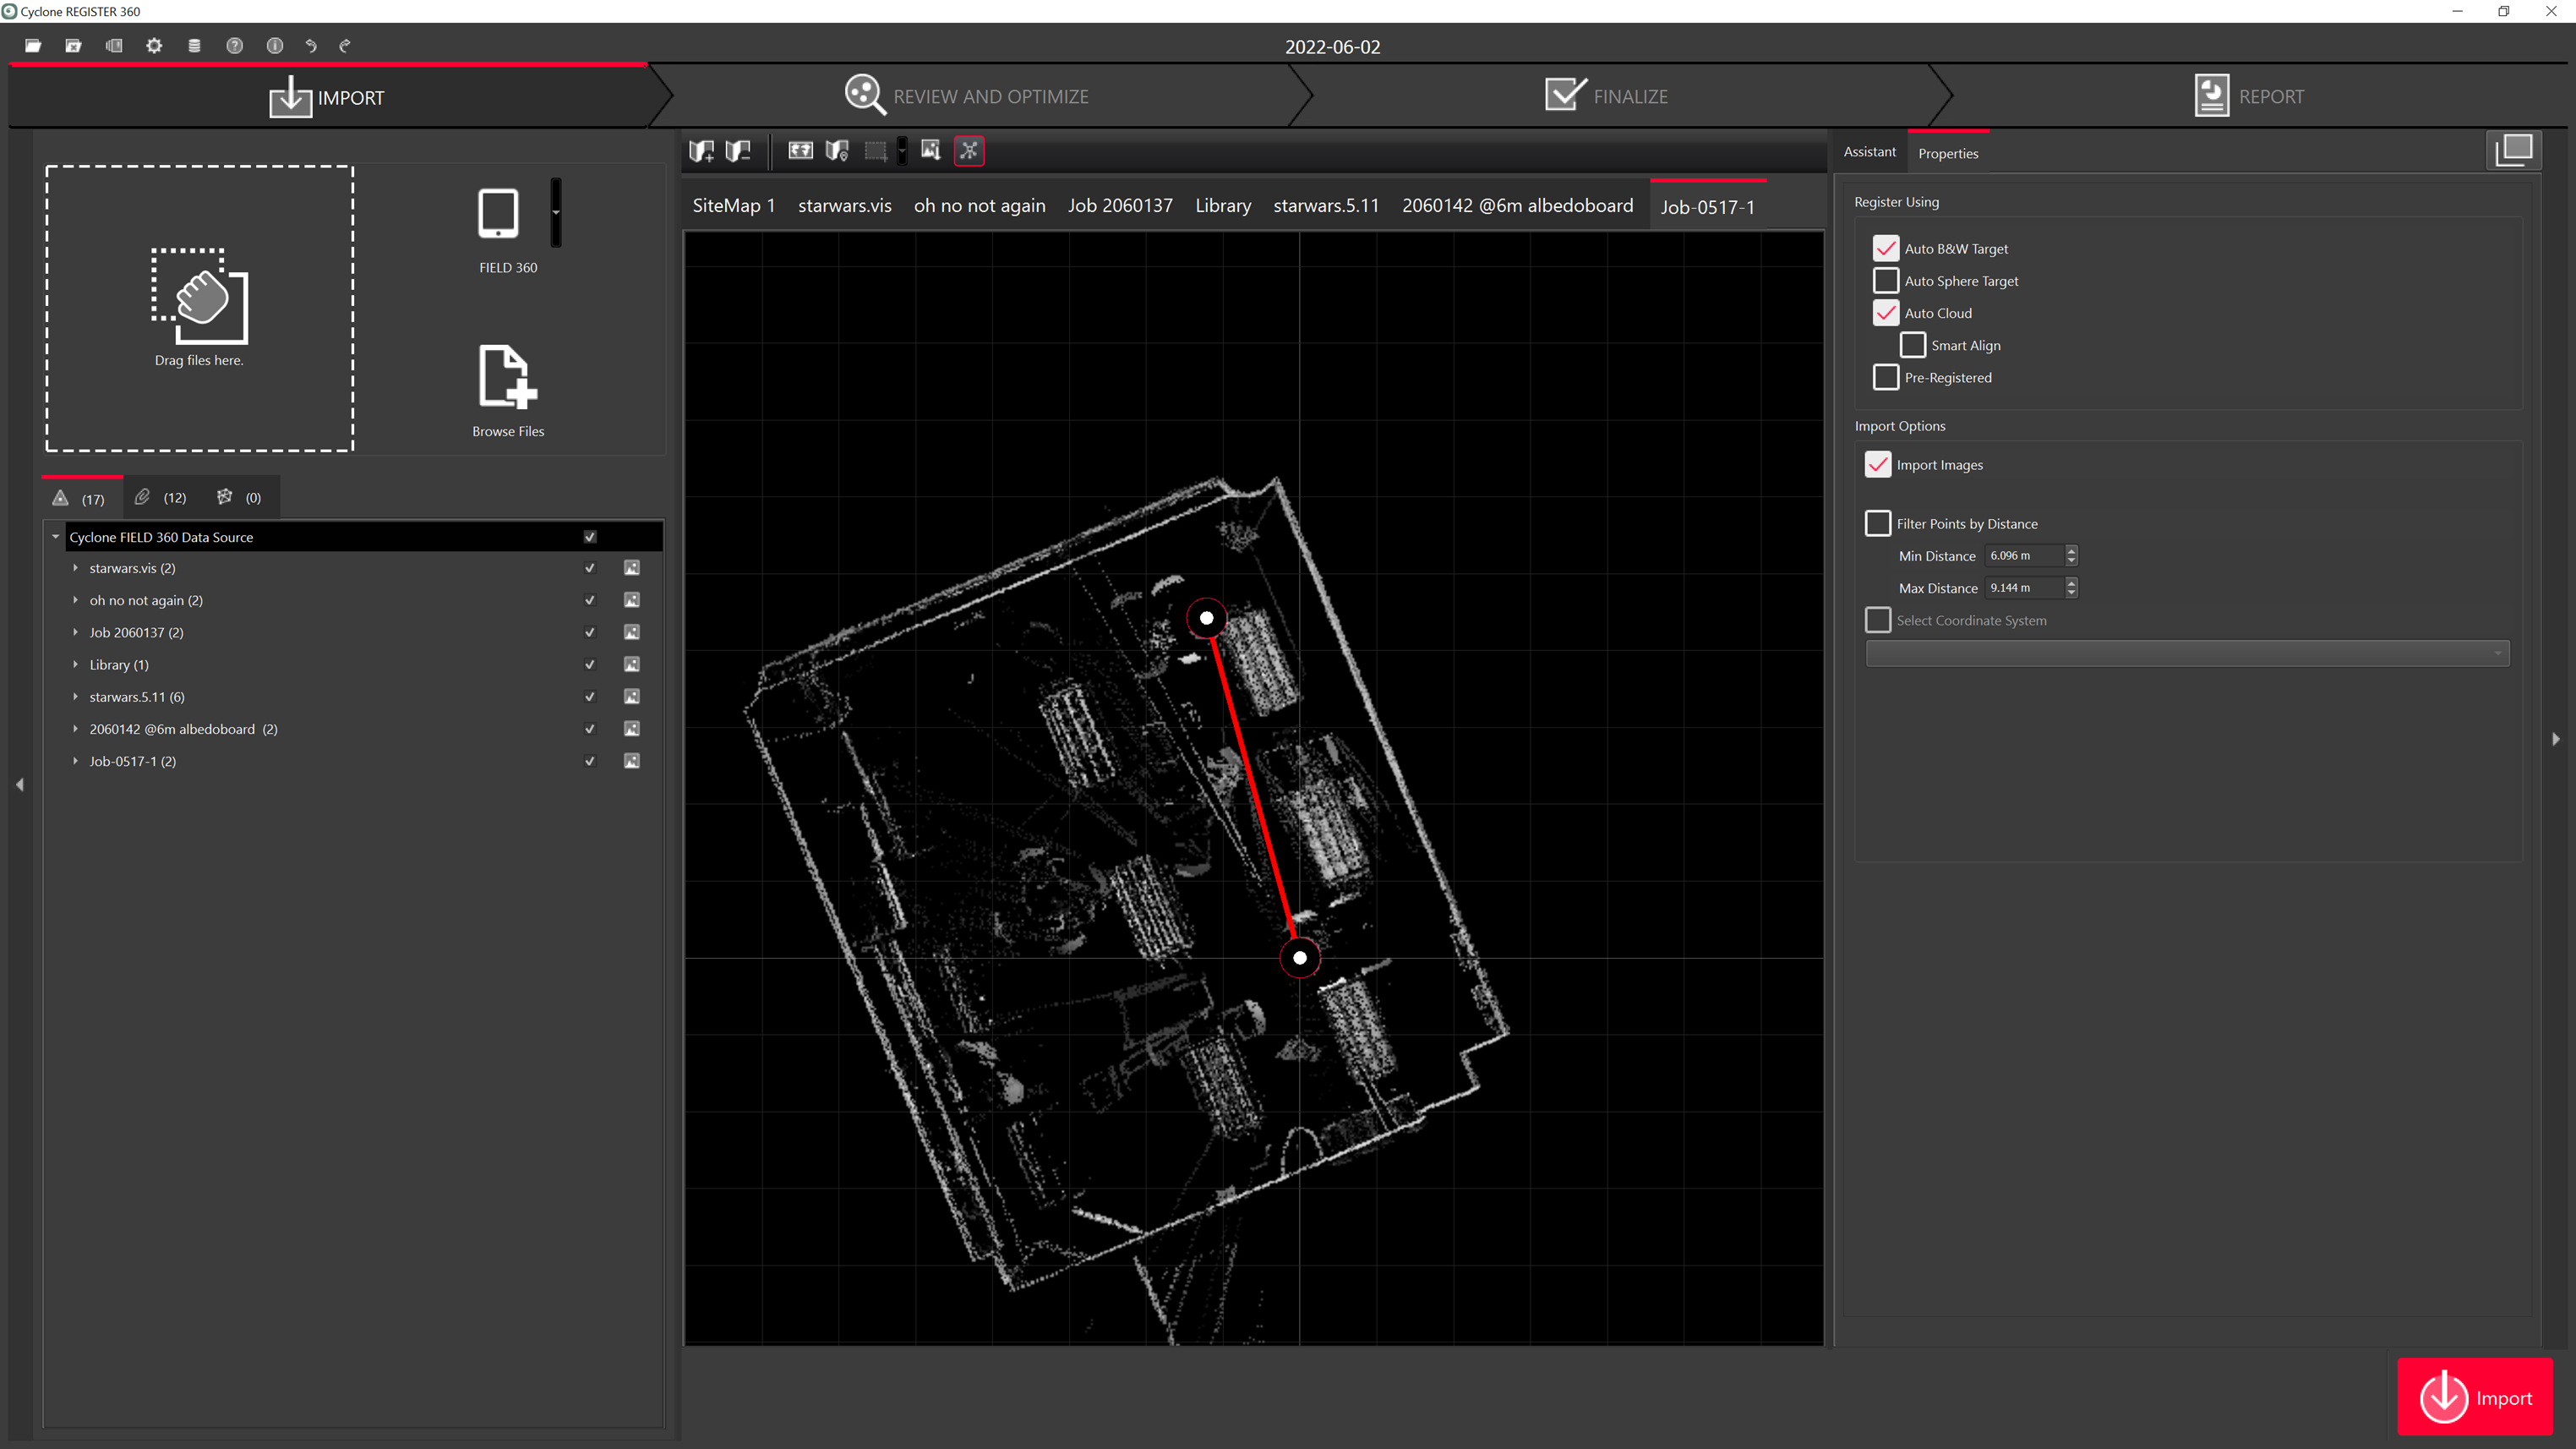
When connecting to Cyclone FIELD 360, there are LWPO’s and preview images.
Select import settings and import scans.

The scans will then be imported.
Auto B&W Target extraction for the BLK2GO and BLK ARC Mobile scanner
As of this release Cyclone REGISTER 360 supports Auto B&W target extraction. To use this feature, click the existing Auto B&W Target check box in the Import area of Cyclone REGISTER 360.

The expected target error is +\- 8mm for the 6” printable B&W targets.
Best practice for B&W target extraction:
1-2 meters recommend distance while walking with BLK2GO around targets and ideally a single stop for 1-2 seconds in front of each target (pointing with the front camera to the target). Target needs to appear on the images and point cloud.
Re-observation for BLK2GO and BLK ARC Mobile scanners
Re-observation is a new processing algorithm more robust against drifts and misalignment in the point cloud.
In more than 80% of the cases where before there was misalignment or double walls there is now an improvement. This is applicable for BLK2GO and BLK ARC scans.
It is beneficial to be applied whenever there is a re-observation of some scenes, meaning some areas have been scanned more than once within the same walk. This can be achieved by starting and ending the walk in the same location and ensuring good overlap or doing some small or medium loops during the walk.
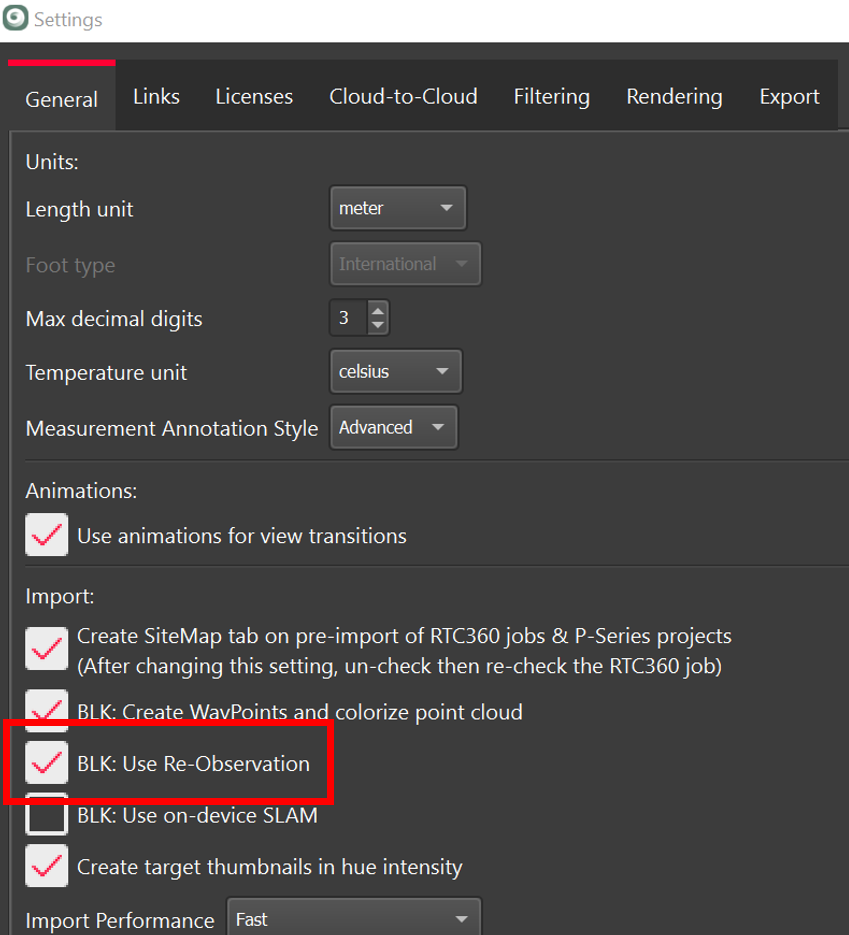
The option to use this new algorithm can be enabled under Settings → General → Import, before the data import. If the option is enabled, it will be applied for any BLK2GO and BLK ARC scans. This has an impact on the processing time, which will be extended. Depending on the scan, processing time may result up to 20-25% more than the time needed if the option is off. Select this option when data has been acquired following the recommendations mentioned above.
Panoramic images captured on demand while scanning with the BLK2GO Mobile scanner
Panoramic images can be captured on demand while scanning. This is valid for BLK2GO only.
This allows the user to capture panoramic images at specific locations. These images are captured in addition to the automatically captured panoramic images.
The panoramic images can be captured by a long-press the BLK2GO power button while scanning. The LED will blink green. A notification will be shown in the BLK2GO Live app.
On-demand panoramic images are available for processing and visualization in this version of Cyclone REGISTER 360, v2022.1.0 by default. If you want to get waypoints at the “On-demand panoramic image” positions only, upon import use a high interval of waypoints (>200m) and no waypoints at GeoTag locations. This will speed up the import time since waypoints will be created at specific and strategic locations.
Import Device-based LiDAR data
Users can now import LiDAR data captured directly on a LiDAR compatible device (ex iPhone 13 Pro) via Cyclone FIELD 360. These on-device LiDAR scans can be collected either to gap fill in TLS projects or standalone.
No special import steps or settings are required to import this new data type.
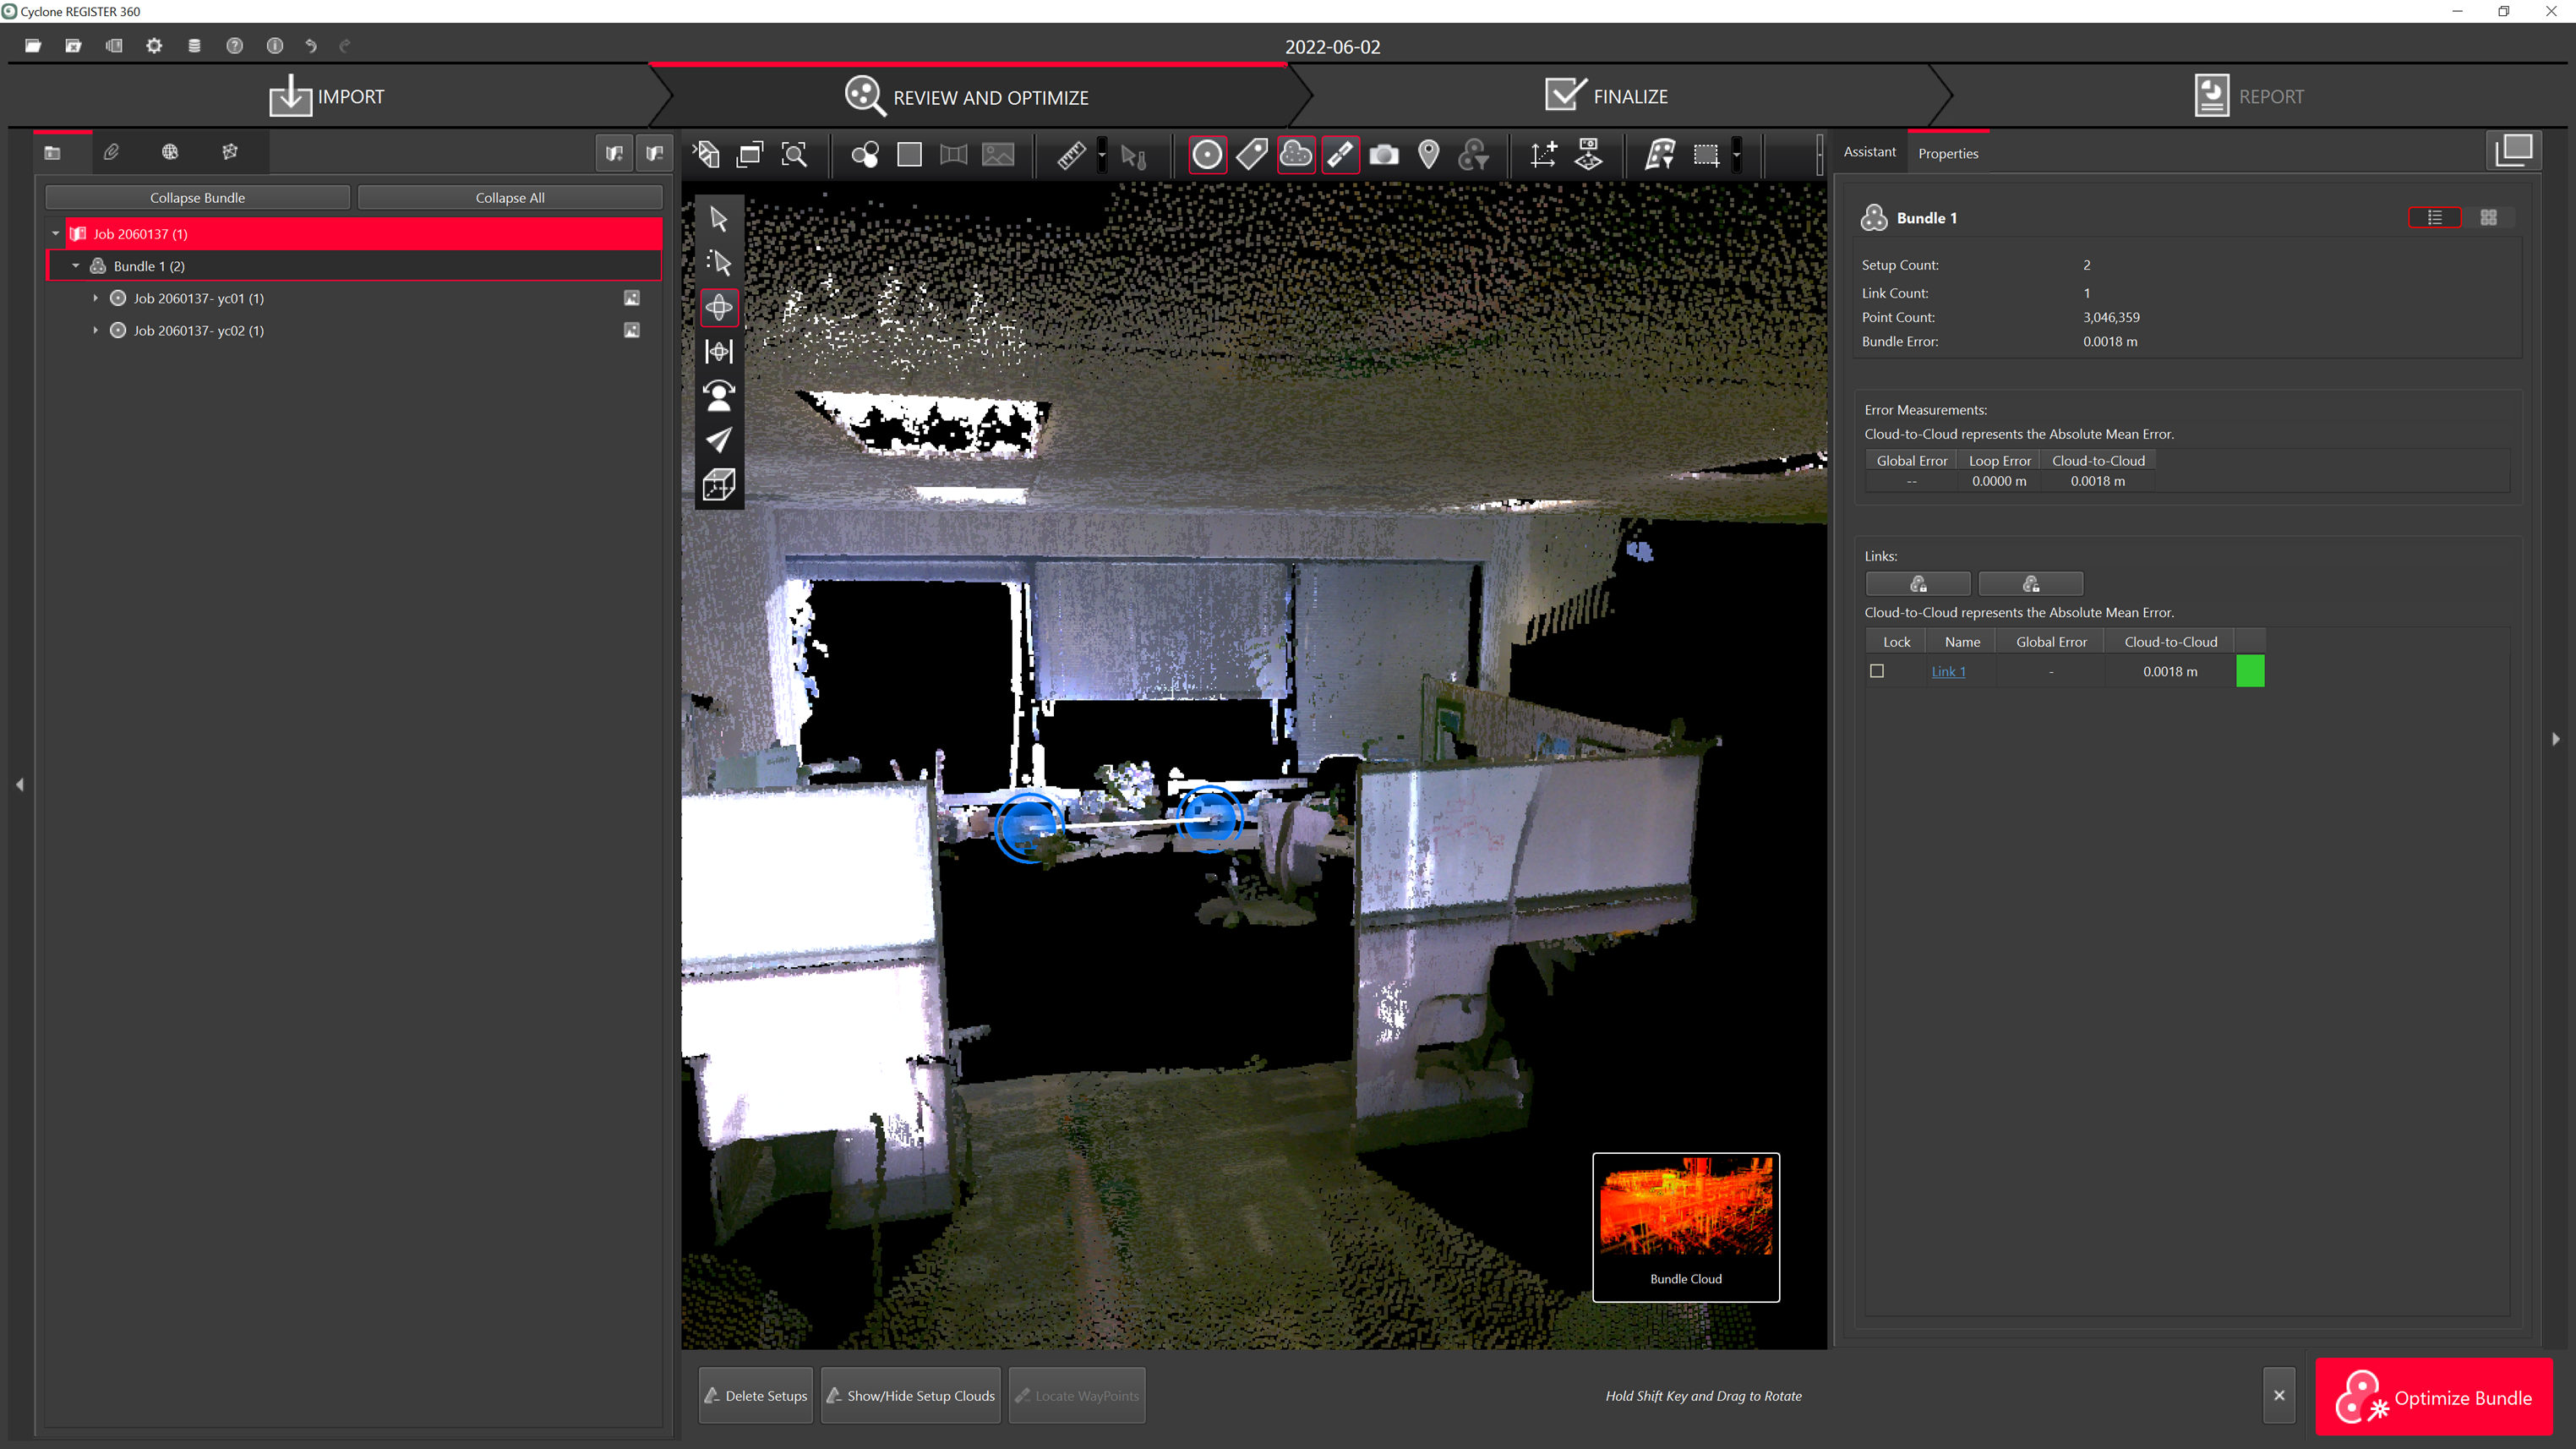
Gap Filling
When using on-device LiDAR scans for gap filling, they will be combined within the scan in which they were collected. They can be visually identified within the Setup once in Cyclone REGISTER 360 but they cannot be extracted or imported separately. Due to the nature of the on-device LiDAR data, its accuracy is not characterized. When combined with TLS data, the bundle statistics (bundle error etc.) will reflect the accuracy and quality of the TLS data only. Users wishing to have greater insight and accuracy of their project accuracy should use the standalone import option.

Gap filling scans are marked along the perimeter of the room. they are clearly distinguishable by their point coloration.
Standalone
Capturing on-device LiDAR data in standalone mode means that LiDAR scans are not being captured and tagged inside of a TLS scan. Users should capture all of their TLS data within one job and all on-device LiDAR scans within a separate job. These can then be imported separately and joined within Cyclone REGISTER 360.
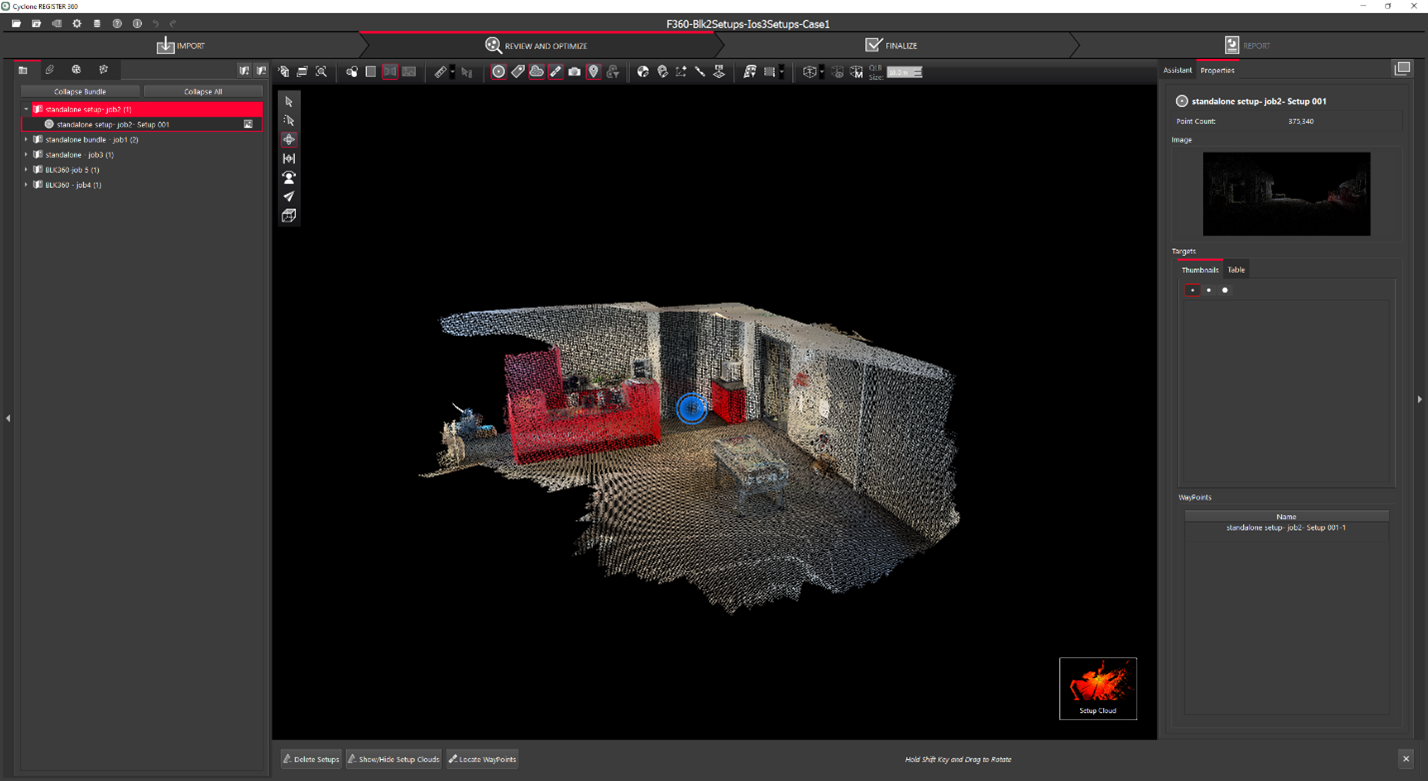
An on-device LiDAR scan captured independently of TLS data.
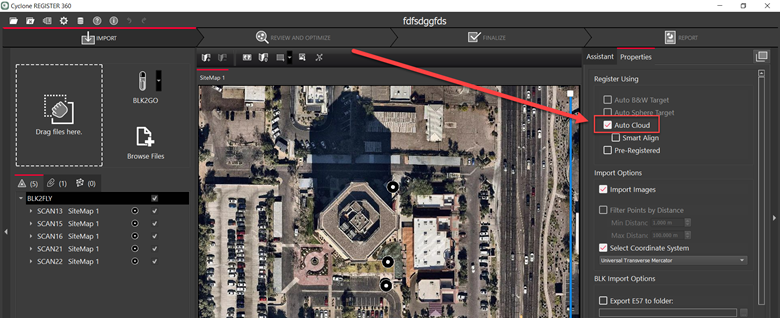
GNSS enhancement for BLK2FLY
Auto Cloud can now be used with BLK2FLY data that was captured with RTK support. Based on the accuracy of the RTK, REGISTER 360 can import and automatically form a bundle.
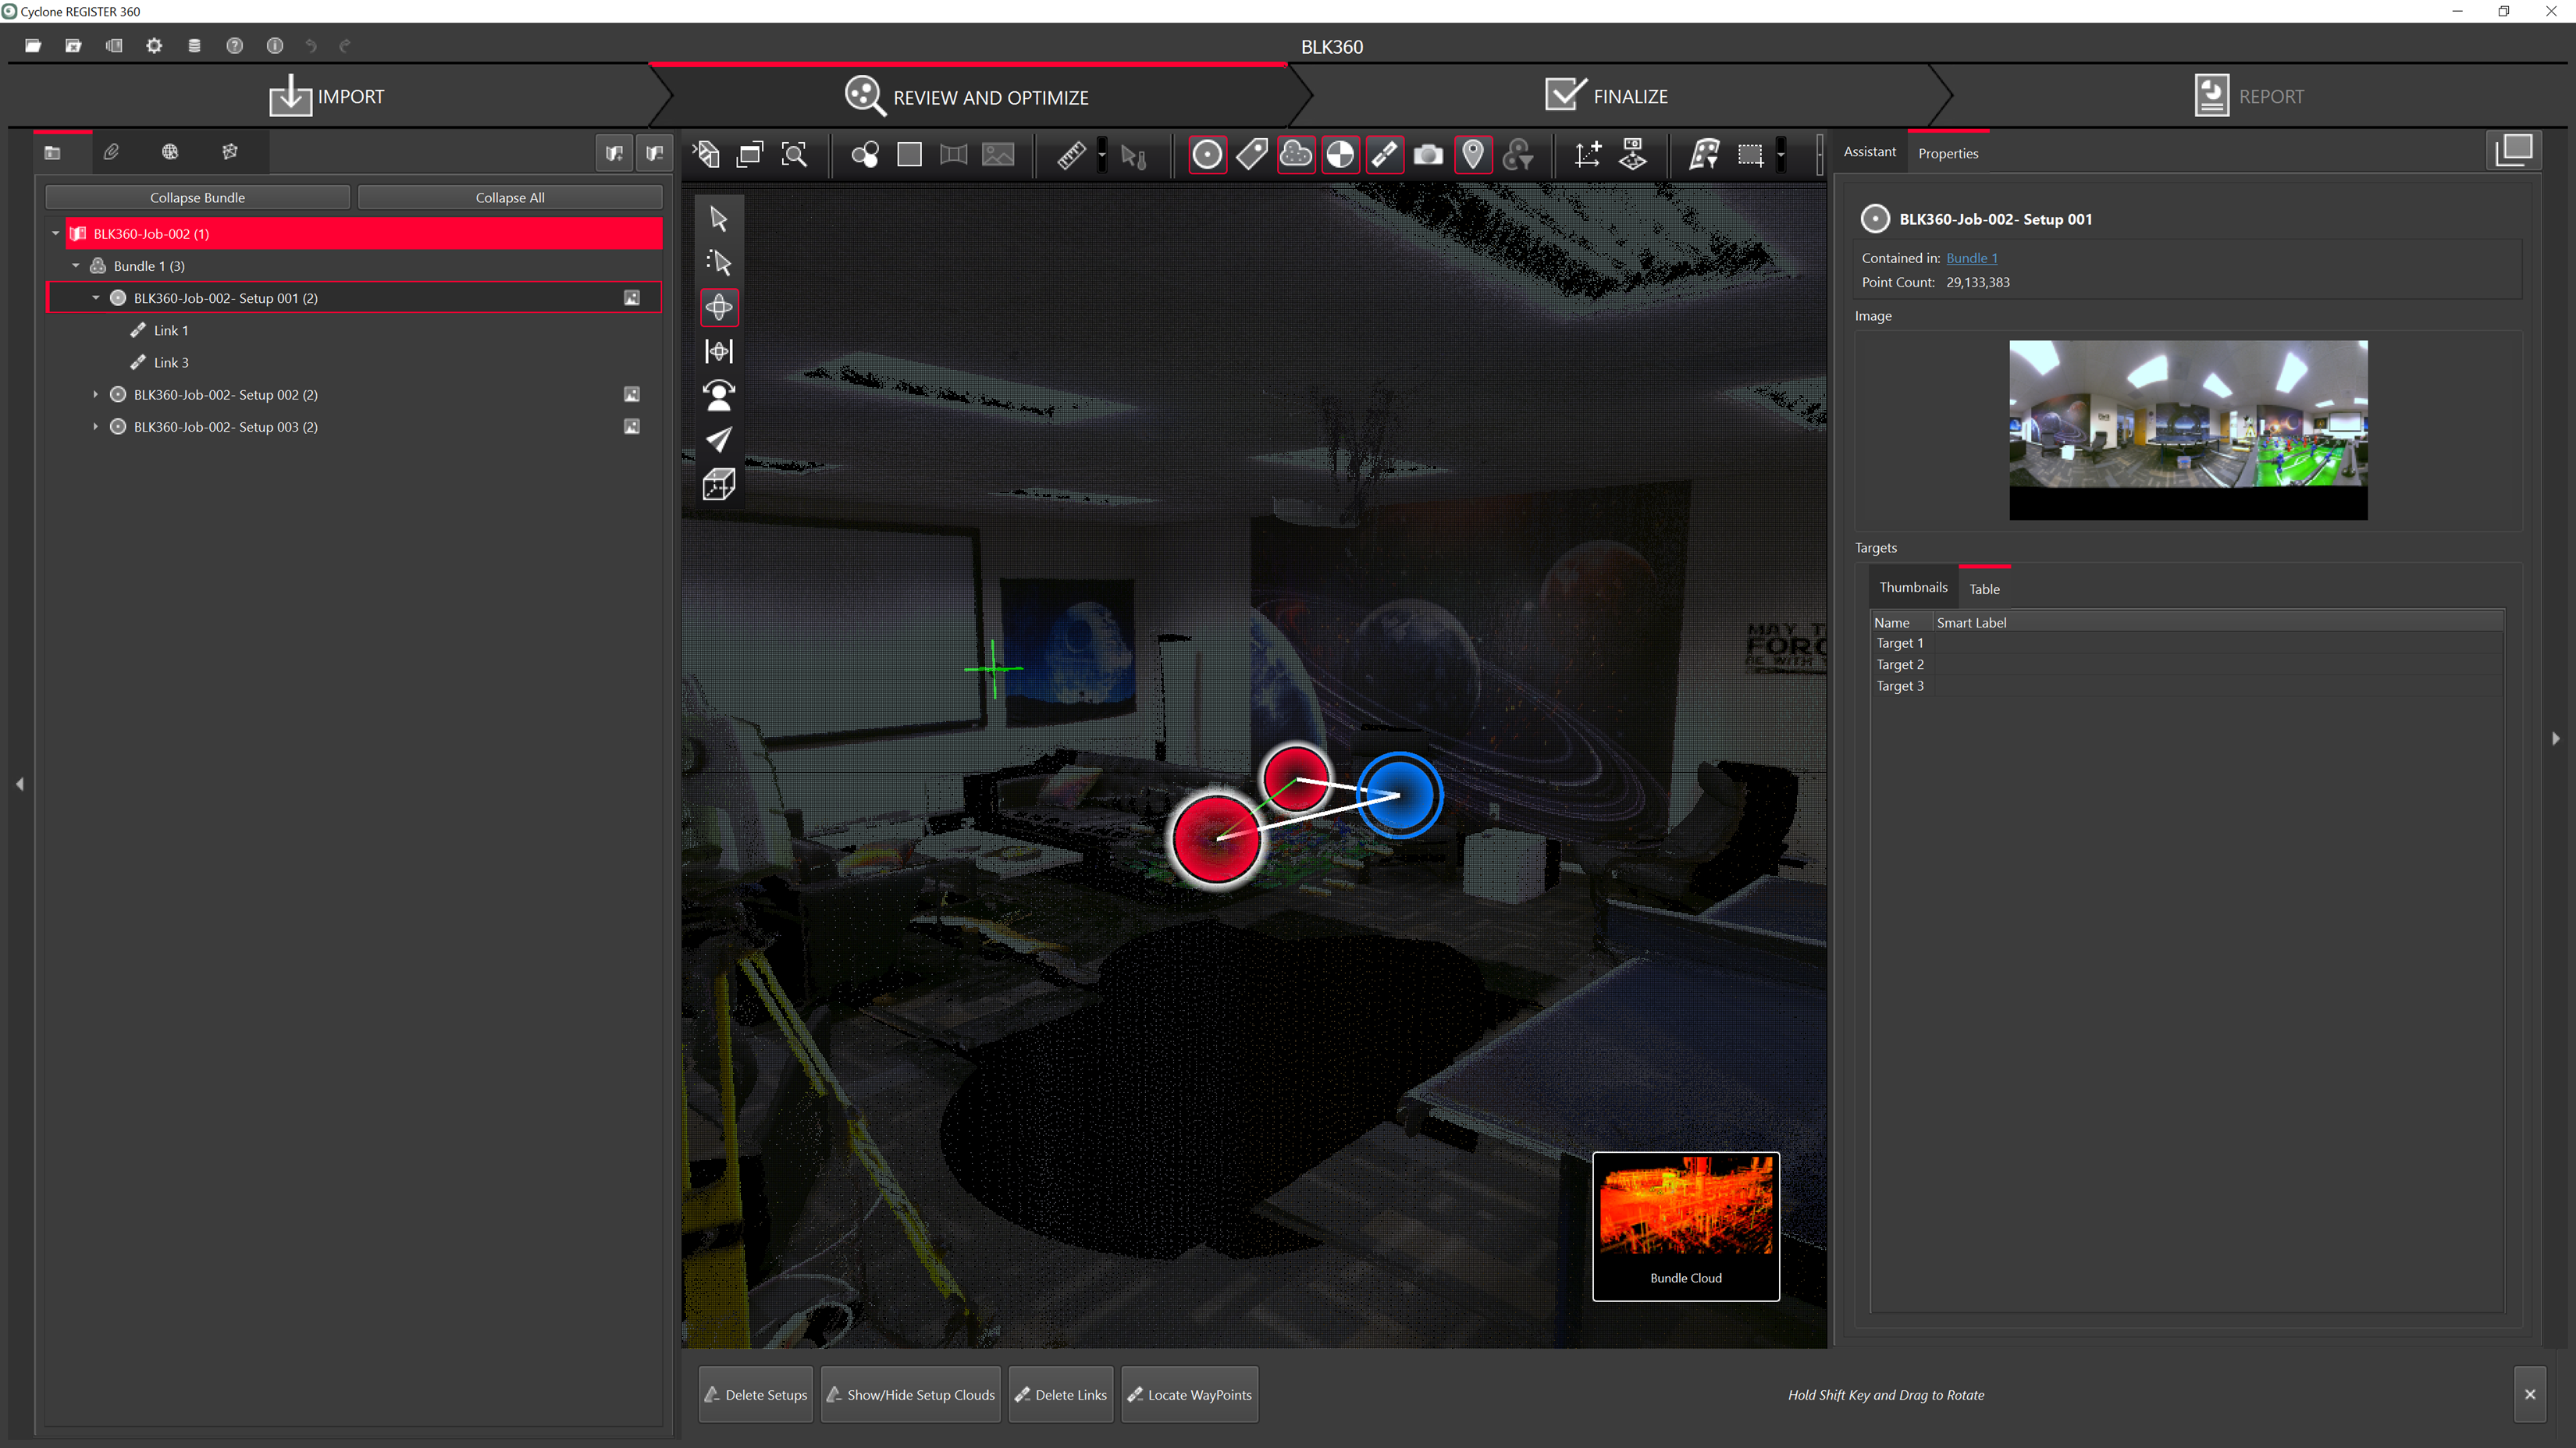
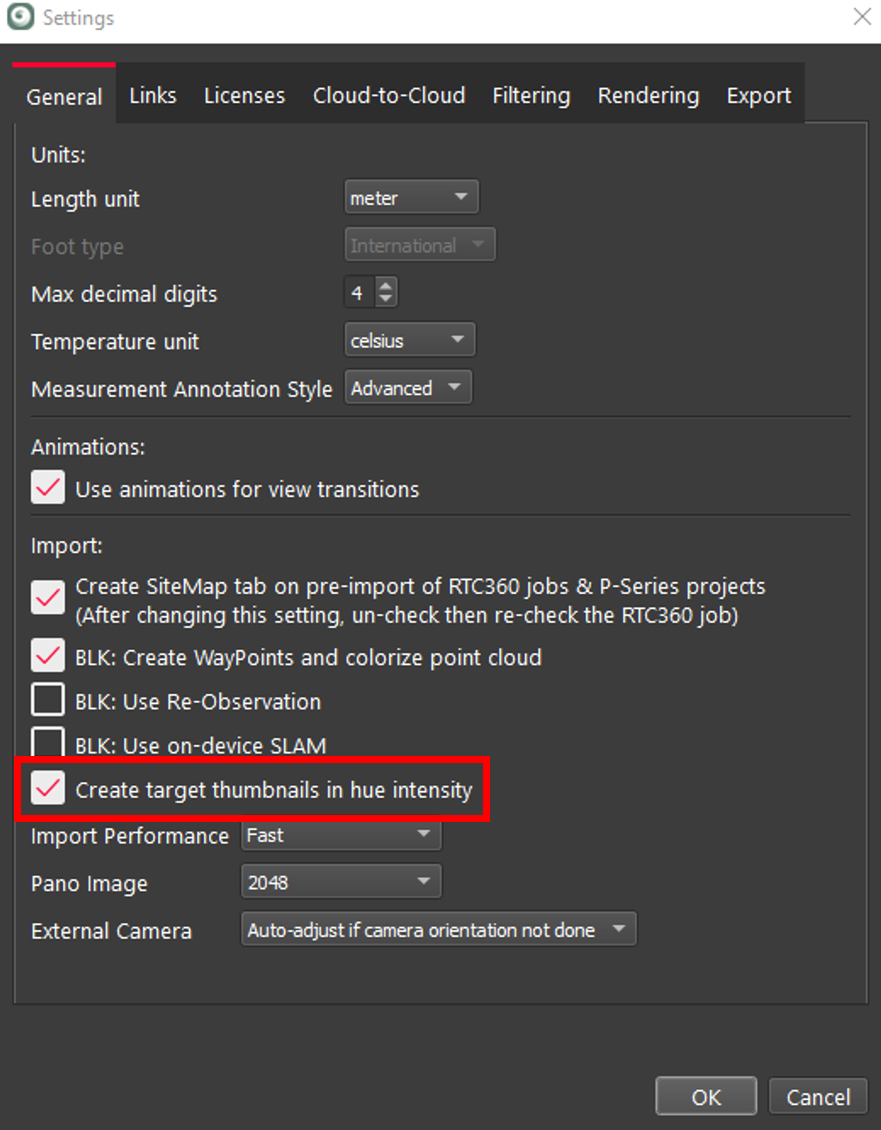
Target Thumbnails
Users can now view target thumbnails with hue intensity coloration rather than black and white coloration. This may allow users to better identify the quality of the center picking. To view the scans, select a setup and select Thumbnails on the right panel.
.png?inst-v=bde041b8-3963-4113-9854-dc8733f3bcd2)
To view targets with hue intensity, select the setting in the Settings under Import.
Pick snapping to vertex
When selecting a vertex using the picking tool, the tool will now snap to the center of the vertex to assist users in making a precise pick.
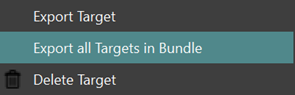
Export targets
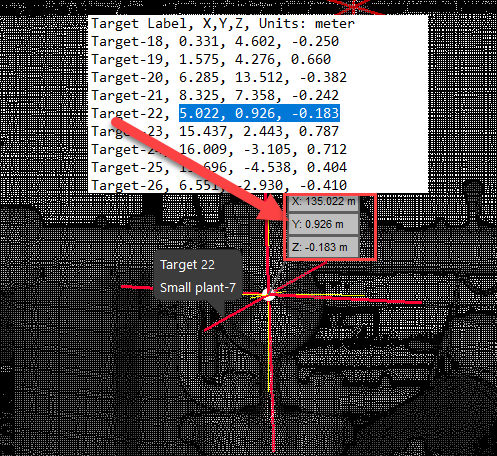
Users can now export Target vertexes as a text file in the same way that pick points can be exported. Begin by right-clicking on a target vertex, or target vertices, and select Options | Export Selected or Export All.
The resulting file will be formatted as target label, x, y, z.
Don’t show me again dialog
Overnight publishes, preserved session to session, uninstall and reinstall to make a different selection.
Improved reporting when applying control
Users will now be warned via an error message if applying Control fails due to the target error being larger than the minimum set by the end-user. This ensures that users are aware that Control was not applied and why, allowing them to remedy the situation.
Import E57 with multiple pano images
Users can now import unstructured E57s with multiple pano images. Pano images will be imported as WayPoints. This means that Cyclone REGISTER 360 will now support the import of the e57’s that are created from the CLI tool -b2btrajectory which creates an e57 with 1 to n panos.
Bug fixes
Fixed a bug that prevented users from setting the active “Control” UCS for a project.
Fixed a bug that caused Setup labels to be missing from the import area.
Fixed a bug that prevented users from setting the active UCS.
fixed a bug that prevented the UCS associated with the first SiteMap from being set as the active UCS after publishing to LGS.
Fixed a bug that caused the “place by geo-coordinates option to use VIS info to place the setup rather than the GPS position.
Fixed a bug that caused the timestamp on P-Series Setups to be incorrectly reported.
Fixed a bug that caused instability after canceling an import.
Fixed a bug that caused instability when importing BLK2GO/BLK2FLY data alongside non BLK2GO/BLK2FLY data.
Fixed a bug that prevented users from importing E57 files exported from Agisoft.
Fixed a bug that caused pano images to appear blurred.
Fixed a bug that could prevent publishing to E57 a project containing duplicate setup labels despite Setup names not matching.
Fixed a bug that prevented publishing the contents of a LimitBox when the project contains a single setup.
Fixed a bug that caused LimitBoxes to be associated with the first Setup in a project despite not containing data from that Setup.
Fixed a bug that caused instability in the CLI tool when processing files.
Fixed a bug that could cause the Optimize button to behave unexpectedly after collapsing the right panel.
Fixed a bug that could cause the Create LimitBox button to become inactive after use.
Fixed a bug that could prevent a user from successfully publishing after a previous publish event was canceled.
Fixed a bug that could prevent cloud rotation along the z axis.
Fixed a bug that resulted in merged projects not having a merged image thumbnail.
Fixed a bug that caused all BLK2GO Setups to become selected in the Import area when a single Setup is selected.
Fixed a bug that could cause WayPoints to be missing or placed in the wrong location when publishing an LGS file.
Fixed a bug that caused the “Create WayPoints at GeoTag location” option to override the “Create WayPoints” option in settings.
Fixed a bug that could prevent applied control coordinates from being applied to single BLK2GO scans.
Fixed a bug that caused instability when Setup names exceeded 31 characters.
Fixed a bug in BLK Edition that could prevent a recently exported RAF file from being re-imported.
Known Issues
New BLK360 Known Issues
When downloading scans from the BLK360, progress is being made even though the dialog says 1% for much of the download.
When the BLK360 battery is low, download is not supported. The download button will not be clickable though no warning message is given.
When the BLK360 battery level is low, the charge percentage number is not shown.
When a download from the BLK Data Manager is canceled, there is an intermittent error that causes the program to hang. The workaround is to restart both the scanner and BLK Data Manager and reconnect.
If a download is unsuccessful, a user might receive a message stating “Downloaded 0 setup(s).” if you receive this message, please re-download those scans.
BLK360 scans will appear chronologically in the Download Manager while BLK2GO walks will appear in alphanumeric order.
The temp folder may not contain non-ASCII characters.
If there is a synchronization issue between the tablet and the scanner (which may be caused by a poor or interfering Wi-Fi connection) items created on the tablet using FIELD 360 such as links, images, and geotags may not be synced back to the scanner. The workaround here is to download the data from the tablet using FIELD 360 rather than directly from the scanner.
In rare cases when importing using Auto Cloud, REGISTER 360 may hang. The data is imported correctly with links created, the workaround is to close REGISTER 360 and open it again.
When in a setup view and the Panoramic images are turned off, occasionally the position of the camera changes and is inverted. Going back to SiteMap View and then into the setup again will fix the issue.
When a download from a BLK2GO scanner is canceled the user will not be informed.
Virtual target snaps below were clicked and the exported data has different coordinates to those in Cyclone REGISTER 360. The Workaround is to lock the bundle before applying control.
If a control file has a leading space (a space as the first character) then that line is ignored. The workaround is to manually delete the first line.
Export Panoramic images with the location coordinates and orientation in the user coordinate system i.e. in the control coordinate system.
When we import BLK2FLY GPS data with 'Wall Aligned UCS' option, it ignores the UTM/State Plane coordinate UCS. The workaround is to not use Wall Aligned with UTM.
Save B2G file(s) function during import from BLK2GO scanner is broken. The workaround is to use the DM.
Re-import image command fails when trying to import image(s) from a BLK360 scanner with a cable connection i.e. via LAN
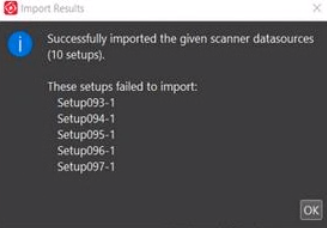
After importing from a BLK scanner (BLK360, BLK2GO or BLK2FLY) if there were setups that were not selected for import, there is a dialog box that states “failed to import” on the un-selected setups. The expected behaviour is that these setups should not be mentioned.
Scans that have more than one point cloud in a Setup are not properly displayed. This can be the case when a C10 has a full 360 scan and a highly detailed window scan. The scans still exist and can be exported.
If Faro scans fail to import, please contact Leica support. The scans collected from the newest Faro scanner may not import. Please contact Leica support for the newest Faro SDK. It may be the case that new software from Faro needs to be downloaded and installed separately.
After the recommended firmware update for BLK2GO, in some cases, setups are unable to be imported over wi-fi. The workaround is to import via USB-C cable.
Cyclone In some cases, when publishing to TruView Cloud setups do not appear in the SiteMap. The workaround here is to publish to LGS and import the file into TruView Cloud.
In rare cases, exports to LGS and RCP show different elevations on point cloud points than in Cyclone REGISTER 360.
Windows scaling works best when set to 100%. Setting to 150% or higher causes some graphical errors.
Some dialog boxes cannot be rescaled correctly and OK button is not shown in the dialog box.
Some panels have a dialog that does not fit correctly.
Setup icons are in some cases misplaced when data is published to TruView Cloud. The workaround is to set Windows Scaling to 100% as there seems to be an issue when set to 150%.
Scaling of 175% and 200% collapses the left side panel and cannot resize after collapse.
Some new dialogs will not have translations.
Some customers have reported Cyclone REGISTER 360 crashes when using AMD Ryzen 7 processors.
In rare cases downloading scans from a BLK360 may fail. The workaround is to restart the BLK360 scanner.
After downloading Setups from the scanner this dialog will show if the number of Setups selected is less than the total Setups on the scanner. This dialog, while correct, should be ignored.
Inserting Virtual Targets with BLK2GO data can have issues if the Pano is on. The workaround is to turn off the pano image and then create a virtual target.
Cyclone REGISTER 360 Projects located on NAS drives are NOT recommended.
Due to variations between network deployments Cyclone REGISTER 360 projects may be unreliable or slow to respond when accessed from a network location.
Cyclone REGISTER 360 Projects located on NAS drives show <1MB in the Projects & Storage tab.
RCP publish will fail if the Setup published has zero points. The workaround is to restore the points for the Setup and publish again.
The cloud used for Cloud-to-Cloud registration cannot be cleaned by the Smooth Surface feature. Therefore, the options for which cloud to clean are not available.
There is an issue with publishing data to TruView Cloud with Applied Control for projects created in Cyclone REGISTER 360 prior to 2020.0. The Setup icons to do match the SiteMap. The solution is to create another Finalized Registration, then re-publish to TruView Cloud.
Once imported into 2021.0, B2G files are changed and are not compatible with older versions of Cyclone REGISTER 360. Please make a backup copy of the B2G file BEFORE import.
After editing an HDR tone map, other Versions created will still show the original tone map in the thumbnail but the Pano and point cloud will be correct.
The 2-billion-point limitation has been removed from publishing to RCP.
30 GB of temp space is needed for every billion points exported to a single RCP cloud.
Using Export to Separate Setups does not use the same level of temp space. Temp space is not generally a problem when exporting separate Setups.
Virtual Machine (VM) environments are not supported.
Remote Desktop is only supported if Cyclone REGISTER 360 is opened in the remote computer first. Trying to open Cyclone REGISTER 360 through a remote desktop is not supported.
Cyclone REGISTER 360 will not detect the dedicated graphics card on computers with multiple graphics cards. Users must manually set the dedicated card for use with Cyclone REGISTER 360. This is done with the Nvidia Control Panel for Nvidia graphics cards, or with the Catalyst Control Centre for ATI/AMD graphic cards
Importing data over a network can cause issues, especially on Windows 10. The workaround is to copy the scan data to a local disk.
If memory issues arise, check that the virtual memory size is set to the same size as RAM.
Automatic image matching of imported panoramic images may not always be correct.
The zoom scale bar will be captured in the image in the import area using the satellite or street map.
Project thumbnails (the image shown in the project explorer) are not preserved in the *.raf export file.
F1 contextual help will not work with Microsoft Edge browser as the default browser. The workaround is to set Chrome or Firefox as the default browser.
Files written to the temp folder at C:\Users\(user name)\AppData\Local\Temp\Register360, will be deleted after the program closes. These files will NOT be deleted if the program freezes or crashes.
In rare cases, the Bundle will show an optimized state, but there is still an unoptimized Link in the Bundle (not shown with a dotted line). Optimize the Bundle to resolve the issue or split the Bundle into smaller Bundles and look for the suspect dotted line Link, delete this Link and re-optimize.
The currently active project should not be re-named from the Projects & Storage settings. You should close the project before renaming it.
When a Setup has a UCS created from it, the UCS must first be deleted before the Setup can be deleted from the project.
On rare occasions, HDR images may appear grey with very little variation. The workaround is to open the image with the Tone Map Editor and re-save the image.
Some graphic card anomalies can be caused by power management software. Please turn off by setting the power management profile to High Performance.
Paper targets should not be placed on significantly curved surfaces. The workaround is to create a virtual target rather than using the algorithm to best fit in these cases.
In some cases, if the scanner was inverted and automatically acquired targets, applying control fails. The workaround here is to manually acquire the targets.
A published RCP that has applied control with very large coordinates shows a black map rather than the colour image. The workaround is to create another map in ReCap.
Mac OS’s running Windows Boot Camp is not officially supported
Cyclone REGISTER 360 supports Windows 10 on Windows-native devices only.
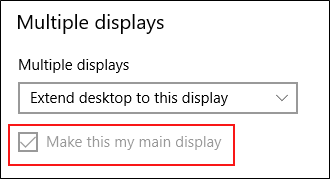
Issue with Multiple monitors using Windows Scaling higher than 100%.
If issues are encountered using Window’s scaling settings higher that 100%, set the monitor that Cyclone REGISTER 360 is using to the main display.
When publishing to Jetstream Enterprise with a large number of assets:
There can be an issue when publishing to JetStream Enterprise with a large number of assets in the project. The workaround is to publish the project to LGS and then import the LGS to JetStream Enterprise.
When publish to Cyclone ENTERPRISE fails to open the proper landing page:
When publishing to Cyclone ENTERPRISE, you need to enter the Host Name and Port for the target server. The Host Name should only contain the top-level domain part of the URL. In some cases, a host name may be valid for the connection test but will not work for publishing. In this case, the connection dialog will display the Project Selector. To solve this problem, edit the Host Name to remove all text after the Top Level Domain. For example, "https://mycycloneenterprise.com/abc...-////" should be trimmed to "https://mycycloneenterprise.com"
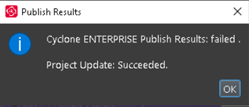
When publishing to Cyclone ENTERPRISE fails, the below error message could mean that:
The sever has low disk space
The network drive is disconnected
Invalid file path
Importing from Cyclone FIELD 360
Only BLK360 projects will appear when the user connects to Cyclone FIELD 360. Cyclone FIELD 360 does not store full project data for the RTC360\P-Series and should be imported directly from the scanner's USB memory stick.
Cleaned vs. Uncleaned pano layer publishing
When publishing an LGS file, the Hue and Greyscale pano layers will show the uncleaned cloud.
A workaround would be to publish to E57 and then re-import the data then publish to LGS.
BLK2GO E57 Support
Due to the unstructured nature of BLK2GO data, E57 files created from the scanner will not be supported for import into Cyclone REGISTER 360 2021.1 or earlier. Users should save original B2G files for future use.
Modified usage for Japanese OS
Japanese OS language preference is not selected by default and causes issues with some Cyclone REGISTER 360 imports.
The user can fix this by manually selecting the language within preferences.
On the Japanese OS machine, launch Control Panel
Select region(地域) and click on the accept button indicated
Check "Use Unicode UTF-8 for worldwide language support"
Reboot
Non-ASCII characters
Non-ASCII characters are not allowed in the following conditions:
Import temp path
On computers with non-Latin user names, the user will not be able to create any project if the source data is stored anywhere under the user profile name. This issue will manifest itself in Japanese, Chinese, or any other language containing special non-Latin characters in the user name.
The SiteMap name cannot have non-Latin (Japanese, Chinese, etc.) characters for publishing to TruView Enterprise or TruView Cloud.
Usage file reporting issue for EnterpriseElite Customers
When using the standalone CLM installer, some EnterpriseElite users may find that the usage file (year-month.db) normally located at C:\Leica Geosystems\CLM\LogFiles does not get produced.
Please ensure your LGS.opt file (located here: C:\Program Files (x86)\Common Files\Leica Geosystems\License-Server\lgs.opt) looks like this:
DEBUGLOG +"C:\Leica Geosystems\CLM\LogFiles\lgs.log"
NOLOG IN
TIMEOUTALL 240
ENABLE_DB_HISTORY 1
PATH_DB_HISTORY C:\Leica Geosystems\CLM\LogFiles
ENABLE_DB_HISTORY should be set to 1 in this file. Please copy the file to a new location, edit it and re-save if the file says it’s read-only.
Installing CLM while a JetStream Enterprise service is running
During the installation of CLM, users may encounter the following error message. This is commonly due to a service like JetStream running in the background.
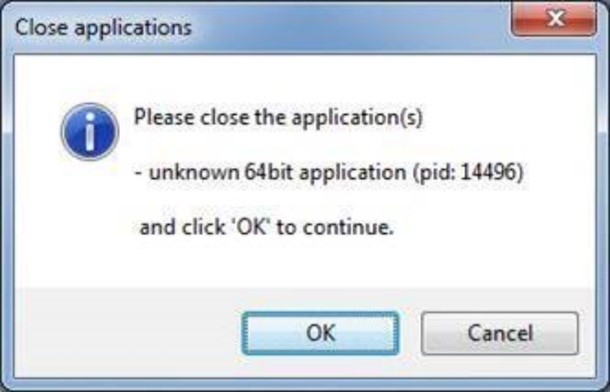
To enable the successful installation of CLM, please follow these steps:
Launch the task manager
Select the Services tab
Look up the process with the PID (Process ID) shown in the Close applications dialog
In this case it is JetStream
Terminate the process so that CLM can be installed
After CLM is installed, click on the Services button in the Task Manager and restart the service
RCP publish dialog progress reporting
When publishing an RCP file, the progress will appear to stall at a certain interval. Though the progress bar does not update, the export is progressing. Users may check the task manager to ensure that the service is still functioning.
Blurred images within ReCap
In some cases, E57 files published from Cyclone REGISTER 360, when imported into ReCap, may display blurred imagery when entering the Setup location sphere. This is a known issue with ReCap's handling of E57 files. RCP files published from Cyclone REGISTER 360 do not show any display issues.
The E57 export using the new Compatibility mode option (see details above in the feature description) may help with this issue.
LGS usage over network
The use of LGS files is only supported when the files are saved locally. Due to variations between network deployments LGS files may be unreliable when published to a network location.
HyperLinks in the Finalize area
Hyperlinks in the Master SiteMap in the Finalize area, once created, will hide behind the inserted image, but will still export to TruView, Cyclone ENTERPRISE and LGS properly.
Deprecated Features
Leica Geosystems strives to provide support for the widest array of operating systems and file formats possible as is reasonable given current technologies and support from third-party partners.
With each release, we review our list of currently supported formats and operating systems in line with industry trends and announced product terminations.
Leica Geosystems may add or terminate support for a file format during any release. Obsolete operating systems will be supported for six months after their announced termination or the next major software release, whichever comes first. Server products will be supported in alignment with Leica’s Client License Manager (CLM) supported servers to guard users against incompatibility.
Cyclone REGISTER 360 2020:
TVG files are no longer published. Users should use the LGS format. If a TVG is required, users can Publish to TruView Local and run the dataset through the free utility Leica Pack&Go.
Cyclone REGISTER 360 2021:
Windows 7, 8 and 8.1 are no longer supported.
Licensing
All users with valid CCP for either Cyclone REGISTER 360 (standard edition) or Cyclone REGISTER, or with CCP valid as late as 28 May 2022, can run this new version of Cyclone REGISTER 360 (standard edition) with no new license required.
All users with valid CCP for Cyclone REGISTER 360 (BLK Edition) or with CCP valid as late as 28 May 2022 can run this new version of Cyclone REGISTER 360 (BLK Edition) with no new license required.