Project Merge allows the merging of two Cyclone ENTERPRISE Projects by migrating objects between the two projects. This tool will enable new workflows for users who do multi-day scanning projects and/or who re-scan the same area over the course of a project to monitor progress. This can be used to combine projects that have complete, partial or no overlap between them.
This feature is a critical workflow for transferring data from legacy products to Cyclone ENTERPRISE. Users who previously migrated to Cyclone ENTERPRISE while maintaining old projects in TruView or JetStream can now reunite unsynchronized versions of the same project existing in both systems.
The project that will receive the data is named Destination Project, and the project that the object will be imported from is named Source Project.
Select objects can be imported from the Source to the Destination. The supported object types include GeoTags, Assets, and SnapShots.
Note: both Source and Destination projects may contain Point Cloud, Pano images, GeoTags, Assets, Snapshots, Models, UCSs, Clips, etc. The merge function provides section and conflict management tools to manage any duplicates or conflicts.
The Project Merge function is only available for the following user roles:
-
Supervisor
-
Administrator
-
Group Admin
-
Project Admin
The following instructions describe the steps for merging projects:
-
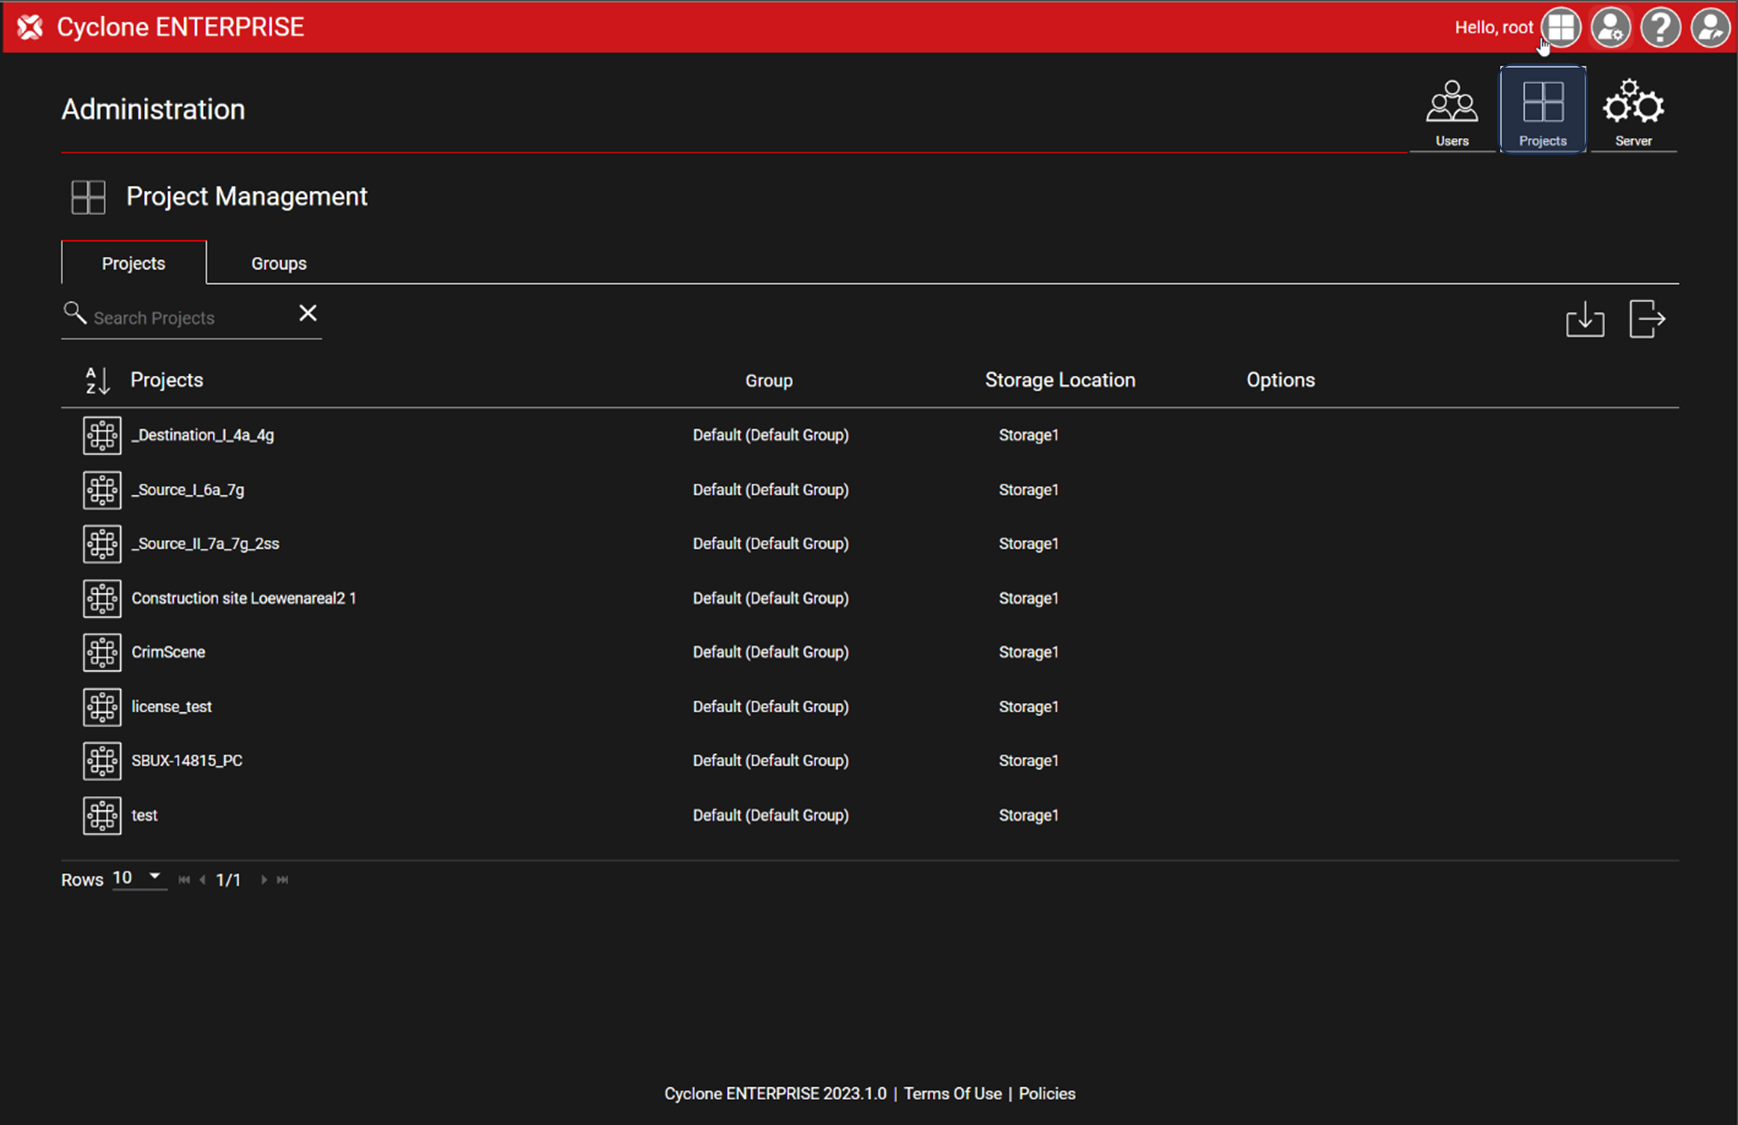
Go to Administration | Project Management.
-
Select a Project; the selected Project will be the Destination Project where the objects will be imported.
-
Click on Merge in the Options of the selected Project.
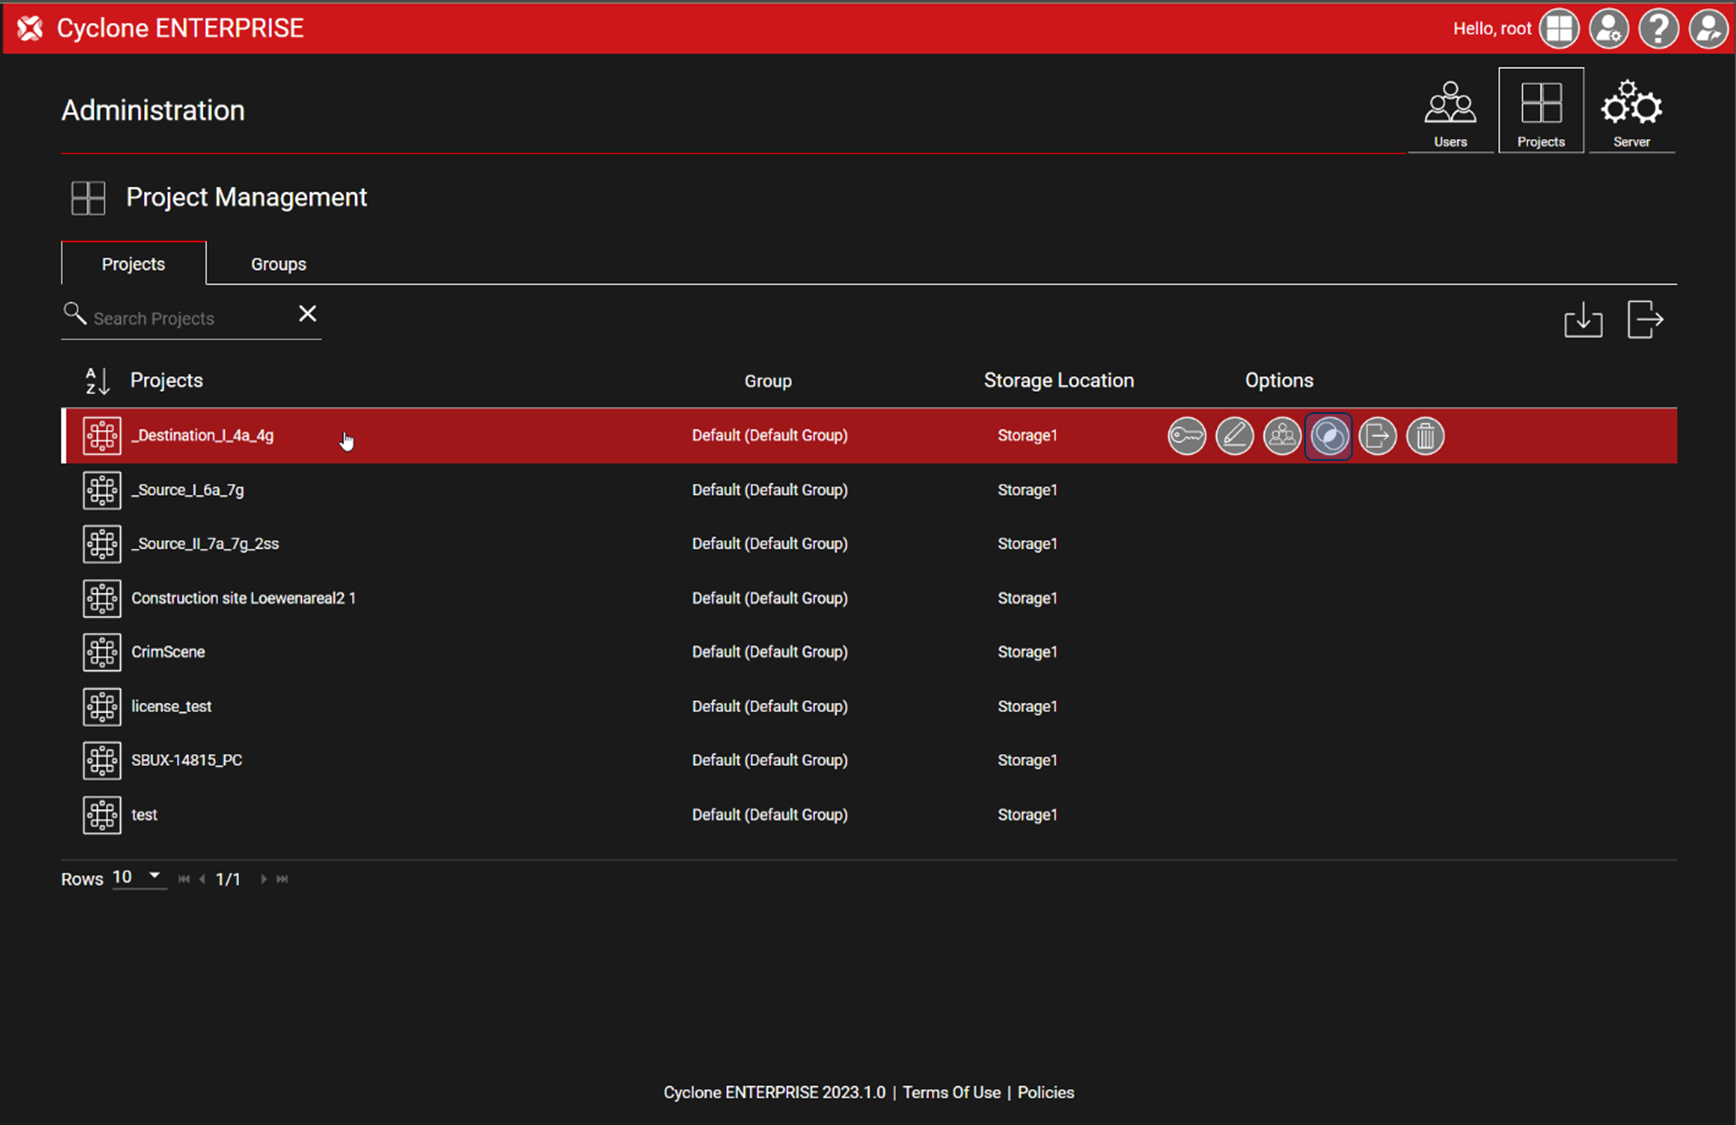
Note: Project Merge is ONLY available for Supervisor, Administrator, Group Admin, and Project Admin user roles.
-
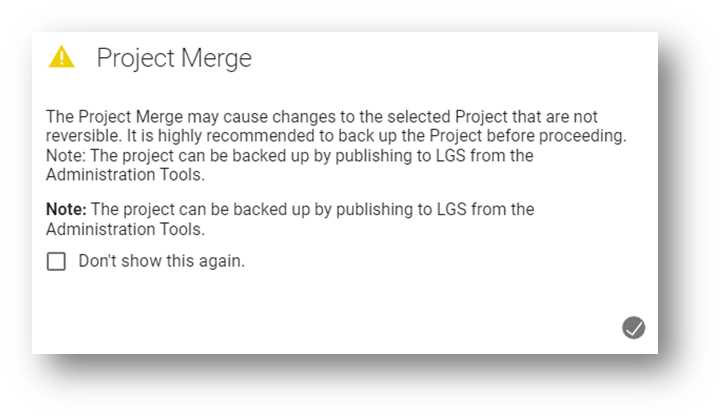
A warning message will be prompted that provides information on how this process may impact the existing Projects.
Note: It is recommended to back up the Project before proceeding.
Note: You may choose not to show the message again by clicking on “Don't show this again”. As a result, the message will not be shown in the current user session.
-
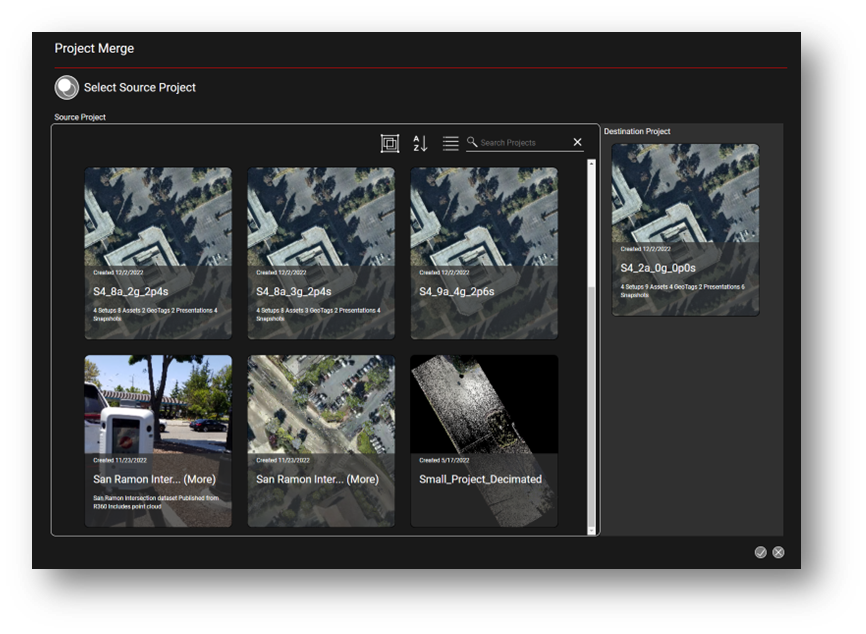
Select the Source Project from the list of Projects.
-
This dialog is the same as the Project Selector with the same view toggle, group toggle, and sort and search functions.
-
Once both Projects are selected, click OK to proceed.
-
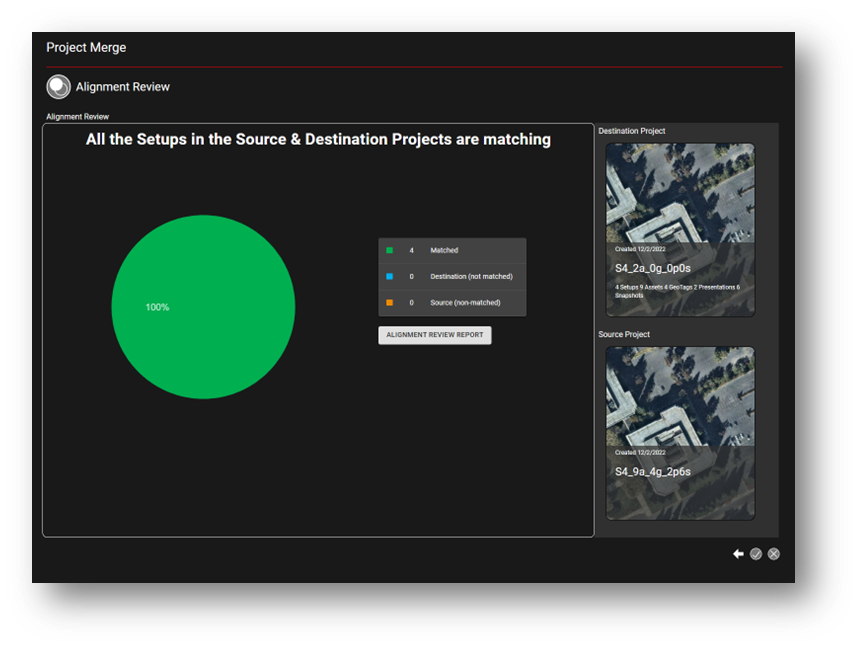
To review that the Projects are selected correctly, Cyclone ENTERPRISE will provide an Alignment Review report to show the matching and non-matching Setups.
-
This is an alignment analysis report for Setup coordinates in the selected Projects
-
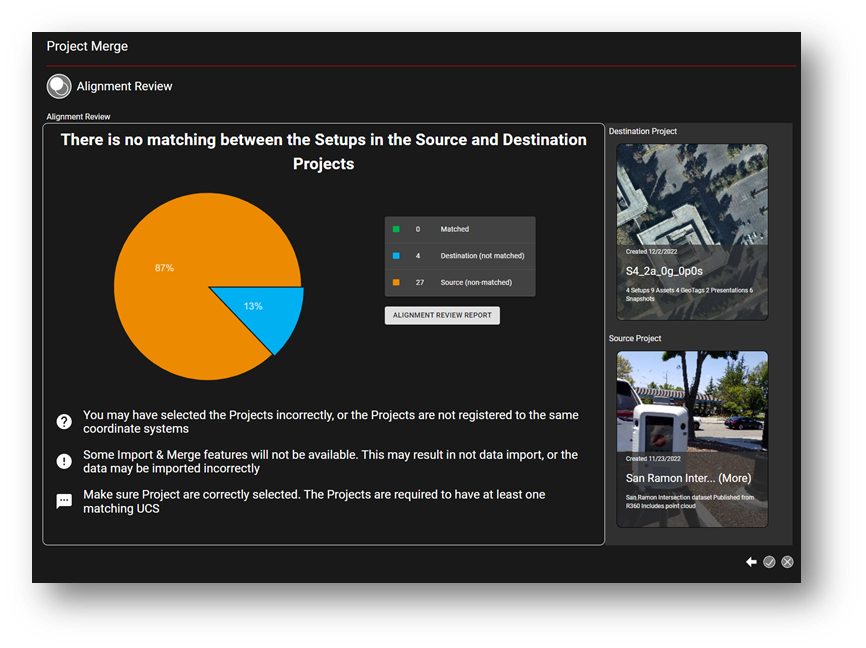
The report provides a list with the number the matched, and non-matched Setups, which is a pie chart of the percentages of matching and non-matching Setups.
-
The alignment analysis is independent of having multiple UCSs in the Projects. It means the same Projects should be matched regardless of having different UCSs.
-
The report is color-coded as the following:
|
|
Matched from both Destination and Source Projects |
|
|
Non-matched from Destination Project |
|
|
Non-matched from Source Project |
-
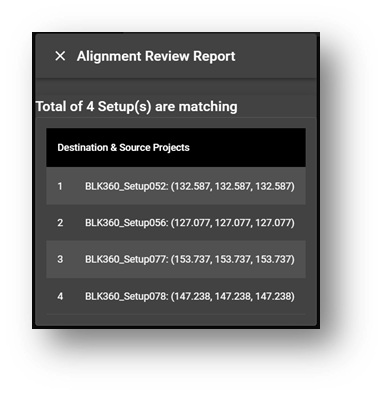
The Alignment Review Report also provides a detailed list of the Setups and their coordinates. This is useful to diagnose scenarios with no or partial matches.
-
The table below summarizes the Project Merge alignment scenarios and shows how Destination and Source projects align in each scenario. It also lists possible reasons for partial or no matches and the potential result of proceeding with the Merge without matching projects. The table also includes suggested actions to resolve non-matched projects. The information in the tables is also interactively provided in the program depending on the scenario.
|
Scenario |
Destination |
Source |
Message |
|
All Setups are matching |
|
|
|
|
Not all Setups are matching |
|
|
|
|
No Matching was found |
|
|
|
-
Proceed to
Merge Functions if the project alignment requirements are met:
-
The previous steps were to review data preparation and select appropriate Projects to ensure alignment.
-
In this step, the user chooses objects to import and resolves potential conflicts and duplicates.
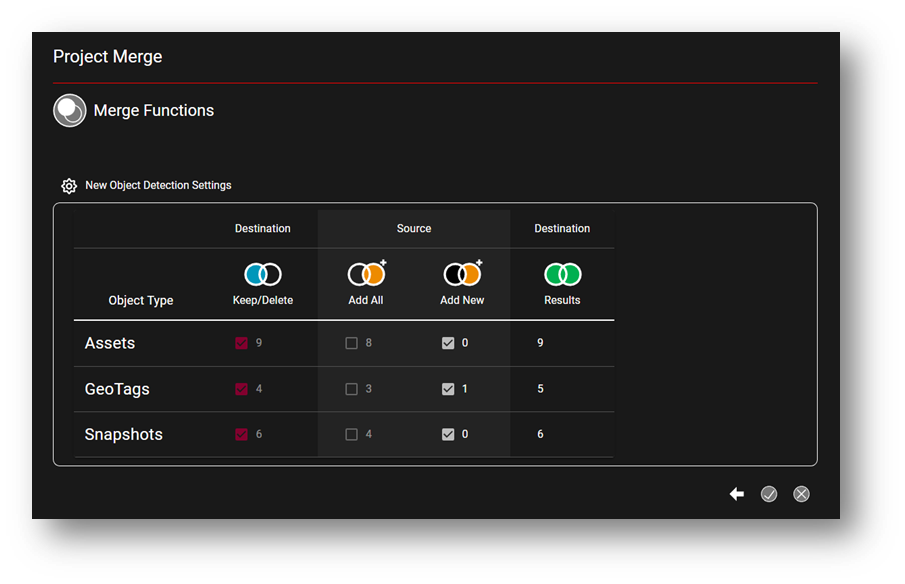
Merge Function dialog include the following components:
-
New Object Detection Settings:
-
Allows modifying the options that identify objects as new or existing.
-
-
Destination (Keep/Delete): Counts the existing object in the Destination Project. It also allows the user to take action on whether to keep or delete existing objects from the Destination Project (the default option is to “Keep”).
-
Source counts “All” and “New” existing objects in the Source project and allows to choose which objects to import:
-
“Add All” adds all objects from Source. This may result in duplicates.
-
“Add New” only adds the new object found in Source that does not exist in Destination (default option).
-
-
Destination dynamically shows the object counts in the Destination project as a result of the Merge completion.
Note: The following table list all possible combinations for Merge Functions, with a detailed description for each combination. Only “Allowed” functions are available.
|
Rule |
Combination (See above graphic for reference) |
Description |
|
Allowed |
☒ | ☐ ☒ |
This combination will keep all existing objects from the Destination and Add New from Source. This is the default setting. |
|
☒ | ☒ ☐ |
This combination will keep all existing objects from Destination and add all objects from Source. This may result in duplicates. |
|
|
☒ | ☐ ☐ |
This combination will make no changes to the objects in the Destination. |
|
|
☐ | ☒ ☐ |
This combination will delete all objects in Destination and will replace them with objects from Source |
|
|
Not Allowed |
☒ | ☒ ☒ |
Not a valid combination |
|
☐ | ☐ ☒ |
This combination will delete destination objects and import New. This is not valid because all objects will be new once objects in Destination are deleted. |
|
|
☐ | ☒ ☒ |
Not a valid combination |
|
|
☐ | ☐ ☐ |
Not allowed, because it will delete everything |
-
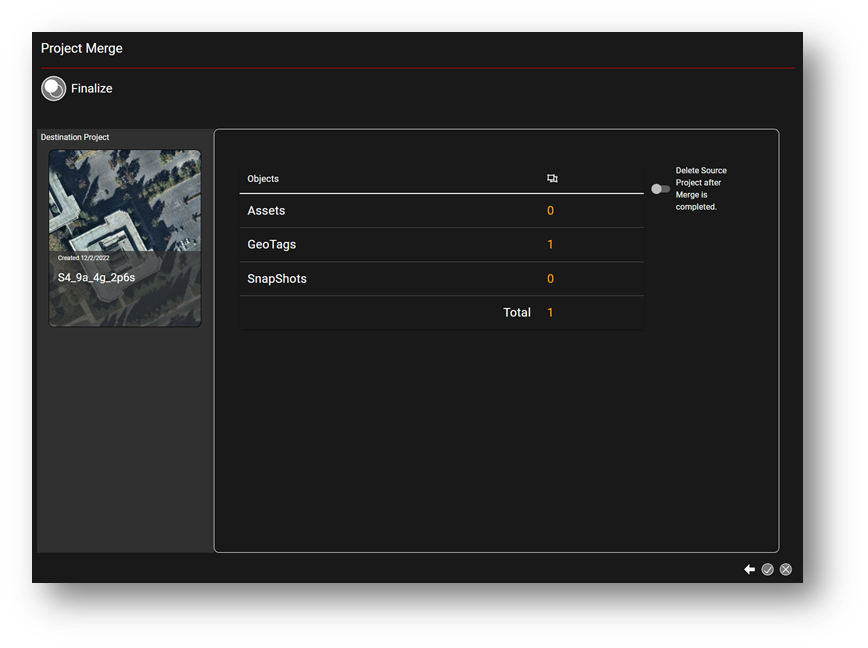
At the last step, the
Finalize dialog shows the result object counts if the Merge operation is completed.
-
To proceed, click OK.
-
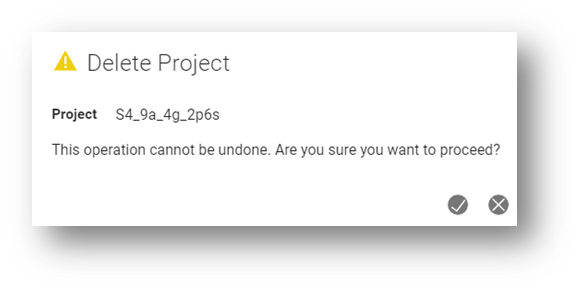
The user may enable the “Delete Source Project after Merge completion” option to delete the Source Project. If the Delete option is selected a “Delete Project” message will be prompted that requires approval to proceed. The Source project will be permanent deleted and cannot be restored without original data.
10. Once the Merge is completed, the Destination Project will be updated to include the imported object for the Source Project