autocad pro revit ultimate
Clips define an area of interest within a project and hide data that is outside of that area of interest. Clips are useful for navigation, visualization, and analysis as they allow the user to focus on important details without subdividing a project or deleting data.
In addition to accessing saved clips, users can create new clip boxes that will persist through the duration of TruSpace session but cannot be saved to the project.
Note: Both point clouds and tracks adhere to the clip box.
Creating a Clip Box
To create a clip box, follow the steps below:
-
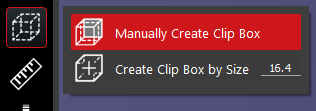
Click the Manually Create Clip Box button.
-
Select one of available clip box creation options:
-
Manually Create Clip Box
-
Create Clip Box by Size
-
Create Clip Box by Time
-
Manually Create Clip Box
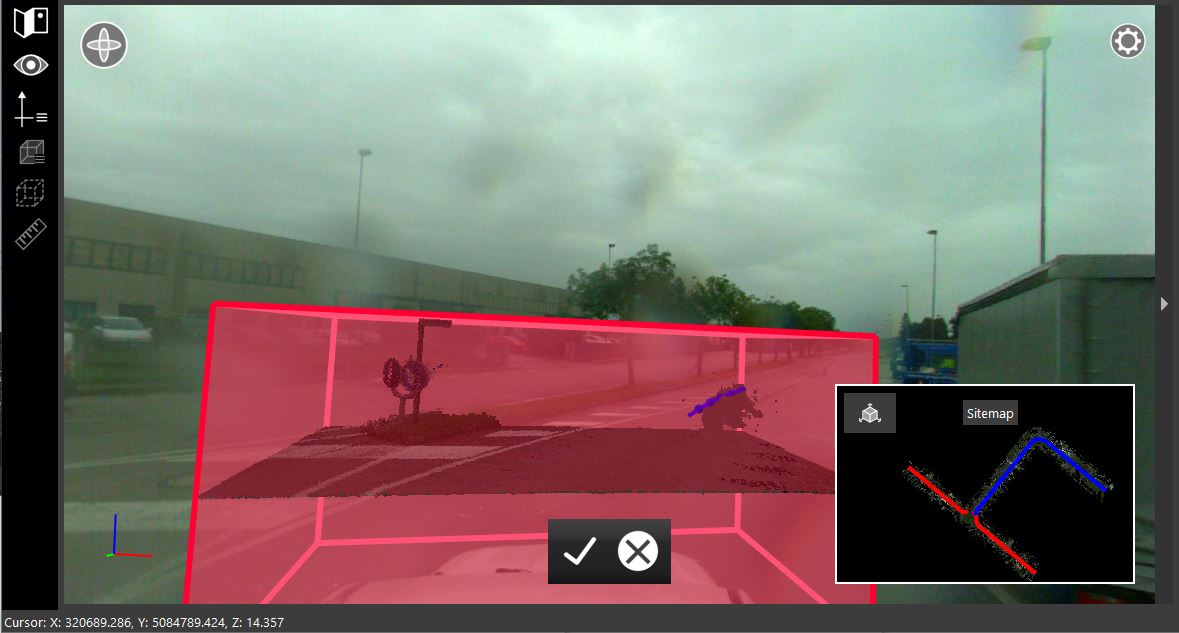
A clip box will be created for the entire extent of the project. At this point, the size of the clip box can be adjusted as needed.
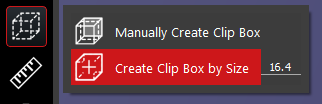
Create Clip Box by Size
Define a clip box size, then identify a point in the viewer.
The clip box will be created at the defined size using the selected point as a centroid.
Once a clip box is created, several controls will become available to manipulate it with a mouse or a touch screen.
-
Clip Box Adjustment
The clip box adjustment control on the right-hand side of the viewing window can be used to adjust the extents and location of the clip box along the selected axis. The buttons on the top and bottom of the slider control can be used to adjust the edges of the clip box. The button in the middle of the slider control can be used to adjust the location of the clip box. Optionally, users can manually type values into the text boxes next to each of these controls. The values should be in the same unit as the coordinate system being used.
Clip boxes can also be adjusted by clicking and dragging any face on the clip box itself. Holding the SHIFT key gives access to the back faces of the clip box.
-
Clip Box Rotation
The clip box rotation control at the top of the viewing window can be used to rotate the clip box along the selected axis. Moving the control to the left will rotate the clip box counterclockwise. Moving the control to the right will rotate the clip box clockwise. Optionally, users can manually type a value into the text box next to the rotation controls. The value should be between 0 and 360 degrees.
Clip boxes can also be rotated by holding the ALT key and then clicking and dragging the corner of the clip box.
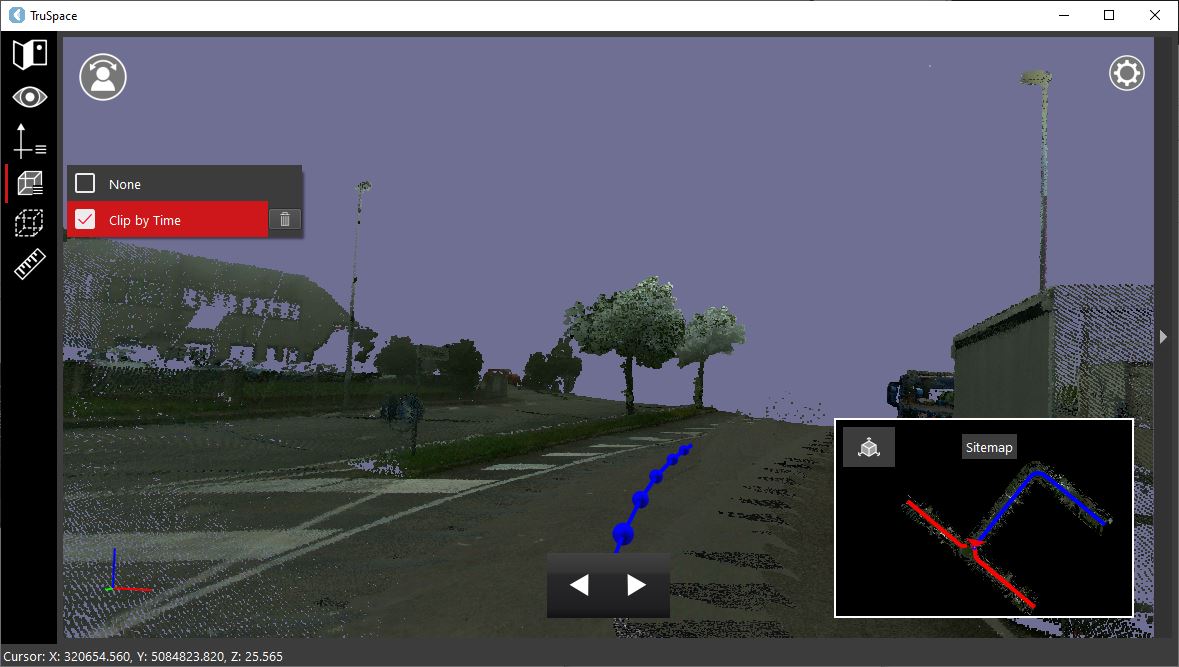
Create Clip Box by Time
A clip will be created based on the time value specified in seconds. After the time has been defined, select a point along the trajectory.
A clip will be created within the specified range along the trajectory. If a time range of 5 is selected, the clip size will span 10 seconds total (+/- 5 seconds). When using the Create Clip Box by Time tool, a clip box is not generated like with the other tools. The point cloud is clipped automatically without any further interaction required.

Note: It is possible to create a time clip and a clip box in the same project. It is not possible to create more than 1 time clip or clip box in the same project.
Temporary clips are not saved in the project. They will only exist during the current session.