A Tour is a defined series of camera positions with animated motion between them. These camera positions can be strung together to create an attractive presentation of an asset and draw attention to specific features, area of interest, measurements or GeoTags.
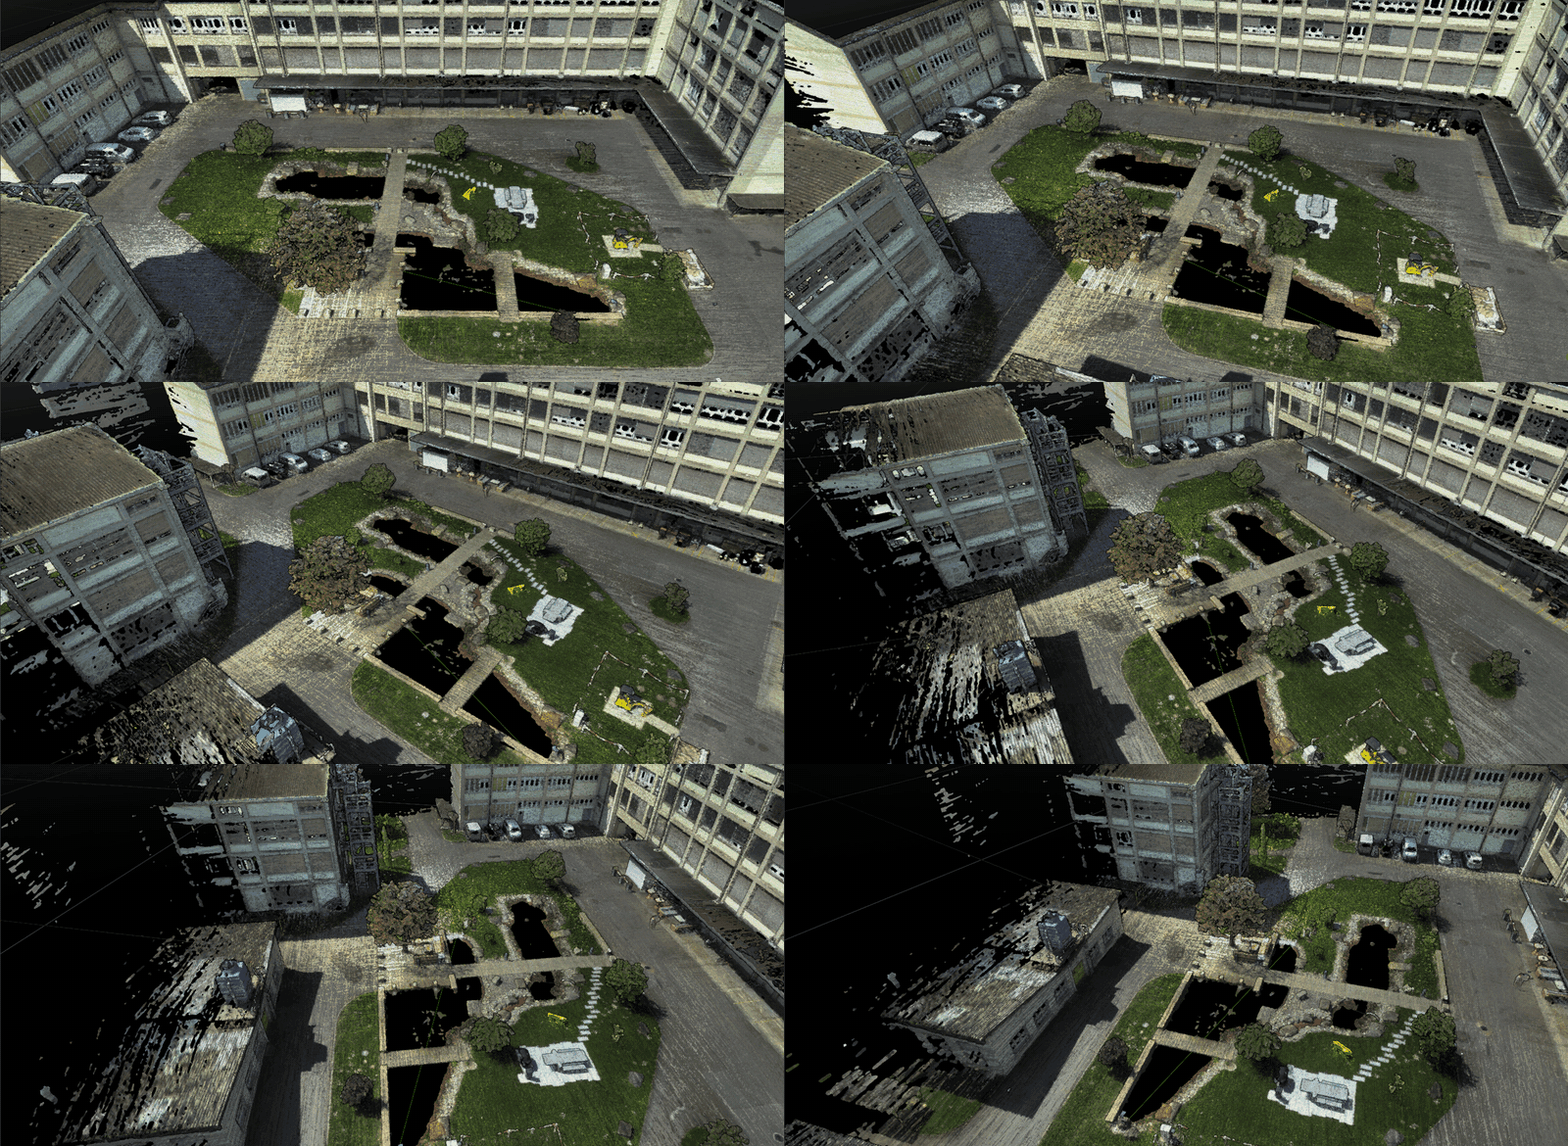
Please refer to this guided workflow for help creating your first tour: Basic tour creation with simple edits and sharing.
The Tour will capture only the path of flight, it will not preserve the layers, settings and visibility of objects that it was original created with.
Add Tour
Click Add tour.
Select the type of tour to make.
Create your own path.
Start from a template.
Select the appropriate number of points and click Save.
Name the tour and, optionally, add a description.
Click Save.
Click Cancel at any time.
Click Discard changes to return to the list of tours.
The undo and redo buttons can be used on any modification to a tour.
Create your own path
Adjust camera position and orientation by moving the view.
Click the white shutter button to add the current camera viewpoint to your tour.
Continue to add more viewpoints.
To edit the position or camera angel of any viewpoint, select the viewpoint and use the buttons at the button of the screen to move it.
Click Move and drag the viewpoint to a new position.
Click Rotate camera. The current camera position of the viewpoint will be zoomed to. Rotate the view in 360 to the new camera position.
To delete a viewpoint, select the viewpoint and click Delete.
Click Confirm.
Define the duration of the tour.
By default, it will take 10 seconds to move between viewpoints.
The minimum duration of a tour is one second per viewpoint.
The user can increase the length of a tour by entering the duration in seconds.
each viewpoint will be equally spaced along the timeline of the tour.
Define whether the tour will follow a circular path.
A circular path's first and last camera points are connected into a loop. This setting ensures that a tour can be added to a looping video.
Define the smoothing of the tour. The smoothness can be defined per point or for the entire tour.
A smoother tour will appear to flow along the defined path while a sharp one will snap directly between viewpoints.
Click Save.
Enter a name and optional description for the tour.
A thumbnail of the tour will be generated at the time that it is saved. This thumbnail will be the last viewpoint in the tour.
Click Save.
Start from a template
Hexagon GeoCloud provides a number of useful templates to make commonly requested tour paths to make the tour creation process simpler and help users produce an attractive tour.
Click on the desired template.
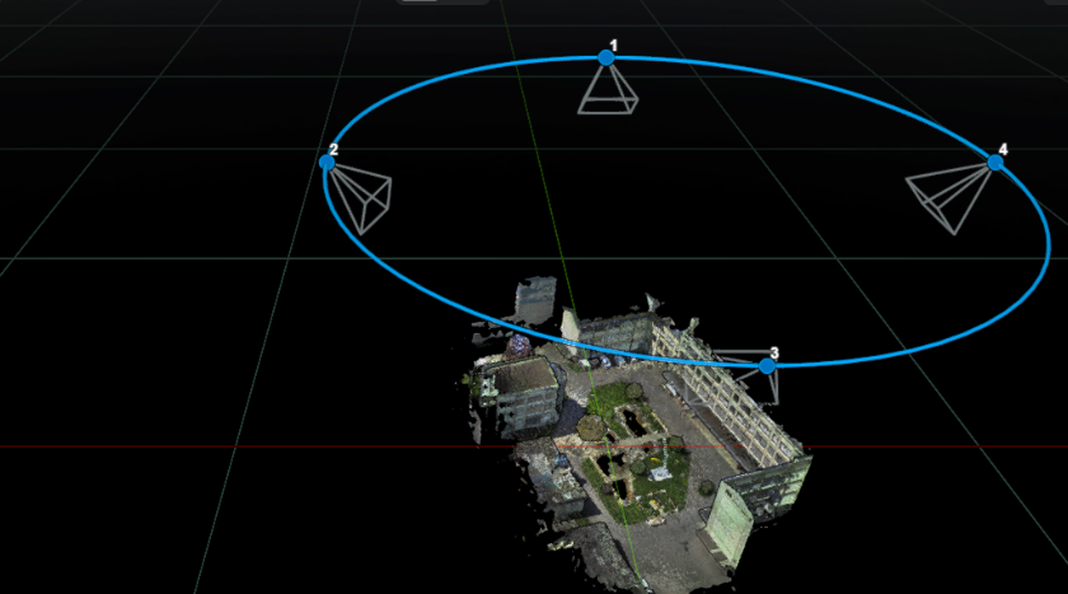
Circle- Creates a circular path around asset with 4 viewpoints above asset with perpendicular facing camera positions along the path toward the asset |
|
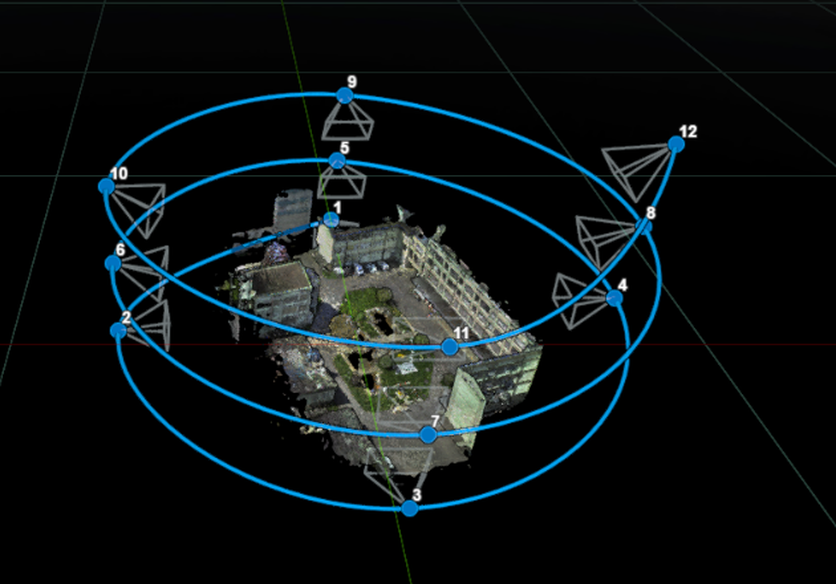
Helix- Creates a helix path around asset with 12 viewpoints starting from asset level to above with perpendicular facing camera positions along the path toward the asset |
|
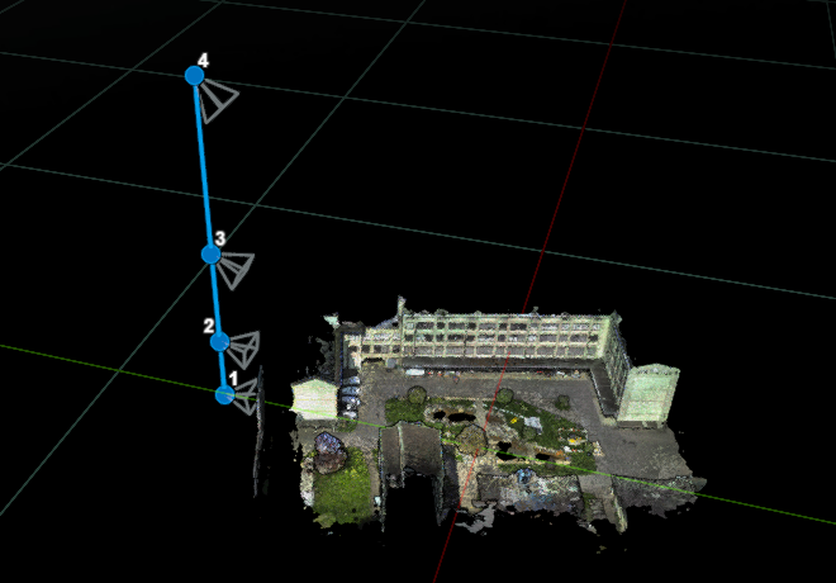
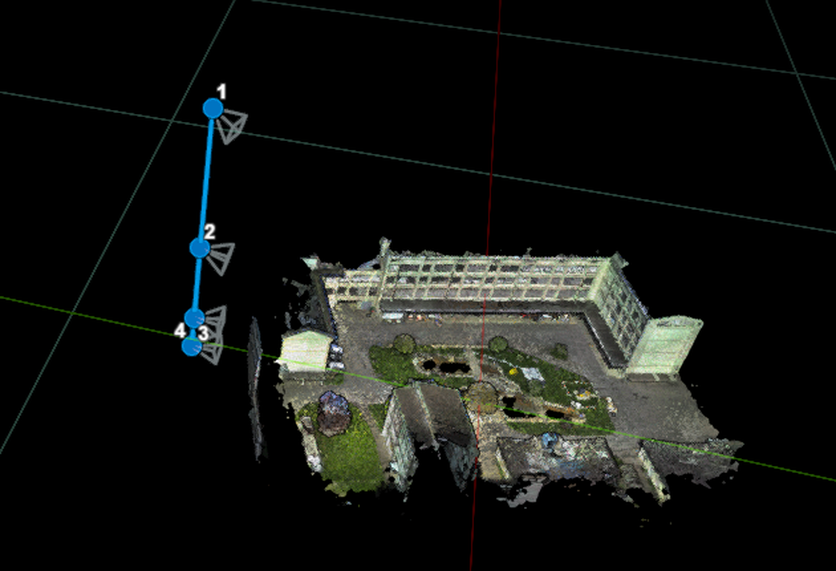
Rocket- Creates a vertical path with 4 viewpoints starting from below to above with perpendicular facing camera positions along the path toward the asset |
|
Landing- Creates a vertical path with 4 viewpoints starting from above to below with perpendicular facing camera positions along the path toward the asset |
|
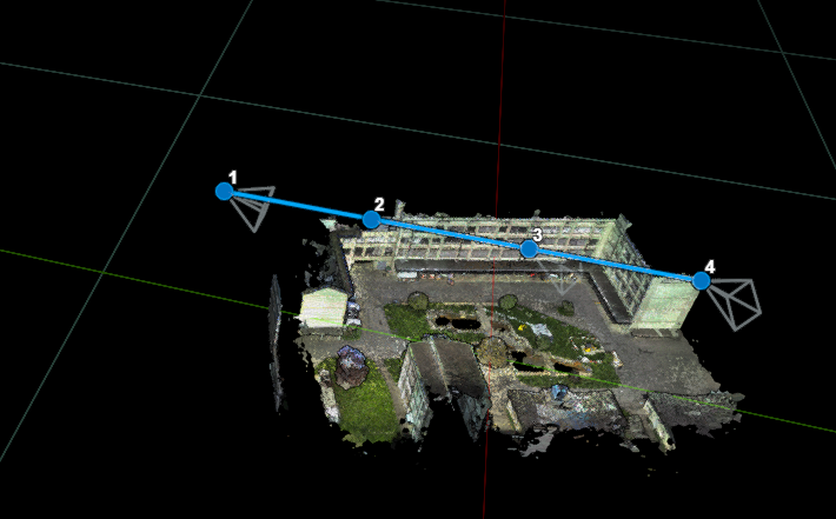
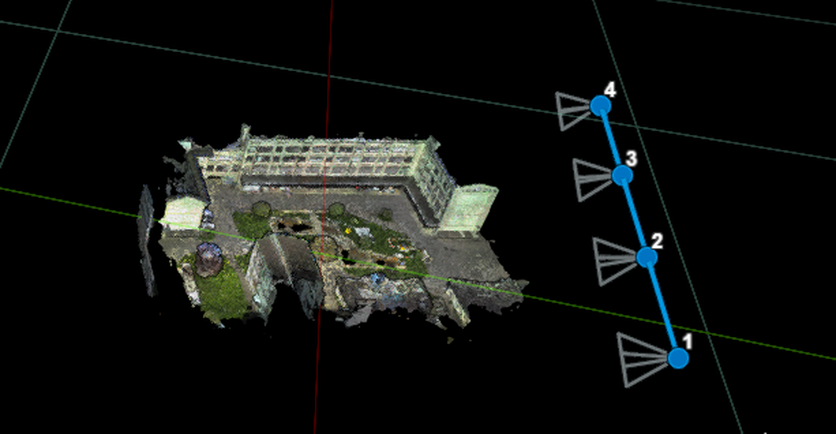
Flyover- Creates a horizontal path with 4 viewpoints with forward facing camera positions along the path toward the asset |
|
Flyby- Creates a horizontal path with 4 viewpoints with perpendicular facing camera positions along the path toward the asset |
|
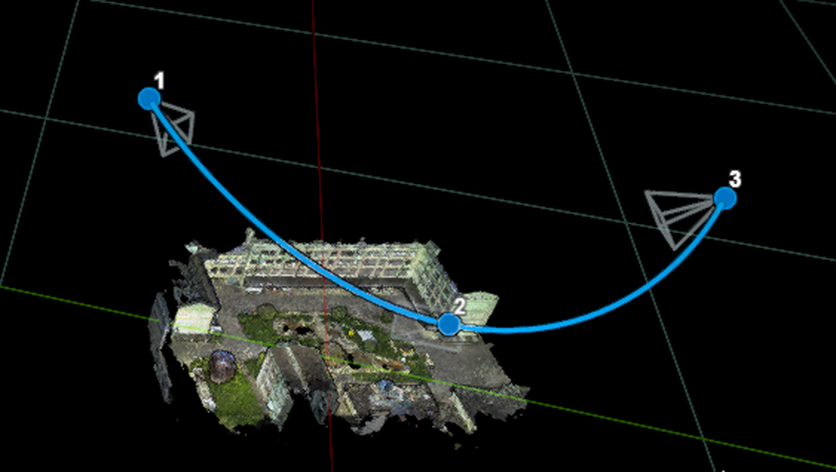
U-Turn- Creates a U-Shaped horizontal path with 3 viewpoints with perpendicular facing camera positions along the path toward the asset |
|
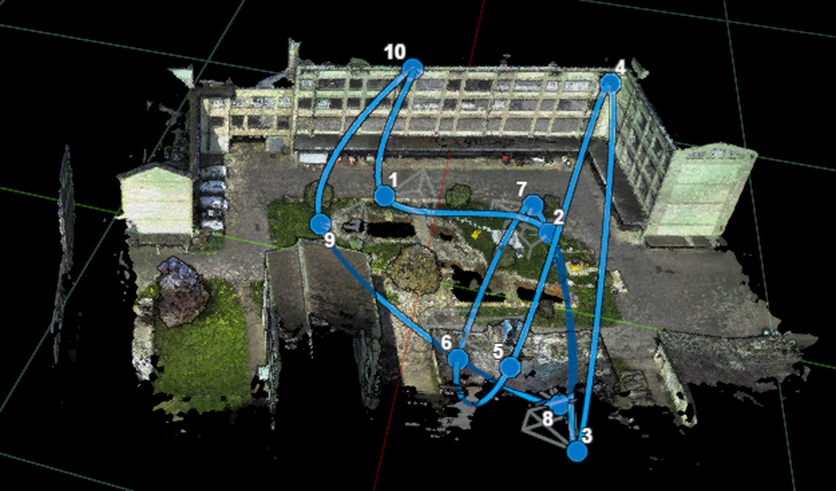
Random- Creates a random closed path around and over the asset. The number of viewpoints, the camera positions and the duration change every time you select it. |
|
To edit the position or camera angel of any viewpoint, select the viewpoint and use the buttons at the button of the screen to move it.
Click Move and drag the viewpoint to a new position.
Click Rotate camera. The current camera position of the viewpoint will be zoomed to. Rotate the view in 360 to the new camera position.
Define the duration of the tour.
By default, it will take 10 seconds to move between viewpoints.
The minimum duration of a tour is one second per viewpoint.
The user can increase the length of a tour by entering the duration in seconds.
each viewpoint will be equally spaced along the timeline of the tour.
Define whether the tour will follow a circular path.
A circular path's first and last camera points are connected into a loop. This setting ensures that a tour can be added to a looping video.
Define the smoothing of the tour. The smoothness can be defined per point or for the entire tour.
A smoother tour will appear to flow along the defined path while a sharp one will snap directly between viewpoints.
Click Save.
Enter a name and optional description for the tour.
A thumbnail of the tour will be generated at the time that it is saved. This thumbnail will be the last viewpoint in the tour.
Click Save.
Edit tour
Once a tour is saved, it can be edited.
Hover over the tour in the list and click the ellipsis button.
Click the appropriate edit function.
Click Edit tour path to modify the duration, circular path setting, smoothness or position or camera position of the tour’s viewpoints.
Click Edit tour info to modify the name or description.
Alternatively, select the tour from the list.
Click the Edit button for either the Tour info or Tour path and modify as desired.
Click Save.
Record tour
Once a tour is save, it can be recorded to create high quality video and showcase your asset and deliver a guided experience or presentation to non-users.
Hover over the tour in the list and click the ellipsis button.
Click Record.
Ensure that your layers, visibility settings, GeoTags, and panoramic viewpoint settings are all set as you want them to appear in your recording.
Select the point along the tour to begin the recording by dragging the time marker along the timeline at the bottom.
Click the red shutter button to begin the recording.
Alternatively, select the tour from the list.
Click the Record video button and adjust the recording settings and view settings as described above.
The recording is processed in real time.
Clicking Stop recording will finalize and download the portion of the tour recorded to that point.
The page cannot be navigated away from during recording.
This export rendering in very intensive on GPU resources. Do NOT use this browser session for any other purposes (e.g. open new tabs) until export is complete.
The recording will be saved to the ‘Downloads’ folder. The file is an MP4 with a name formatted like: [Tour_name]_[MM_DD_YYYY]_[HH MM SS].mp4
Delete tour
Once a tour is saved, it can be deleted.
Click on the ellipsis button.
Click on Delete.
The user will be prompted to accept the deletion to avoid mistaken removal of the tour. Click Yes,delete.
Copy Link
Once a tour is saved, it can be linked to.
Click on the ellipsis button.
Click on Copy link.
The link will be copied to the clipboard to be shared via email, chat or other means. This link will only be accessible to users with permission to view the asset.
Search
Once an asset contains at least one tour, the search bar will be activated. Use the search bar to enter the name of a tour to quickly locate it in the list.
Tour search only searches the name of a tour, not the description or creator.