
Registering data within Reality Cloud Studio: Data uploaded from Cyclone FIELD 360 or the Leica BLK Live App
This guide provides step-by-step instructions on how to register data from the RTC360 and the new BLK360 which has been collected in the field (with VIS enabled) and directly uploaded from the Field to the Cloud using Cyclone FIELD 360 or the Leica BLK live App
To begin, visit https://hxdr.app/login, enter your details and login to the platform
1. Once you have logged into Reality Cloud Studio, click the hamburger menu on the top left of the screen to access your projects

2. Click "Reality Cloud Studio" and you will be presented with all your projects

3. If you are looking for a specific project, you can always use the "Search Projects" dialogue box

4. When uploading from Cyclone FIELD 360 or BLK LIVE apps, you are able to choose the location you wish to add your data.
In this example, we added all the data to a sub-folder within the "Uploading" folder.
Click to the folder you uploaded your data to navigate to it.

5. For this project we created a new folder within "Uploading" called "Wollaston Church BLK360".
Click your folder to navigate to it and view your uploaded data from the field.

Reviewing your unregistered assets uploaded from the field
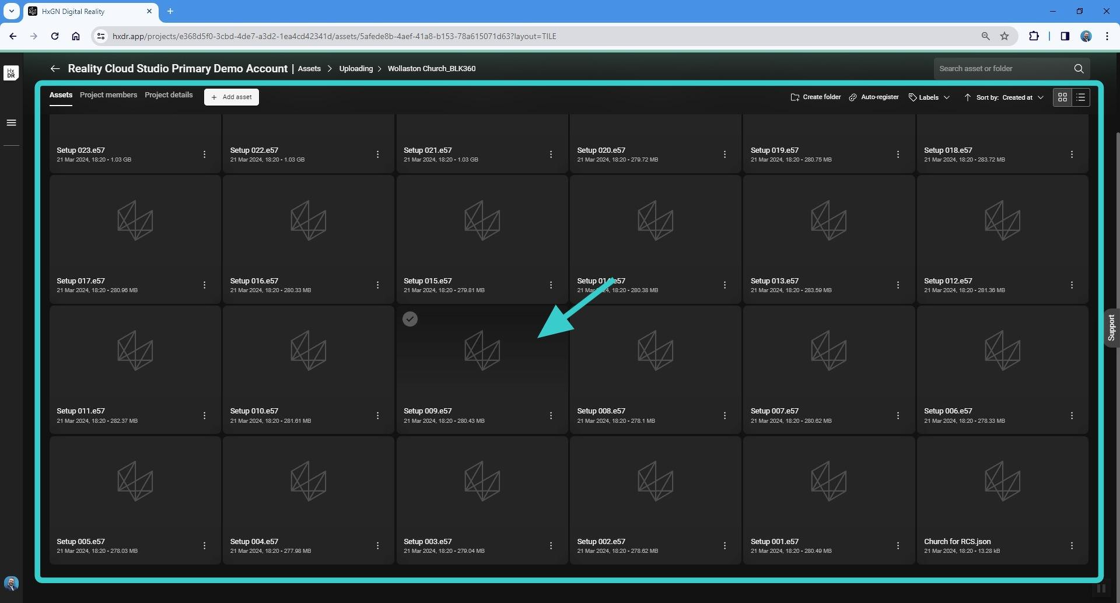
6. Once you have navigated to the folder where you stored all your uploads from the field, you can see the E57 files and a singular *JSON file too.
You can click on any of the single, unregistered files, to view the data from that single setup.
Navigating within a single, unregistered asset
7. You can now see the single setup within the asset view and navigate around it.
If you click on the panorama (represented as a spherical bubble at your scan locations) you will jump into the "Panorama viewpoint".

8. You are able to pan and zoom within the panoramic image.
You can easily press the "Escape" key to revert back to the 3D asset view, or click the "back" button in order to return to the previous folder.
Click "Back" to revert to the folder view and begin the registration process.

Starting the Auto-registration process
9. To begin the process of registering your scans, click the "Auto-register" button.

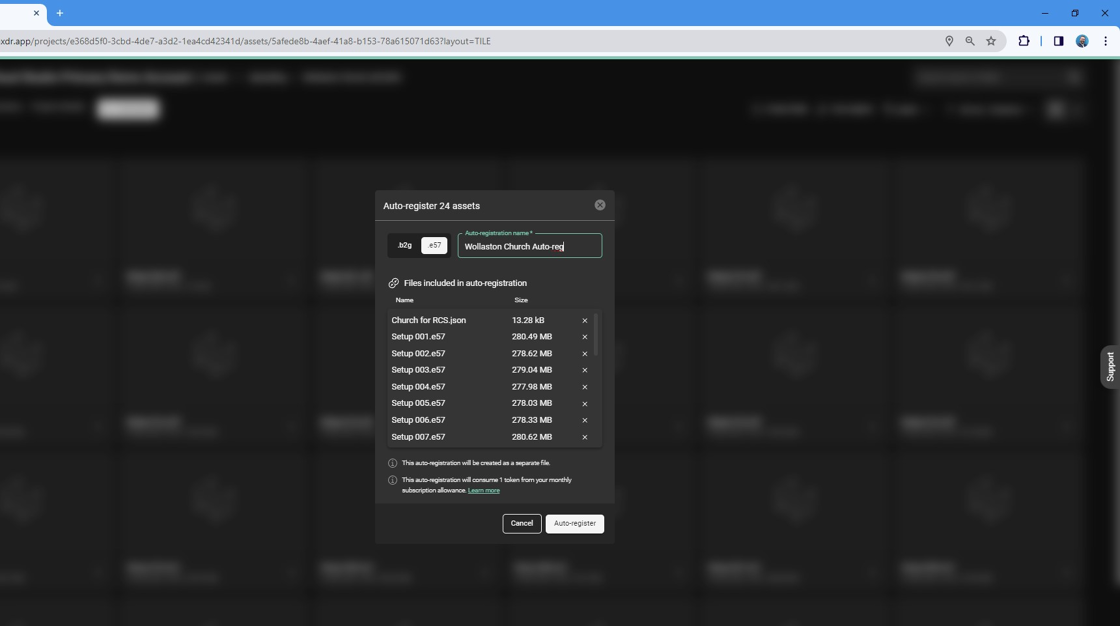
10. Once you click "Auto-register" a dialogue box will pop up and will be automatically populated with all the scans and the *.JSON file, which is a requirement to be able to register the *.E57 files.
You can remove unwanted scans from your registration list if you wish and you are able to choose a name for your registration.
Finalising the Auto-registration process
11. Once you have chosen a name for your registration, click "Auto-register" once more in order to kick-off the processing step.

Summary
You will now have a new asset in your folder which represents your registered dataset - please note it will show as 0kb - this is not an error.
There is no indication in Reality Cloud Studio of the time it will take to register your data, so please come back to the asset periodically to check on the status.
Once the process is complete you can open this new asset just like any other asset within the platform.
If you experience any errors, please contact support through the platform and provide as much information as possible.