
Moving an auto-registered asset to a new folder and running auto-mesh upon it
This guide provides step-by-step instructions on how to move an auto-registered file to a new folder and auto-mesh it. By following these instructions, you can easily organize and optimize your files for efficient use, enhancing your overall workflow.
You previously created an auto-registered asset in Reality Cloud Studio. This workflow follows on from the creation of that asset. If you did not yet create an auto-registered asset, please return to "this step" and create an asset before continuing.
Moving your data to a new location within your account
1. Find your auto-registered asset and click on the 3 dots to access to the options available for this asset.

2. Use the "Move" function to begin moving your data to a different location within your account.
This step is entirely optional and included to show you the capability of the Reality Cloud Studio platform.
Creating folders for the different stages of processing can help to organize and move assets smoothly from upload to completion.

3. Choose the folder you would like to move the asset to and finalise the operation by clicking the 'Move to" button.

4. Once you have completed the move operation, a dialogue will pop up in the lower right corner of the screen allowing you to jump directly to the new location for the asset.
Click the hyperlink to be taken directly to the destination folder.

Opening and reviewing your auto-registered asset
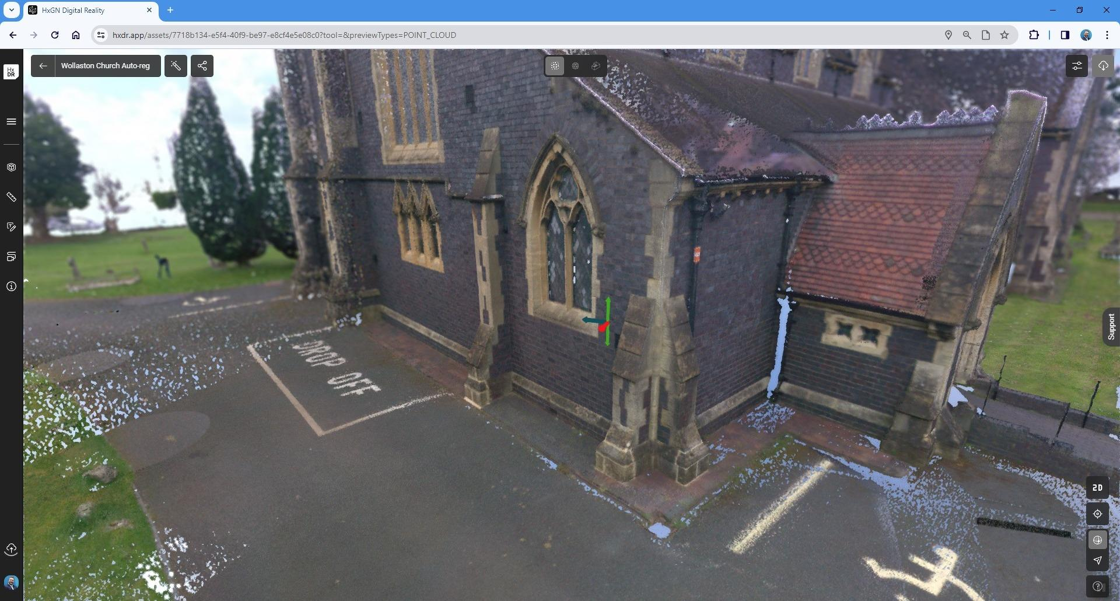
5. Click on the auto-registered asset to open it

6. You can now review your auto-registered asset!
At this stage, no mesh has been generated and therefore you will be limited to viewing the point-cloud data only.
You will now learn one method for generating an auto-mesh for an asset.
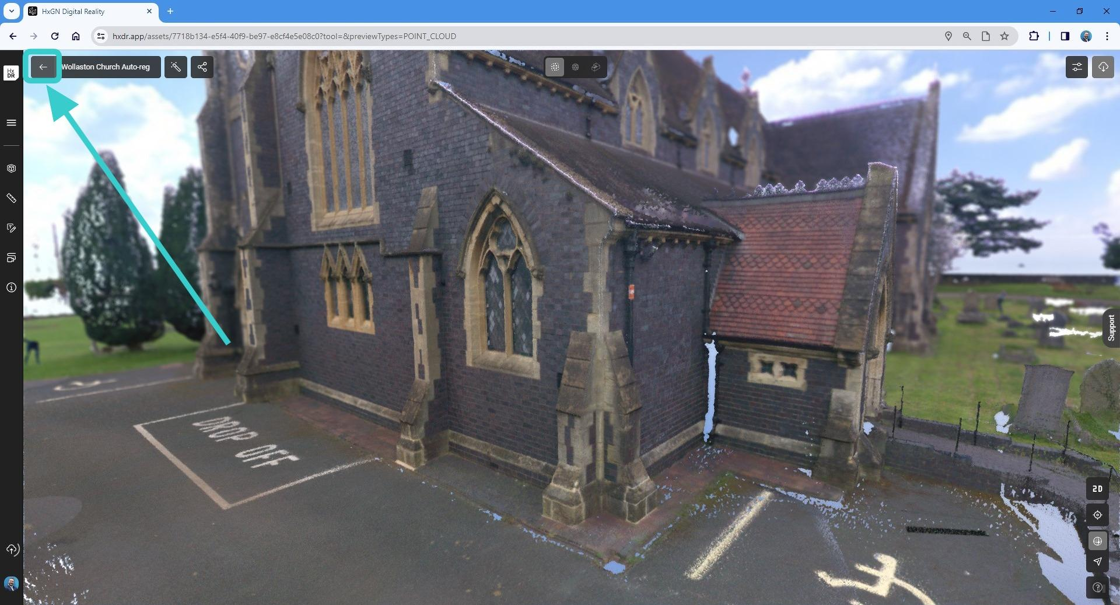
7. Exit the asset using the "back" button
8. Click on the 3 dots on the asset panel

Generating an "auto-mesh" from your registered dataset
9. Click "Generate Mesh" to begin the auto-mesh process.
Creating a Mesh consumes processing bandwidth on your subscription and is a paid function.

10. A dialogue box will appear and you are able to select which sensor was used for the data collection.
If you do not know how your data was collected, you can choose the "Generic" option.
If you believe your data was collected with a variety of sensors (from Leica Geosystems or other 3rd party sensors), then it's suggested to choose "Generic" also.
The different settings have been optimized to take full advantage of each sensor’s capabilities and data structure.

11. Once you are ready to proceed click "Mesh" and the auto-mesh process will begin.

Summary
Mesh generation will depend on the size of the input file(s) and could take several minutes, or several hours accordingly.
Thank you for your patience whilst Reality Cloud Studio produces your automated mesh.
If there are any issues with mesh generation, please contact support