
Basic tour creation with simple edits and sharing
This guide provides a comprehensive overview of creating and editing tours in Reality Cloud Studio. It explains how to view existing tours, create new tours manually or automatically, add viewpoints, edit tour settings, and save and share tours. The guide emphasizes the convenience and power of tours for showcasing projects and reality capture content, making it a valuable resource for anyone looking to effectively share their work using Reality Cloud Studio.
A Tour is a series of camera positions strung together. Tours are a simple way to guide a user around an Asset. A Tour will adopt whatever visualisation settings a user has selected prior to beginning the Tour.
Tours can be created and edited by Owners, Collaborators and Editors of a project. Users with a Viewer project role cannot create or modify Tours.
Viewing existing tours within Reality Cloud Studio
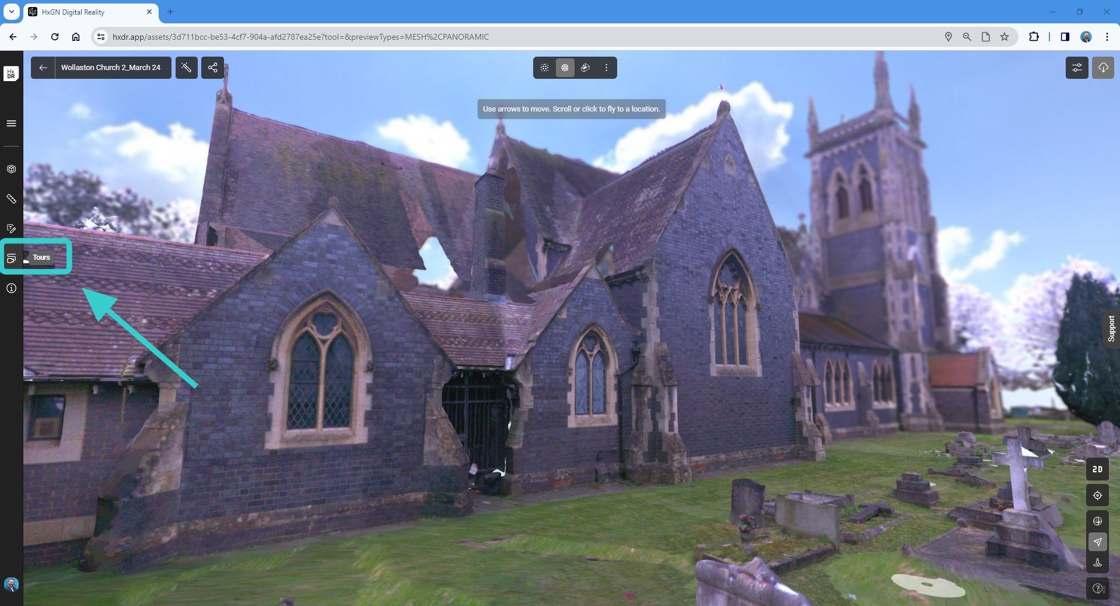
1. To access the "Tours" functionality, click on the left side and enter the menu from within any asset.
Users with the Viewer role, will not be able to create any new Tours, only access existing ones. They will also not be able to edit any existing Tours.
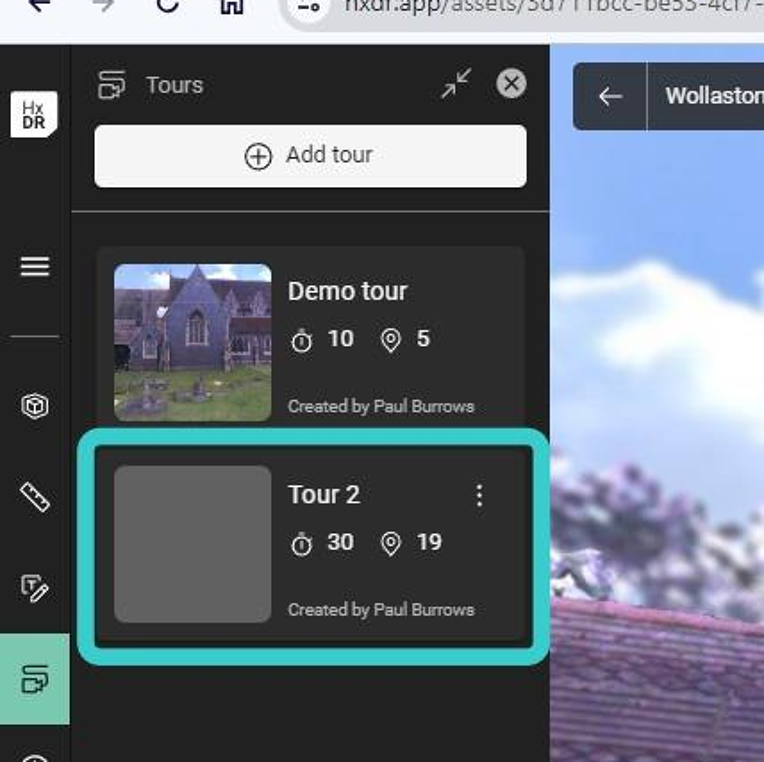
2. From here you can see all existing tours within an asset.
You can click on the 3 dots to edit, delete or share the tour.
If you click on any tour, it will take you to the starting location (the first camera view-point).
3. Once you are at the starting point for the tour, you can click "Play" to start the tour.
The length of the tour and the path are defined by the creator.
You can pause the tour at any time, or jump between key-frames too.
If you use a navigation tool, the tour will also automatically pause.
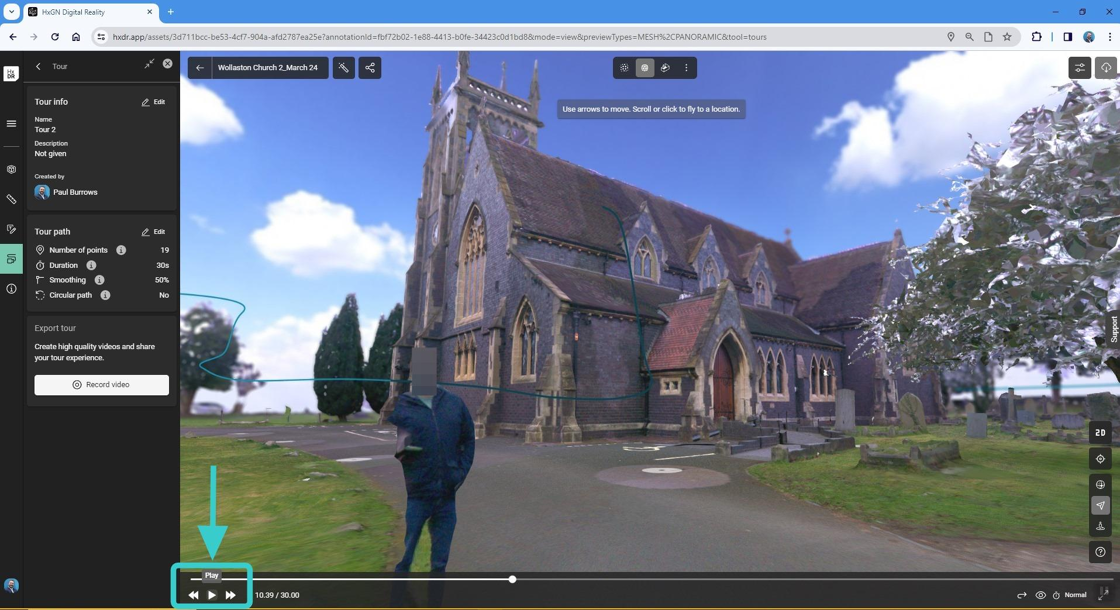
4. You can click "Pause" at any time to stop the tour and see more details of the asset.

5. Once you haver finished viewing the tour, click the "back" button in order to access the tour menu once more.

Creating a new tour
6. If you would like to create your own tour, click "Add tour" from the tour menu.

7. At this point you have two options.
Feel free to explore the automatic tour options for your scene. All of these will give you a nice polished finish, with minimal effort. The tour paths and duration are still 100% editable, so you can always use a predefined tour to start and then tweak it until you are happy.
You can preview a tour by selecting it and clicking the play button before saving the tour.
If you wish to create a manual your, you are prompted to click the "Add Viewpoint" button. Click this once to start your manual tour. You can then move to every location around your asset, and continue to add more and more viewpoints until you have completed your tour.
In this workflow we shall create a new path, so click the shutter icon to store your first viewpoint.

8. Once you have clicked your first "Viewpoint", the prompt will update to "Add a second tour viewpoint to create a path".
A your must contain at least two viewpoints to be saved but may contain as many viewpoints as needed.

9. Continue to add more and more viewpoints around your asset.
Keep adding viewpoints until you are happy with your final path.

10. As you start to add more camera locations, the scene will start to build up.
You will see the camera locations, and the camera path, as shown below.
Now we shall edit the tour settings, before finally saving it to the asset.

Tour Settings
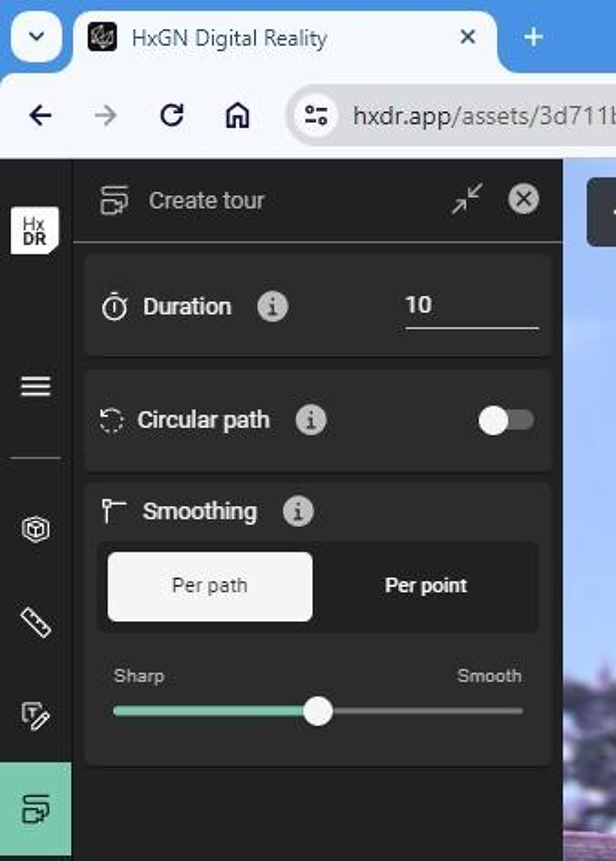
11. From the tour menu, you are able to edit the duration, enable a circular path and alter the smoothing between viewpoints.
Duration is how long your tour will run for, beginning to end.
Circular path ensures the path becomes a closed loop, returning to the first position. With this option selected, you could render the final animation and have it playing over and over, which may be perfect for some marketing applications.
Smoothing allows you to control the softness of the camera path as it flows between camera viewpoints. If you want to snap rigidly between viewpoints, then move the slider towards "Sharp". If want smooth movement between viewpoints, move it towards "Smooth".
In addition, you can change this to "Per path" or "Per point" for even finer control.
Click "Save" to continue.

13. Give your tour a title, and if you want, a description (which is optional).
Click Save once more to store the tour to your asset.

Editing your Tours
14. Once you have saved your tour, you can still edit it.
You can edit the tour information, such as Title and Description
You can edit the tour path, which includes being able to edit each camera position, or even removing camera position entirely.
Additionally you can also record your video using a wide variety of different quality settings.
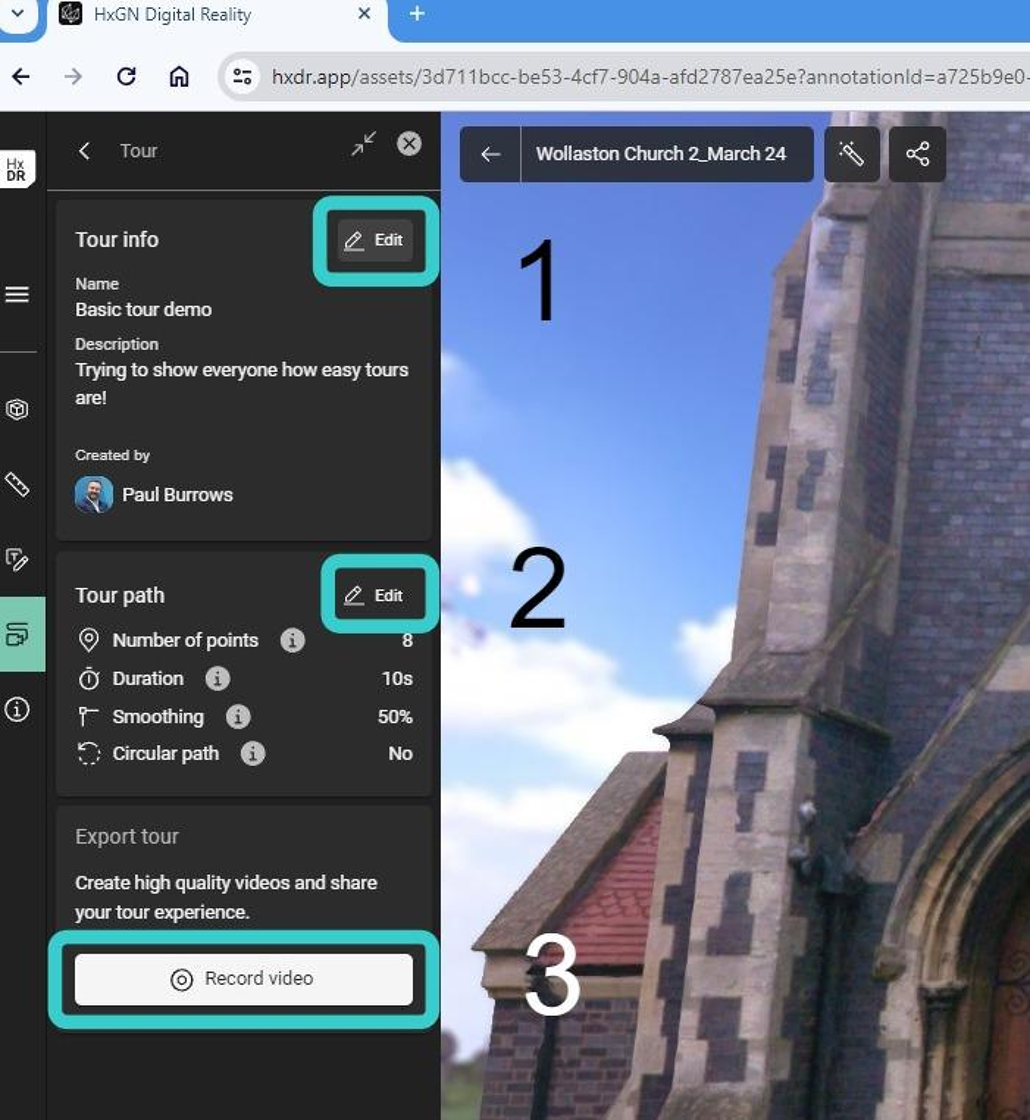
When using the "Record Video" option, the browser will be taken up with the rendering and you will not be able to continue working on your asset.
Depending on which setting you use, and the duration of your video, this could take some time. It is recommended to run the "Record" function during a time when you are not wanting to work on any projects, and within a separate browser window.
15. Once you have made all your edits, you can simply return to the tours menu to see all the tours associated with all your assets.

Sharing your Tours
16. There are two ways to share yours.
You can easily share your totr using the 3 dots on tcreate a he toable link tour panel (1). This link will only work for users who have an account or are invited to your project.
If you wish to share an entire asset (tours included), then use option 2 - to either share an internal or external link.
By sharing an external link, external, public viewers can see everything within your project - but they cannot edit it. The only function available to a Viewer, is measurement.

Summary
Tours are a powerful way to easily share the best parts of your projects. Use them to showcase your amazing reality capture content with a simple URL.
We look forward to seeing what you create with Reality Cloud Studio Tours!