
Basic GeoTag capability within Reality Cloud Studio: viewing, creating, editing and sharing GeoTags
This guide provides a step-by-step explanation of how to view, create, edit, and share GeoTags within Reality Cloud Studio. By following the instructions, users can easily access the GeoTag menu, show or hide GeoTags, create new GeoTags with names and descriptions, and share links to GeoTags with other project collaborators. The guide also highlights important features such as editing and deleting GeoTags.
A GeoTag is a pin in 3D space that contains and name and optional description which can be used to annotate key features of an Asset, leave notes for collaborators or communicate with project stakeholders.
GeoTags can be created and edited by Owners, Collaborators and Editors of a project. Users with a Viewer project role cannot create or modify GeoTags.
Viewing and Visibility of GeoTags
1. Click on the "GeoTag" icon on the left of the screen to access the GeoTag menu.

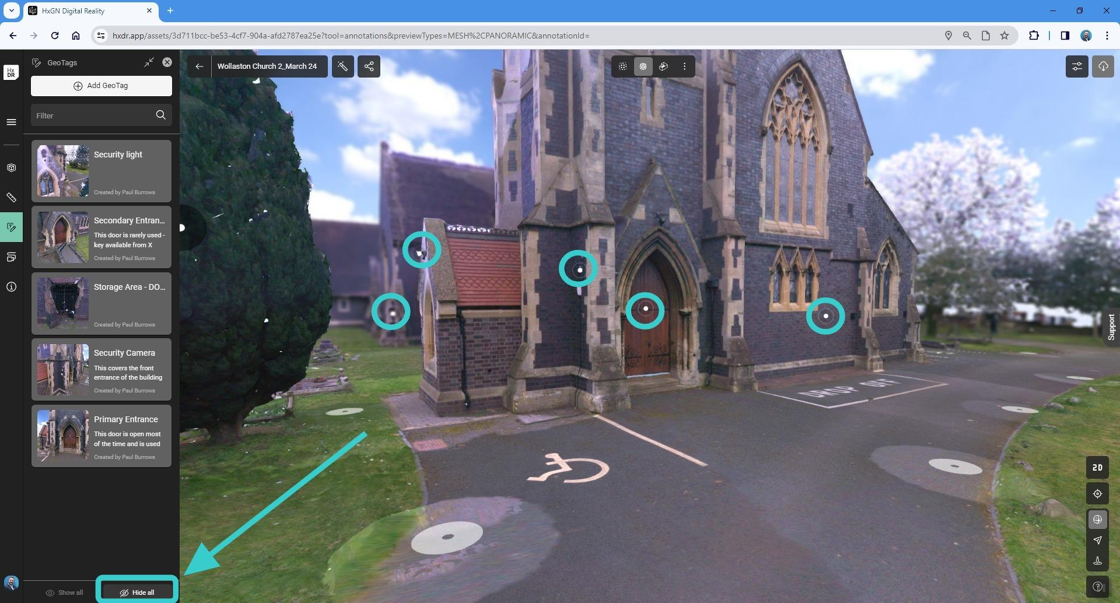
2. You are able to "Show all" or "Hide all" GeoTags within an asset by simply clicking the relevant buttons at the bottom of the GeoTag menu.
This allows the user to quickly assess the location of GeoTags or clear the scene to navigate freely.
Click "Show all" to make all of the GeoTags visible.

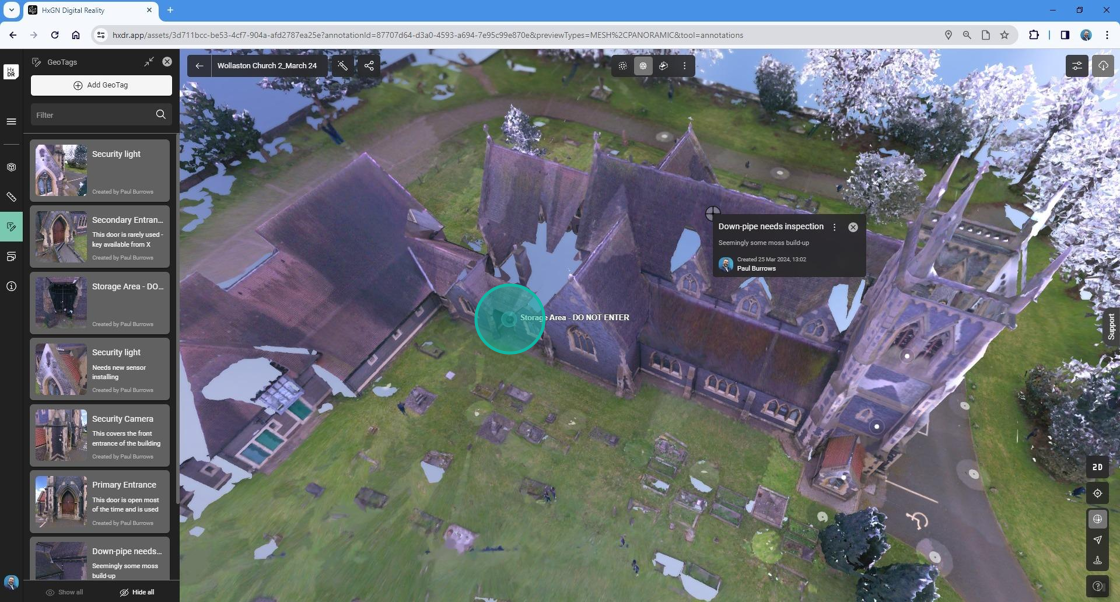
3. You will notice small white dots appear all over your asset - these can be clicked to Open the specific GeoTag of interest and view its content.
Click "Hide all" to once again make all GeoTags invisible within the scene.
Next, let's look at the creation process to add more GeoTags to your asset.
Creating new GeoTags
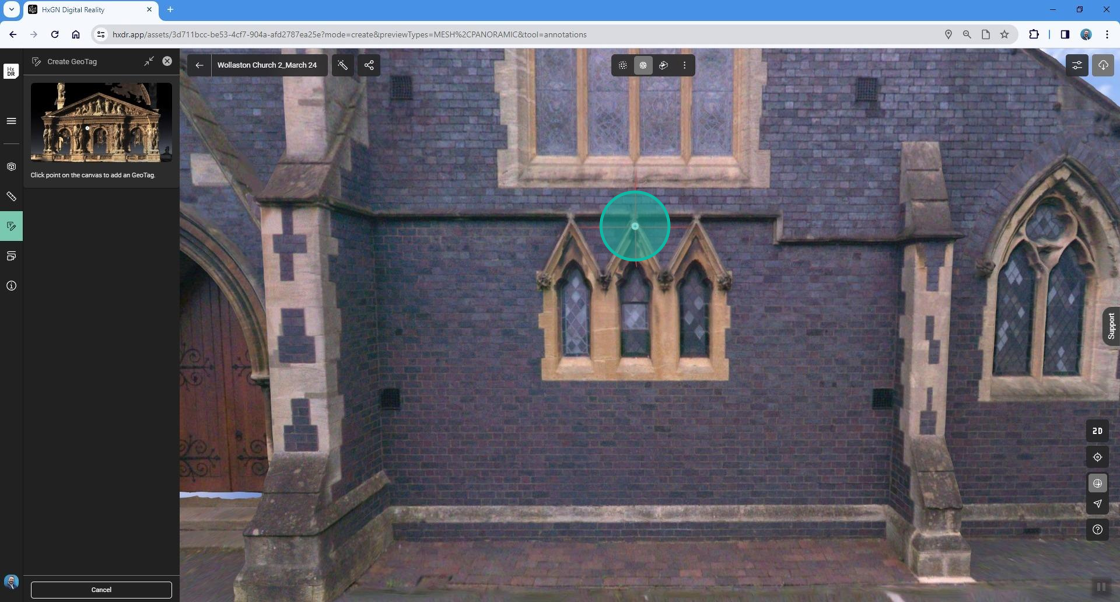
4. At the top of the GeoTag menu, click "Add GeoTag" to begin the process of creating a new GeoTag.

5. Now navigate to any location within your asset where you'd like to add a new GeoTag.
Your cursor will become a red cross hair to help with precise placement of the GeoTag.
Single click when you are happy to place your GeoTag.
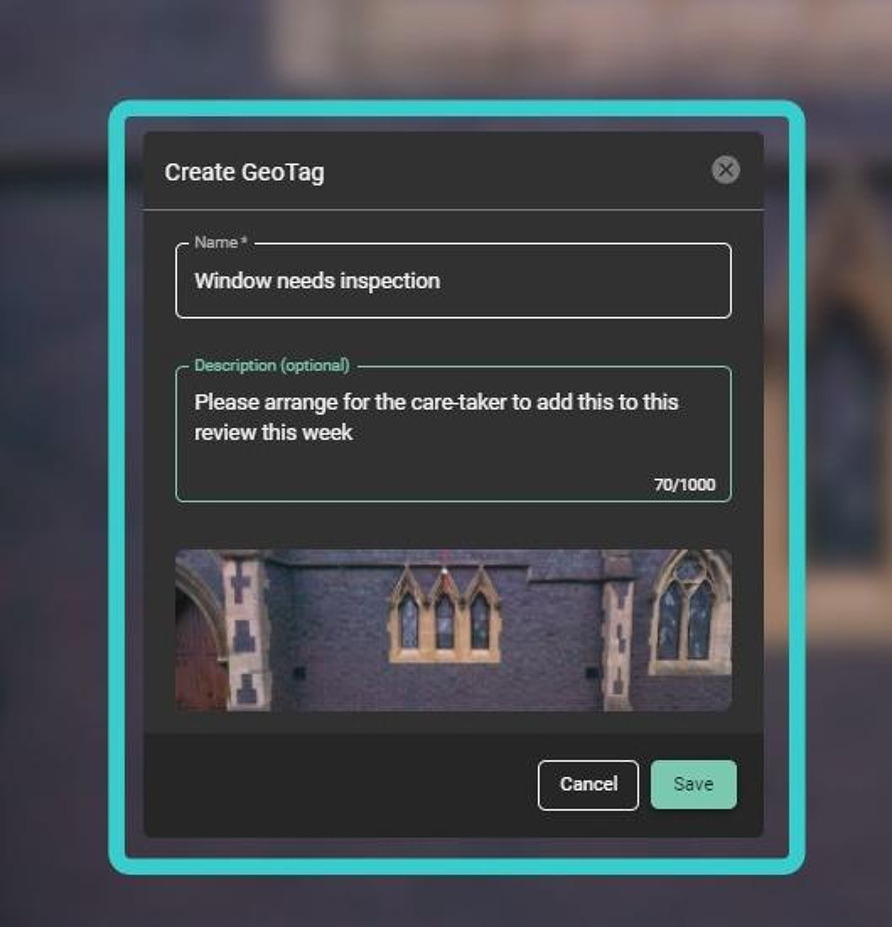
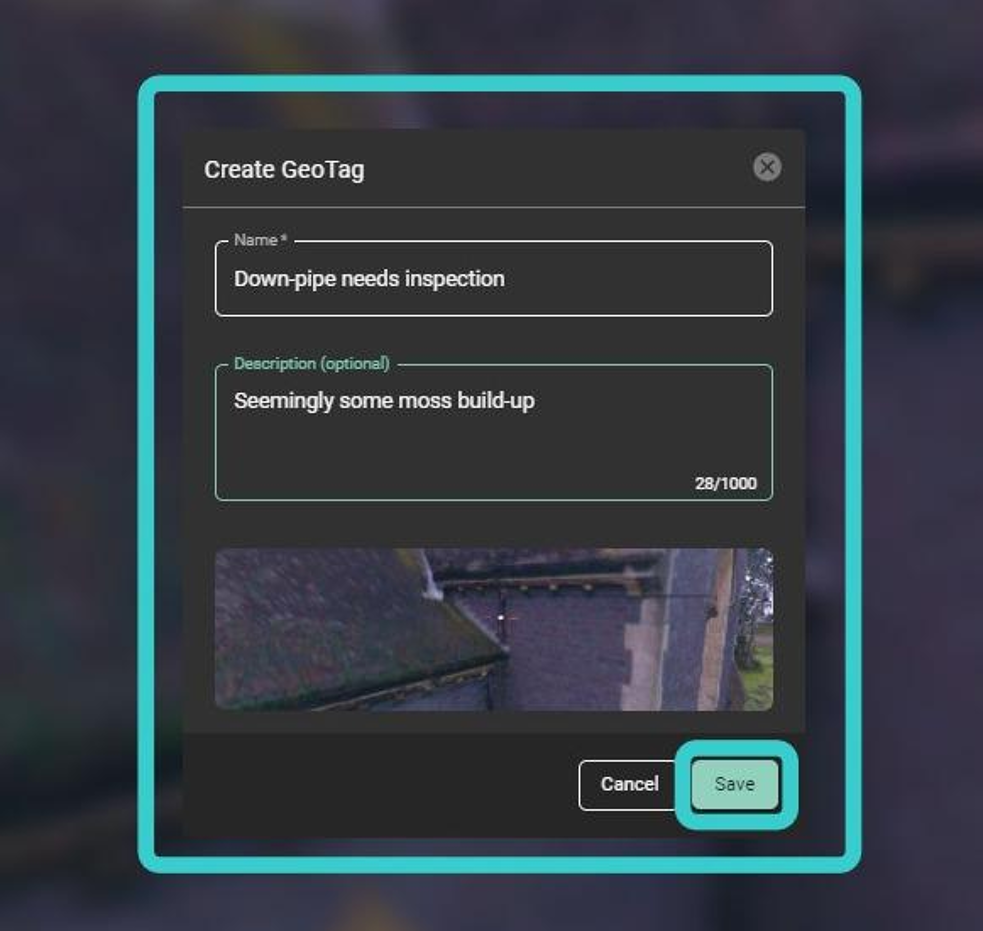
6. Input a "Name" for your GeoTag.
Input a "Description" (which is optional).
When you are done, click "Save".
You can now continue to add more GeoTags within your Asset.
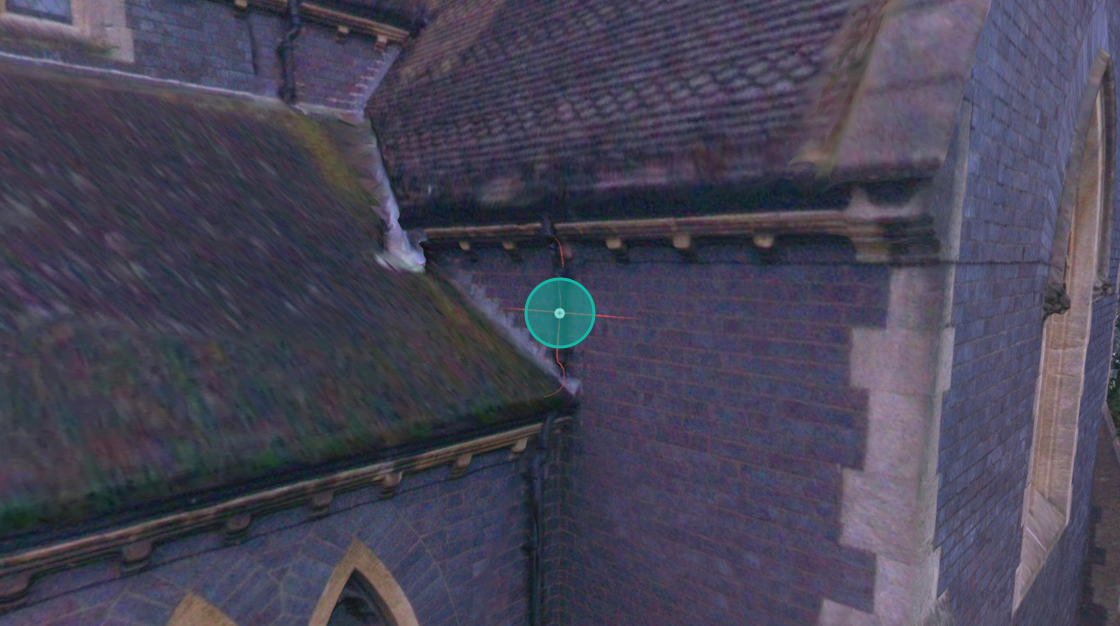
7. Move to a different location within your asset.
You will need to click "Add GeoTag" once more to add a further GeoTag.

8. Click a new location to add the GeoTag.
9. Add the Name/Description and save the new Geotag.
Editing and Sharing GeoTags
10. Now let's look at how you can share a link for a GeoTag to share with another user in your Project.
Click on any of your GeoTags within your Asset.
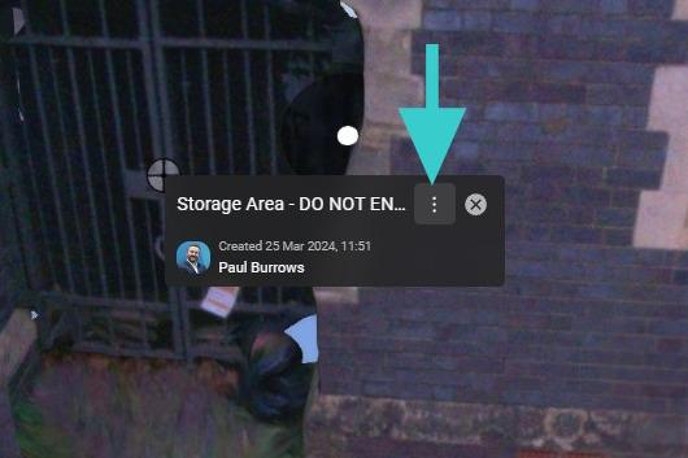
11. Click the 3 dots on any given GeoTag to open the editing and collaboration sub-menu.
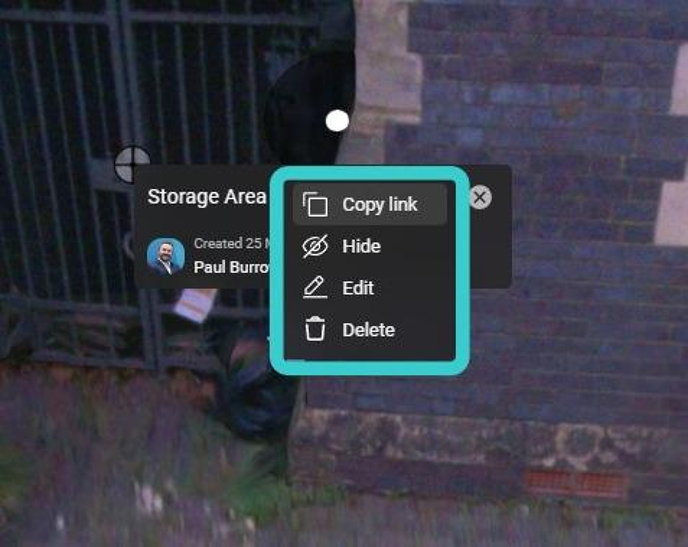
12. "Copy Link" allows you to copy a shareable link to your clipboard. You can use this to send to other users who have access to your project.
"Hide" allows you to hide only the GeoTag you have open to control the scene more precisely. Using the Hide/Show All selection for GeoTags will override this selection.
"Edit" allows you to edit details about the GeoTag - it does not allow you to "Move" the GeoTag.
GeoTags cannot be moved. They must be re-created in a new location.
"Delete" removes the GeoTag.
GeoTag deletion cannot be undone.
Summary
You are now ready to work with GeoTags in your projects. Not only are they a great way to highlight areas of importance within your solutions, but they can be easily shared with your colleagues for greater collaboration across projects.