Auto-Registration and Auto-Meshing of B2G files
This guide provides step-by-step instructions on how to register three B2G files from a Leica BLK2GO and view the cleaned mesh. Following these instructions will help users easily navigate through the auto-registration and auto-meshing process and access the cleaned mesh data within the asset view.
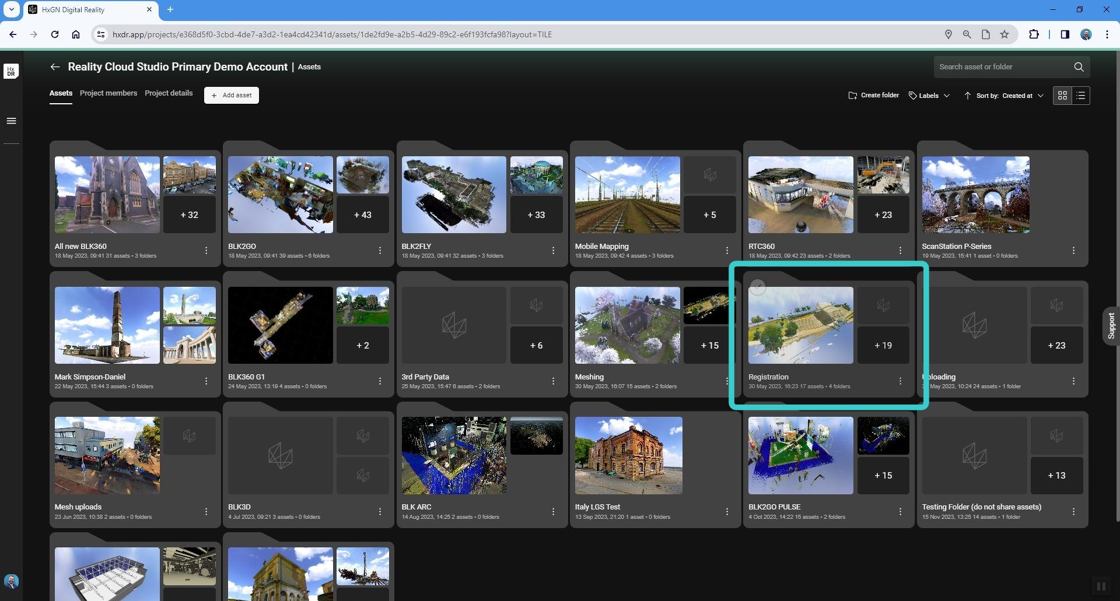
Creating an auto-registration from three B2G files
1. You will now learn how to register B2G files within Reality Cloud Studio
You will also review how auto-meshing helps clean the data from "noise" such as moving objects.
Select the project where you have uploaded your B2G files to begin.
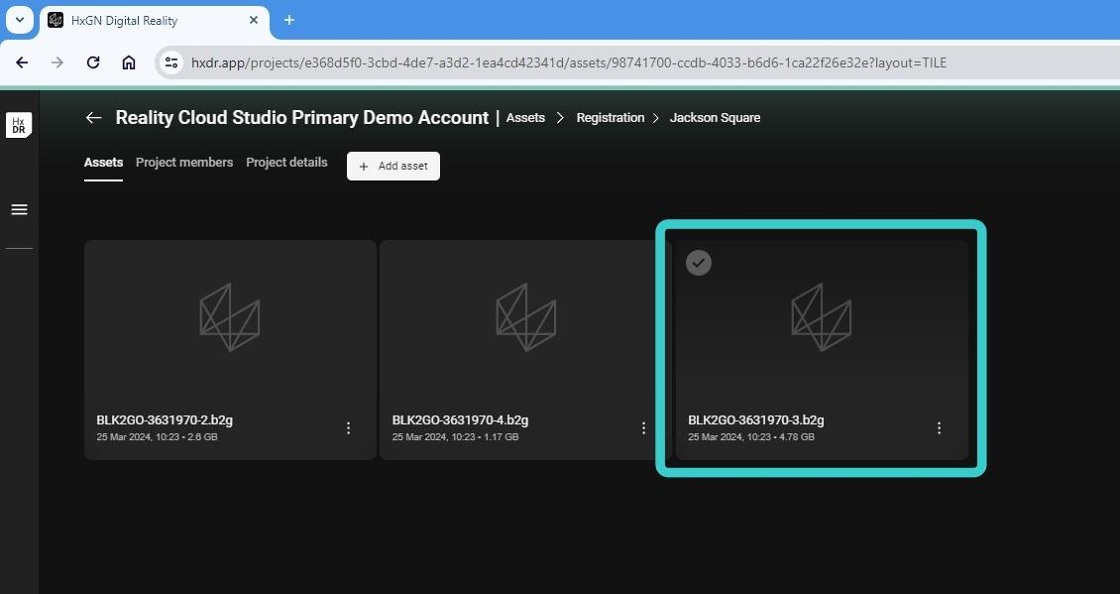
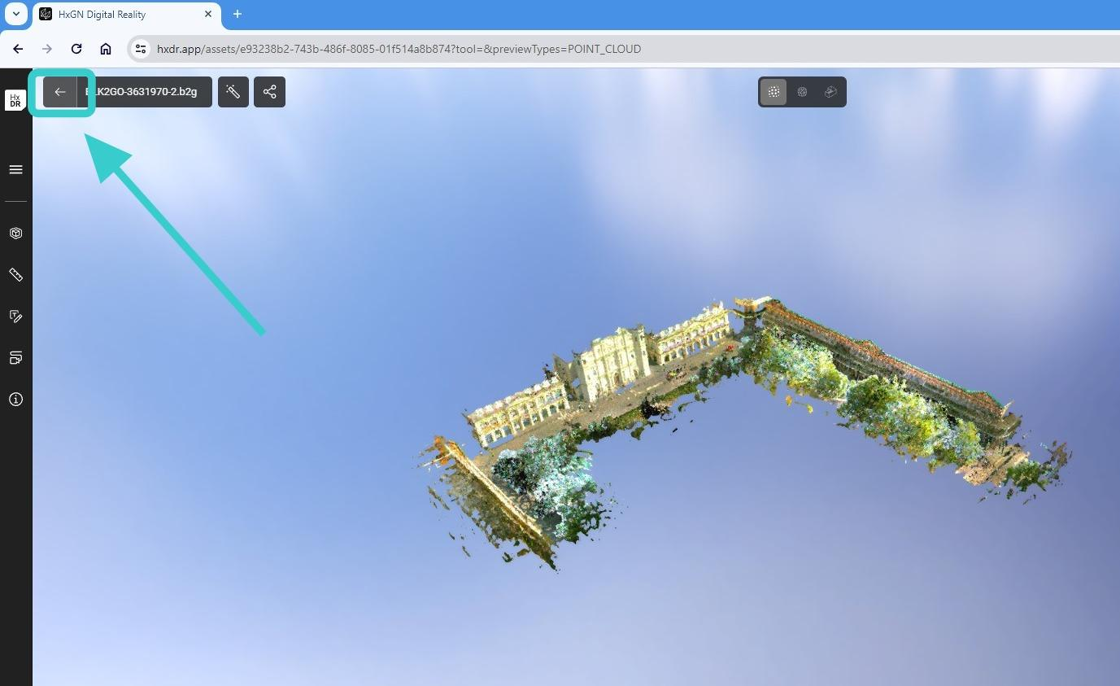
2. Click one of the B2G files to see the single scan which is currently unregistered.
3. In this example you can see that there is a lot of data missing from the right-hand side of the asset - in this case there is a whole side-street and multiple buildings not included. This is because they were part of an additional B2G file collected on a separate walk with the Leica BLK2GO device.
Exit the asset using the Back button and review another B2G file.
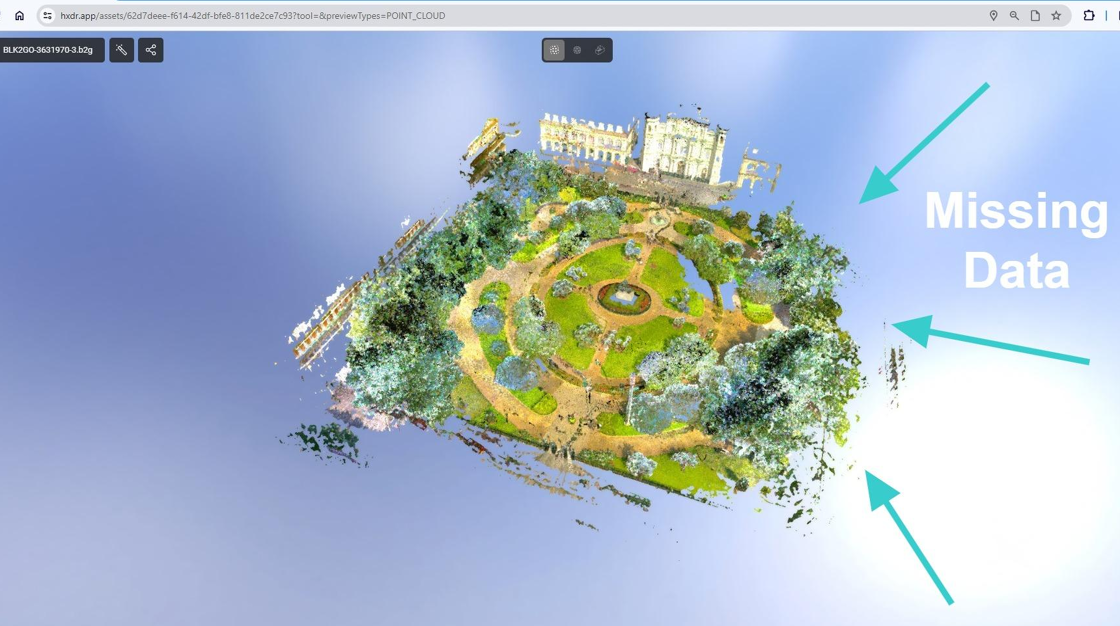
4. Here you can see the additional data missing from the first asset, so we need to combine the datasets (all three B2G files) in order to create a final registered asset.
Click the Back button to exit the asset.
This review step is entirely optional.
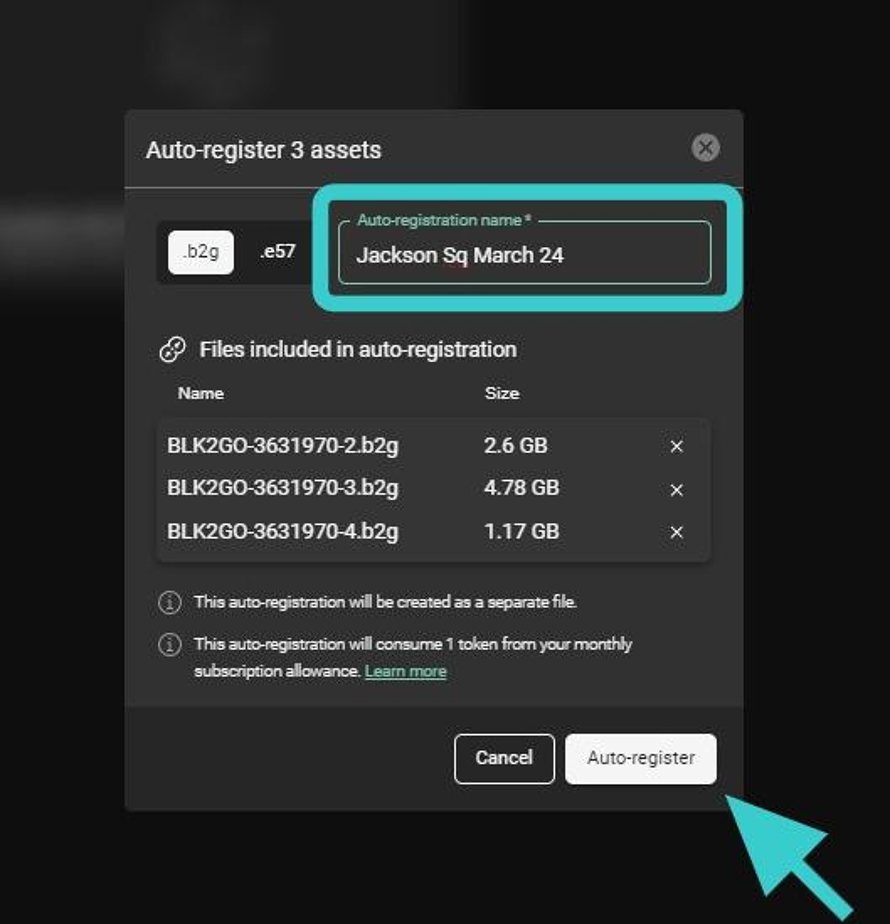
5. In order to begin the registration process, click Auto-register.
Reality Cloud Studio will review all the files in the current folder and select the necessary assets to complete the registration step.

6. Give your registration a name and click Auto-register.
Opening an auto-registered asset
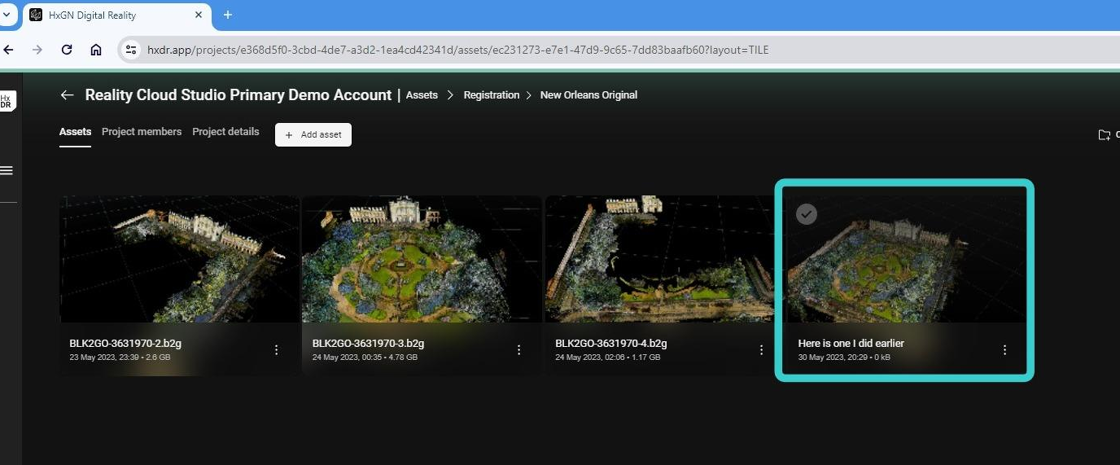
7. Whilst that asset is being generated, you are free to look at any other assets within your projects.
Let's look at a completed registration using the same three assets.
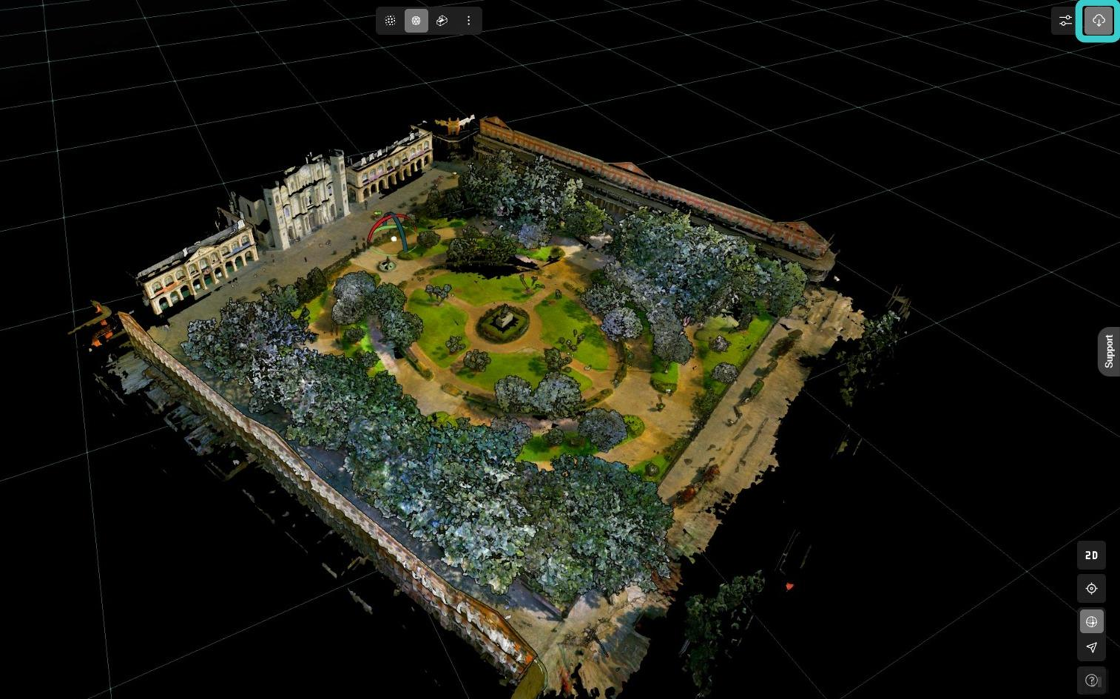
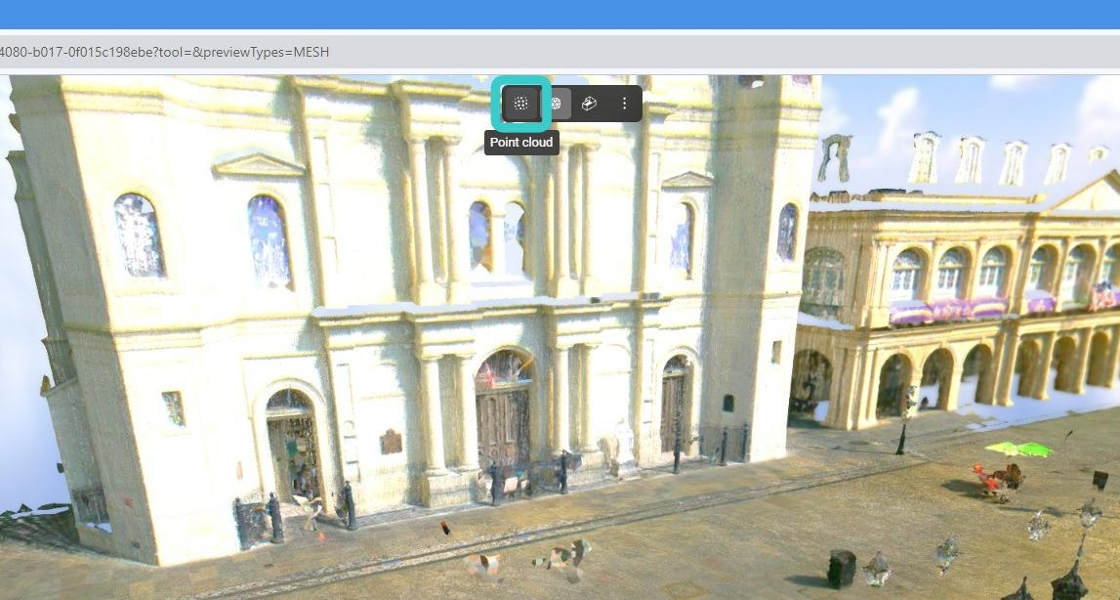
8. If you have generated a mesh for an asset, it will always revert to the mesh view when you initially load the asset.
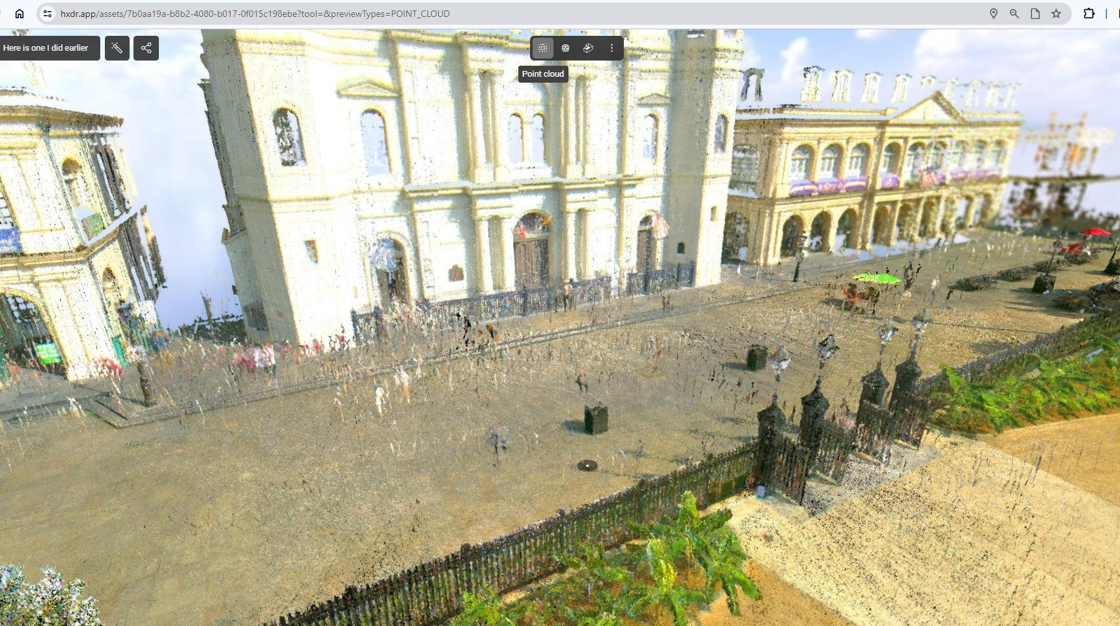
You can easily switch to the point cloud view using this button at the top of the screen.
Visualising the cleaned noise from the auto-registered asset
9. What you can now see, in this particular asset, is the noise which was originally contained within the dataset.
By using the Auto-mesh functionality, we are able to clean the data automatically so that our final mesh result is as neat as possible so that your clients and customers have the best possible visual experience when viewing your content via their browsers.
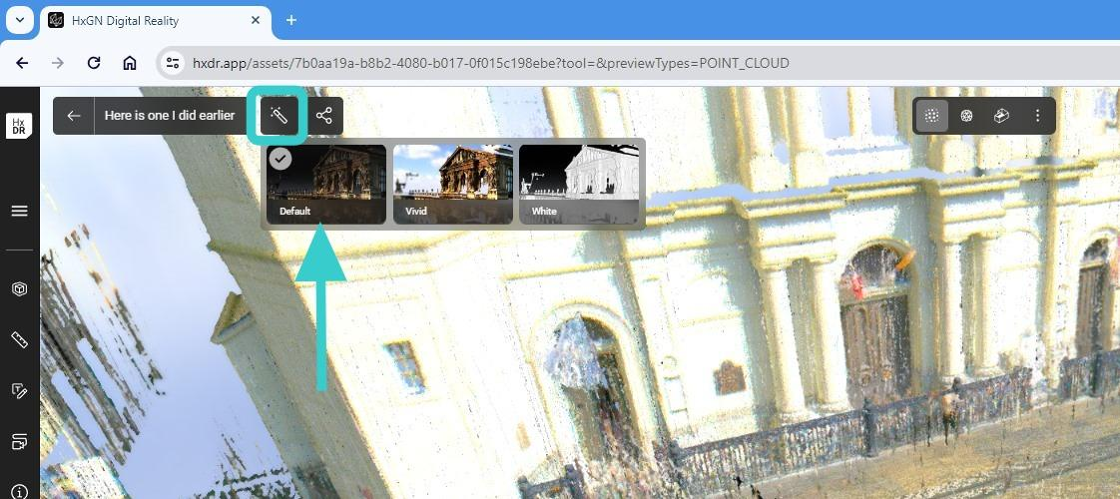
10. You will now change the viewing mode to highlight this noise.
Click the Quick mode button which looks like a Magic Wand, then choose Default. The rendered view will then update accordingly.
You can revert back to your original viewing mode at any time, plus Reality Cloud Studio offers complete customisation of the mesh and point-cloud visualisation settings.
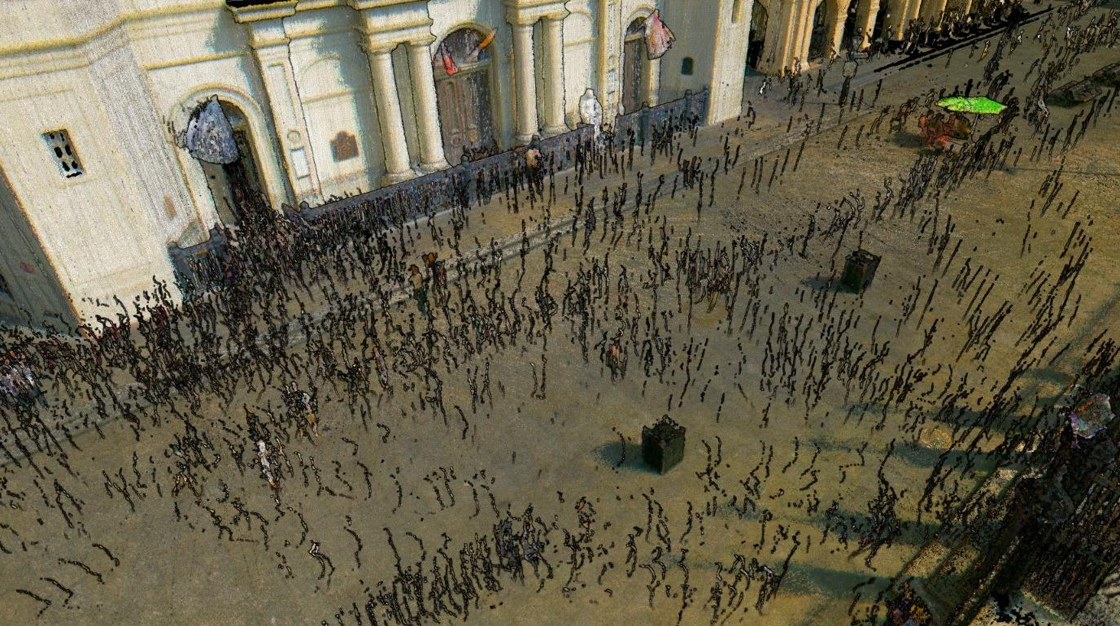
11. By using the default viewing mode, it's very clear to see the noise within your original upload.
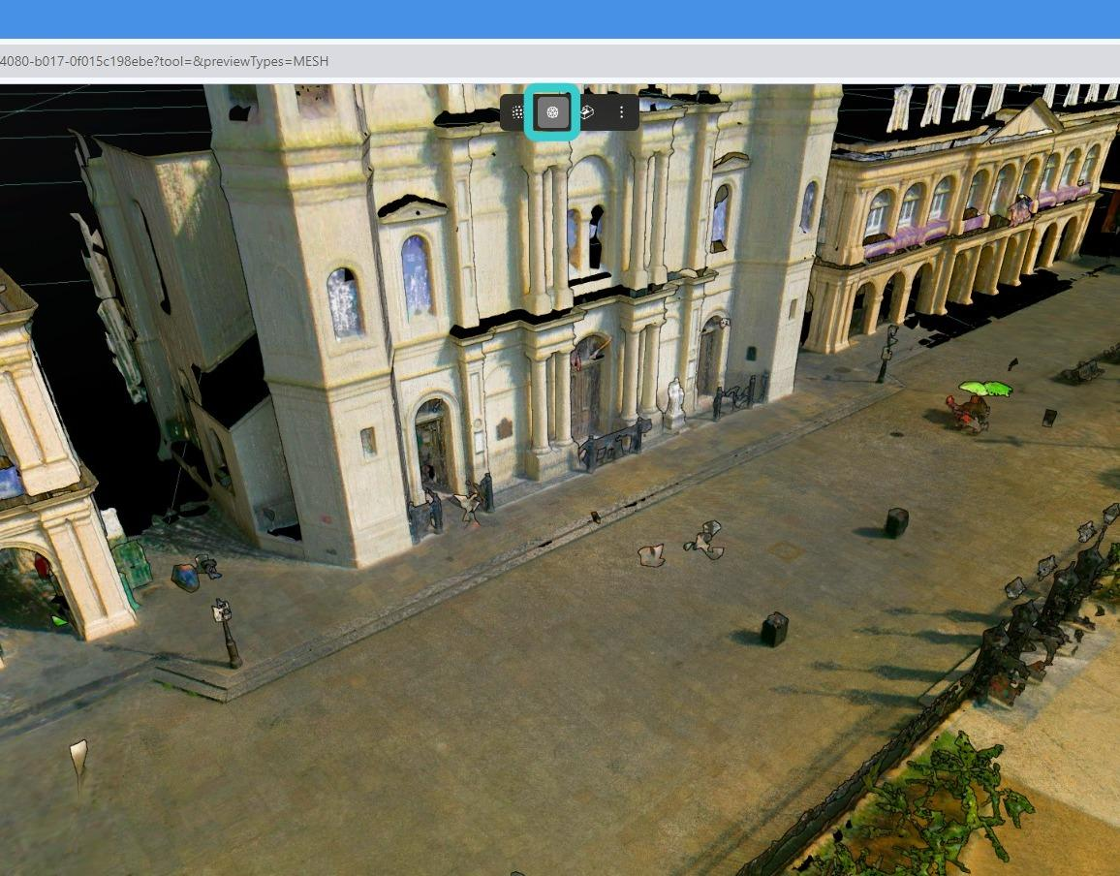
12. When reverting back to the mesh view, you can now clearly see most of the noise has been removed, leaving you with a clean dataset ready for sharing.
13. You are able to download your assets using the download button in the top right-hand side of the interface.
For meshes Reality Cloud Studio currently offers OBJ downloads, with more formats coming online in due course.
You can also download your original data, a new point-cloud (in *.PTS format) and (if they are part of the dataset), panoramic images.