SSO User Management (New Accounts)
Logging In and Managing Your Account with SSO
Step 1: Visit the Website
Go to https://hxdr.app/ and log in using Single Sign-On (SSO).
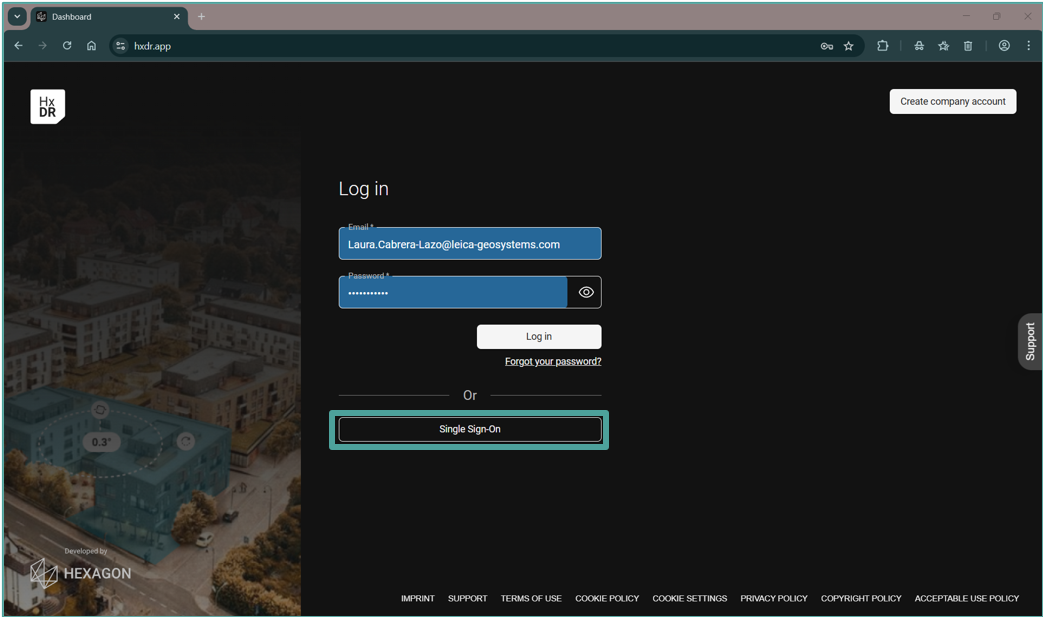
Step 2: Enter Your Email
Input your company email address.

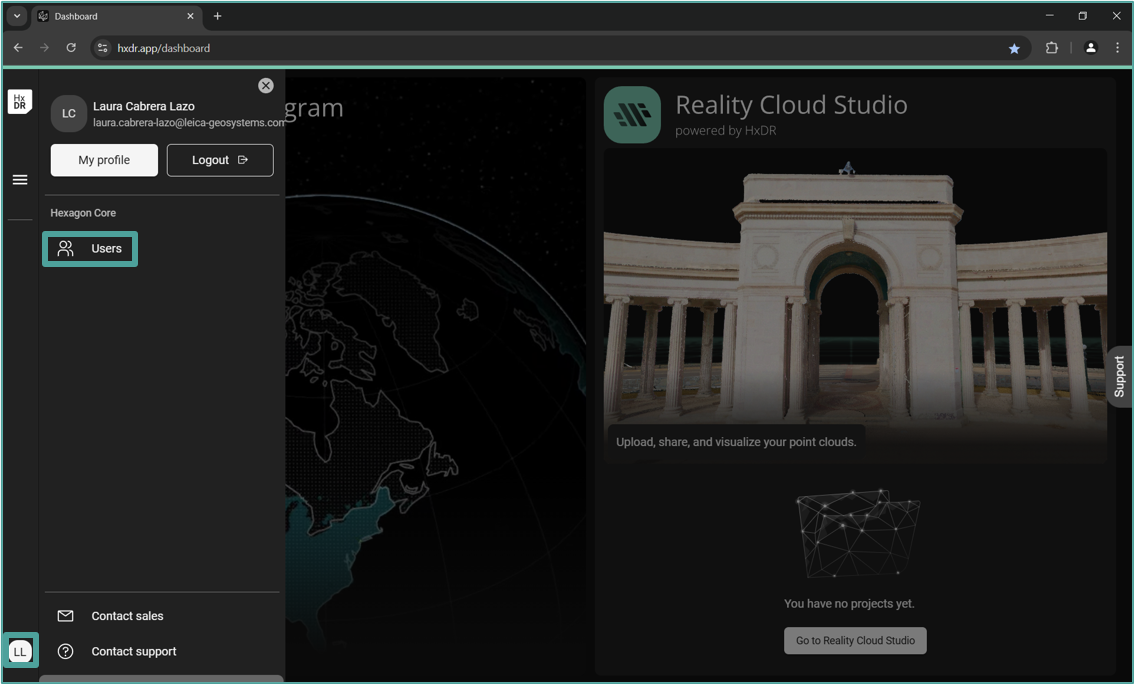
Step 3: Access the User Menu
Once logged in, click on the icon with your initials located on the lower left-hand side to access the user menu.
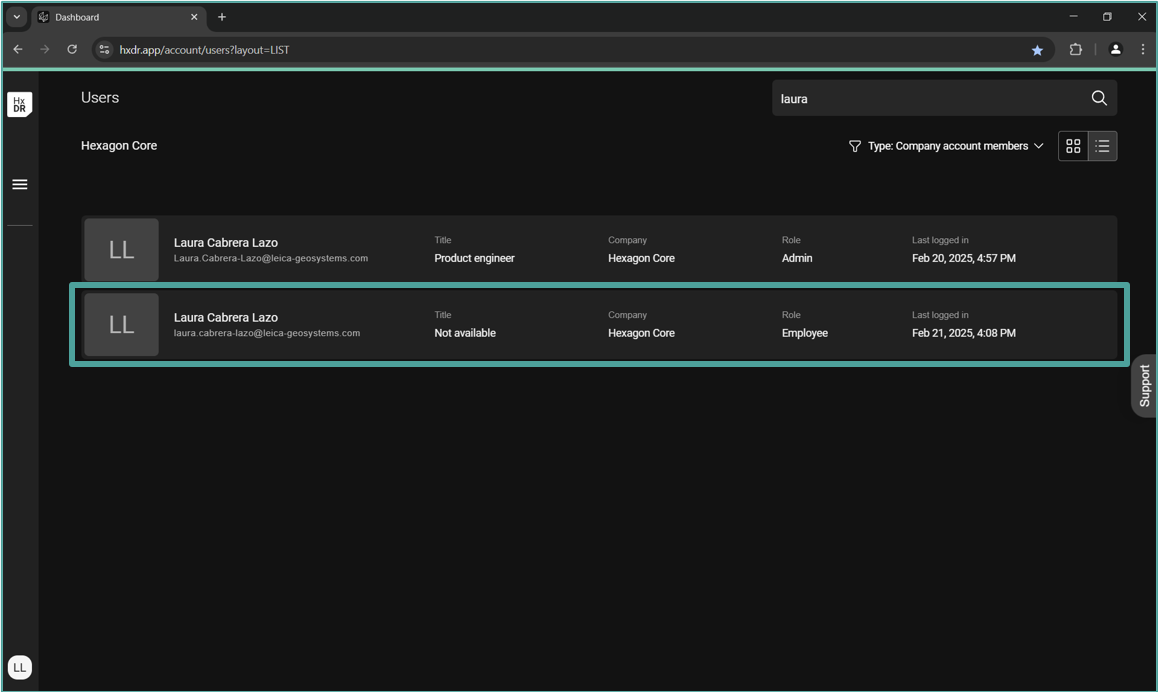
Step 4: Identify Your SSO User
In the "User" menu, you will see two users: the one created without SSO and one with SSO login. The user with the role "Employee" and title "Not Available" is the SSO user.
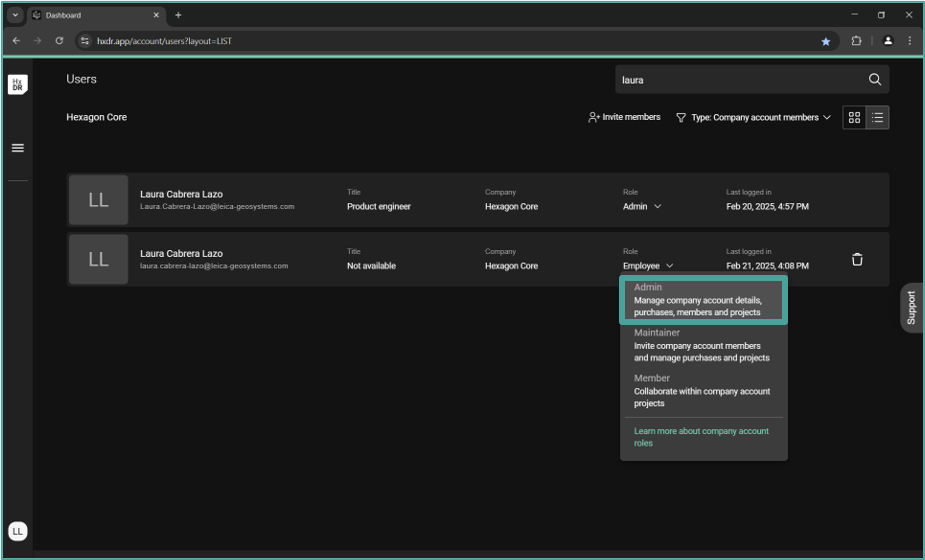
Step 5: Make Your SSO User an Admin
To manage the account and users, you need to make your SSO user an admin:
Log out and log in again using now your non-SSO user credentials.
Go to the user menu and change the role of your SSO user to "Admin".
Step 6: Log In as Admin
Log in again with your SSO user. Once logged in, clicking on the icon with your initials will now show the full Admin menu, including company, users, and subscription information.
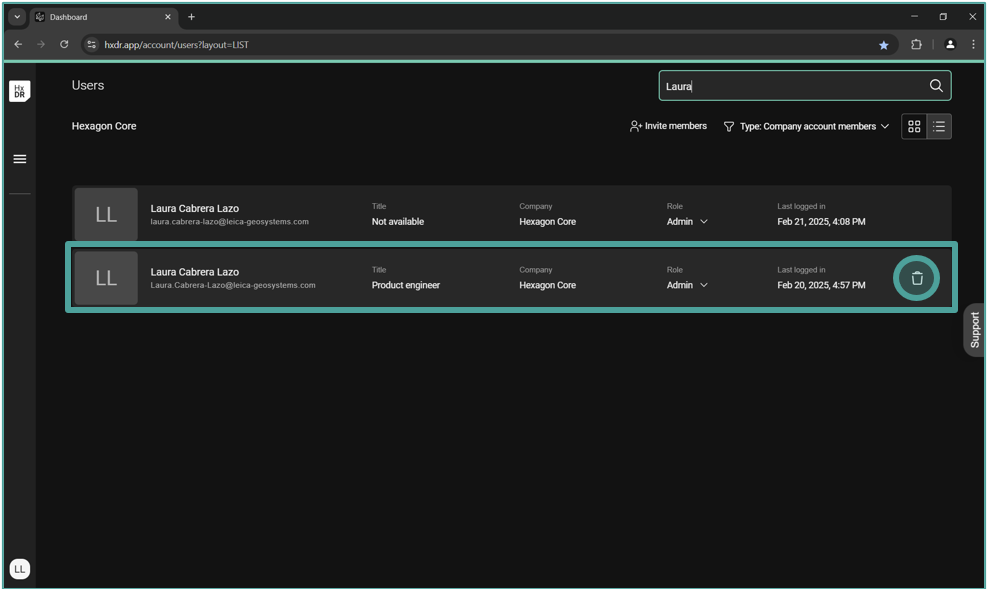
Go to the user menu and delete your non-SSO user (the one with a title). Note: You can’t delete your own user (the one that is currently logged in).
Step 7: Adding New Users
Colleagues who want to use Reality Cloud Studio can create a new user by logging in to https://hxdr.app/ with their SSO credentials. Once logged in for the first time, their user will be created and appear in the user menu, allowing the admin to manage their role.
Step 8: Activate Subscription
To start using Reality Cloud Studio, a subscription must be activated. Please follow the steps of this guide (from step 9 onwards) for subscription activation.