Categories
Projects include a metadata feature called “Categories”. Categories exist at the project-level and can be applied to GeoTags (with the ability to apply Categories to additional project elements coming in the future).
Categories help maximize the value of data in HxDR by fully contextualizing it, turning elements (GeoTags) from merely visual annotiations to functional, or even actionalable data for true digital twin experience.
Categories:
Support a single dataset's utility for multiple uses by multiple stakeholders, for example:
Different stakeholders during the same stage of a project or asset lifecycle, such as:
During construction with simultaneous but unique categories defined for each subcontractor (e.g., with lists of statuses or actions for them), as well as a cateogry(ies) for project managers, site health and safetey managers, etc.
During occupation/operation with simultaneous but unique categories design teams (e.g., to create floor plans for retrofits and space planning), operations teams (e.g., to track maintenance), safety teams (e.g., to track safety risks, safety equipment, etc.), 3rd party vendors (e.g., suppling equipment like vending machines or office equipment like printers, or suppling services like integration to external asset/facility management systems), and more.
Different stakeholders across a project or asset’s full lifecycle, such as all the examples above living in the data as a defensable record of actions, decisions, capital assets, and more for every need of an Owner-Operator.
Enable 4D workflows
e.g., Cross-link data with GeoTag links and use Categories to track different epochs of work
Improve data robustness and value
Avoid limiting available information for stakeholders
Enable terminology alignment with linked Asset/Facility Management systems
Reduce human error with pre-defined lists for category values to ensure consistency, searchability, etc.
Technical Details
Each project can have unlimited categories. Categories are created, edited, or deleted within the Category Manager, which is found in the project’s “Categories” page:
Categories are customizable, including the order in which they are displayed. The top 3 categories listed (and displayed above the “Default on every GeoTag” line) will be the 3 categories always displayed by default when creating a new GeoTag to efficiently select the most common Categories.
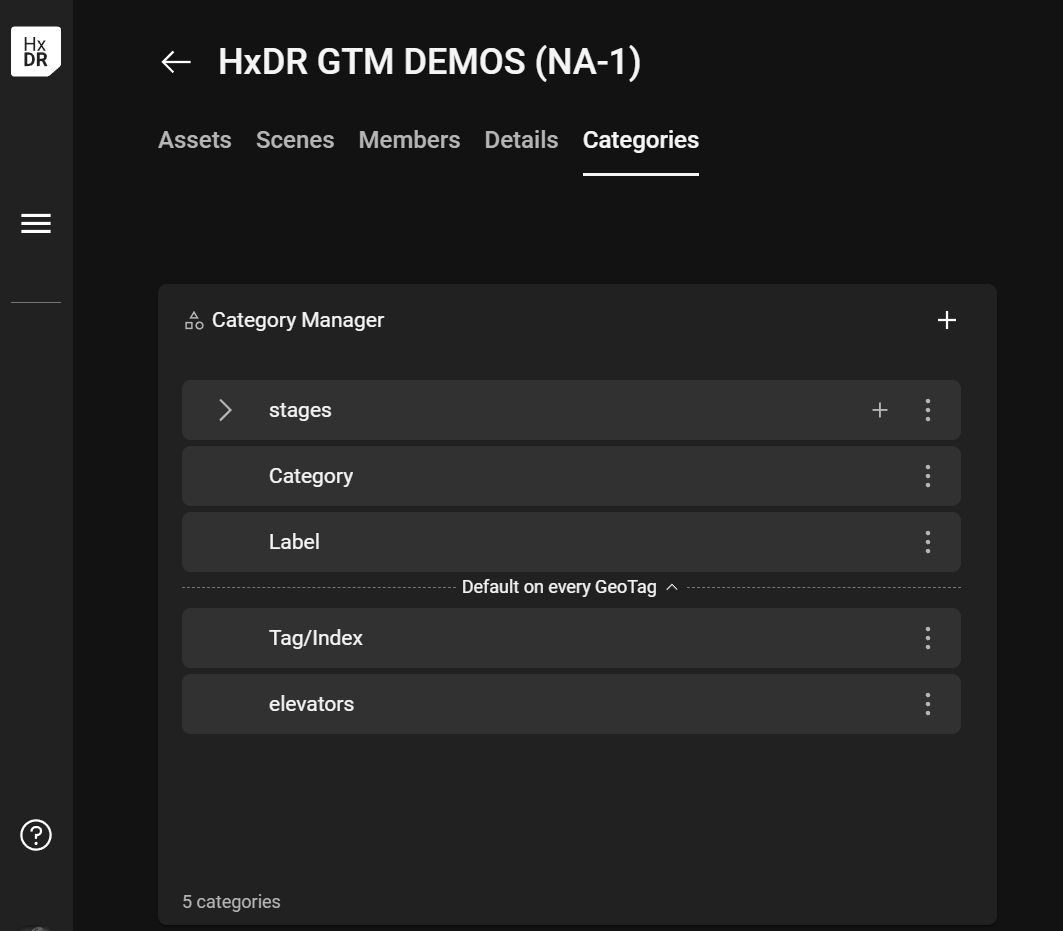
A project’s “Categories” page, where the Category Manager can be used to define unlimited, unique Categories.
Category contents
A category includes:
a name
a value
A category can be one of two types, which defines the category’s value(s):
Text category
The category’s value is a free text field (i.e., user-entered text strings).
Every time a user assigns a text category to a project GeoTag, the user will is required to manually enter text into the category’s value field. Thus, each GeoTag with the same text category will have a unique category value for that GeoTag (even if the same text is entered for the text category in multiple GeoTags).
List category
The category’s value will be selected by the user from a defined list of values.
Lists can have unlimited values, but only one item in the list an be chosen when a category is assigned.
The order the list values are displayed to the user is customizable.
The list is defiend in the Category Manager.
Each item in a list can have a colour associated with it to provide a quick, visual cue about the category(ies) assigned to a GeoTag.
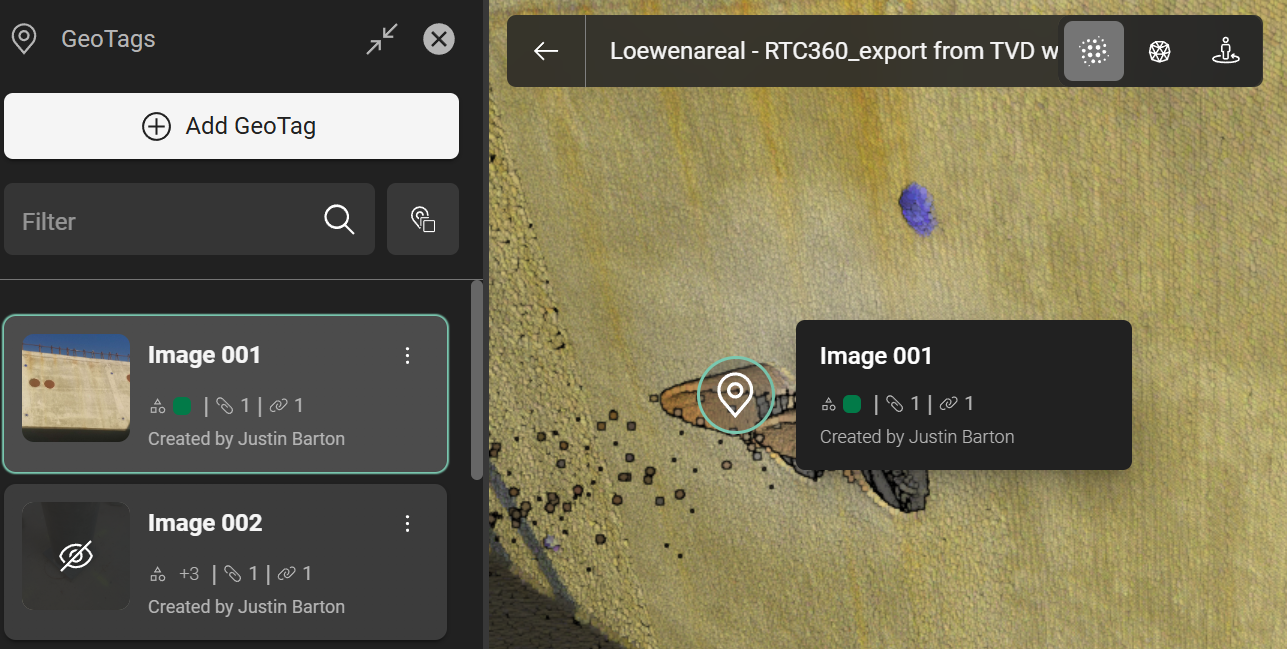
A category of the list type where one of the list’s value is assigned green. Green is visible in both the hover-over tile in the 3D canvas and the GeoTag tile in the GeoTag tab as a visual cue for that list value.
Category Manager
Currently, Categories cannot be imported or exported (e.g., as CSV files), nor copied across projects. Categories must be manually created in each project.
To manage a project’s categories:
Open the desired project.
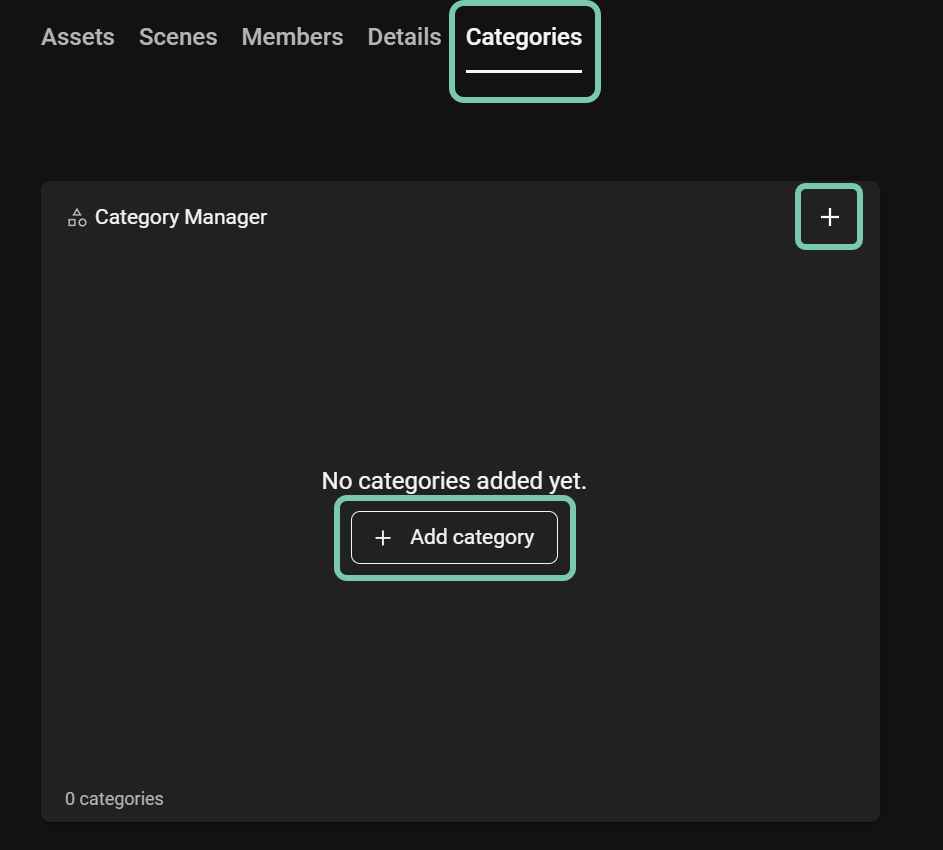
Click “Categories” in the project’s list of pages (i.e., the page list at the top which including Assets, Scenes, Members, and Details).
Click “+ Add category” at the center of the empty Category Manager field, or click “+” at the top right (the standalone “+” will be the method after the first category is added).
Select the type of category
For a text category
Enter a name
Click Save
For a list category
Enter a name
Click Save
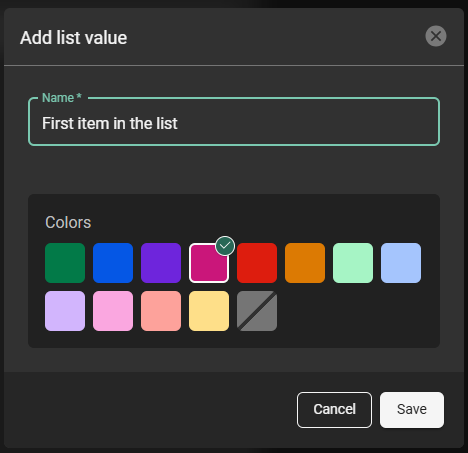
The UI will change to the “Add list value” dialogue.
Enter a name for the list value being added
Select a color to represent the value as a visual cue
Click Save
Assign a name and color to each of the list’s values.
Repeat steps 3-6 until all categories are added.
OPTIONAL: Reorder the display order of categories and/or list values:
Reorder categories: Click a category tile and drag it up or down to re-order it in the list.
The top 3 categories listed (and displayed above the “Default on every GeoTag” line) will be the 3 categories always displayed by default when creating a new GeoTag to efficiently select the most common Categories.
Reorder a category’s list values:
Expand a category list to see the list (click the side-pointing arrow next to the category’s name)
Click a list value tile and drag it up or down to re-order it in the list.