The new GeoTags are the enhanced version of the already existing Field360 GeoTags and embed both functionalities, user experience and workflow improvements.
Datasets
Here there are two datasets containing the new GeoTags: import them to Field360 v. 6.2 and start getting familiar with the new workflow!
Dataset 1: Grugliasco 081124 _NewGeoTags.fafx
Dataset 2: Santa Monica Pier_NewGeoTags.fafx
Workflow
Step 1- Create Categories
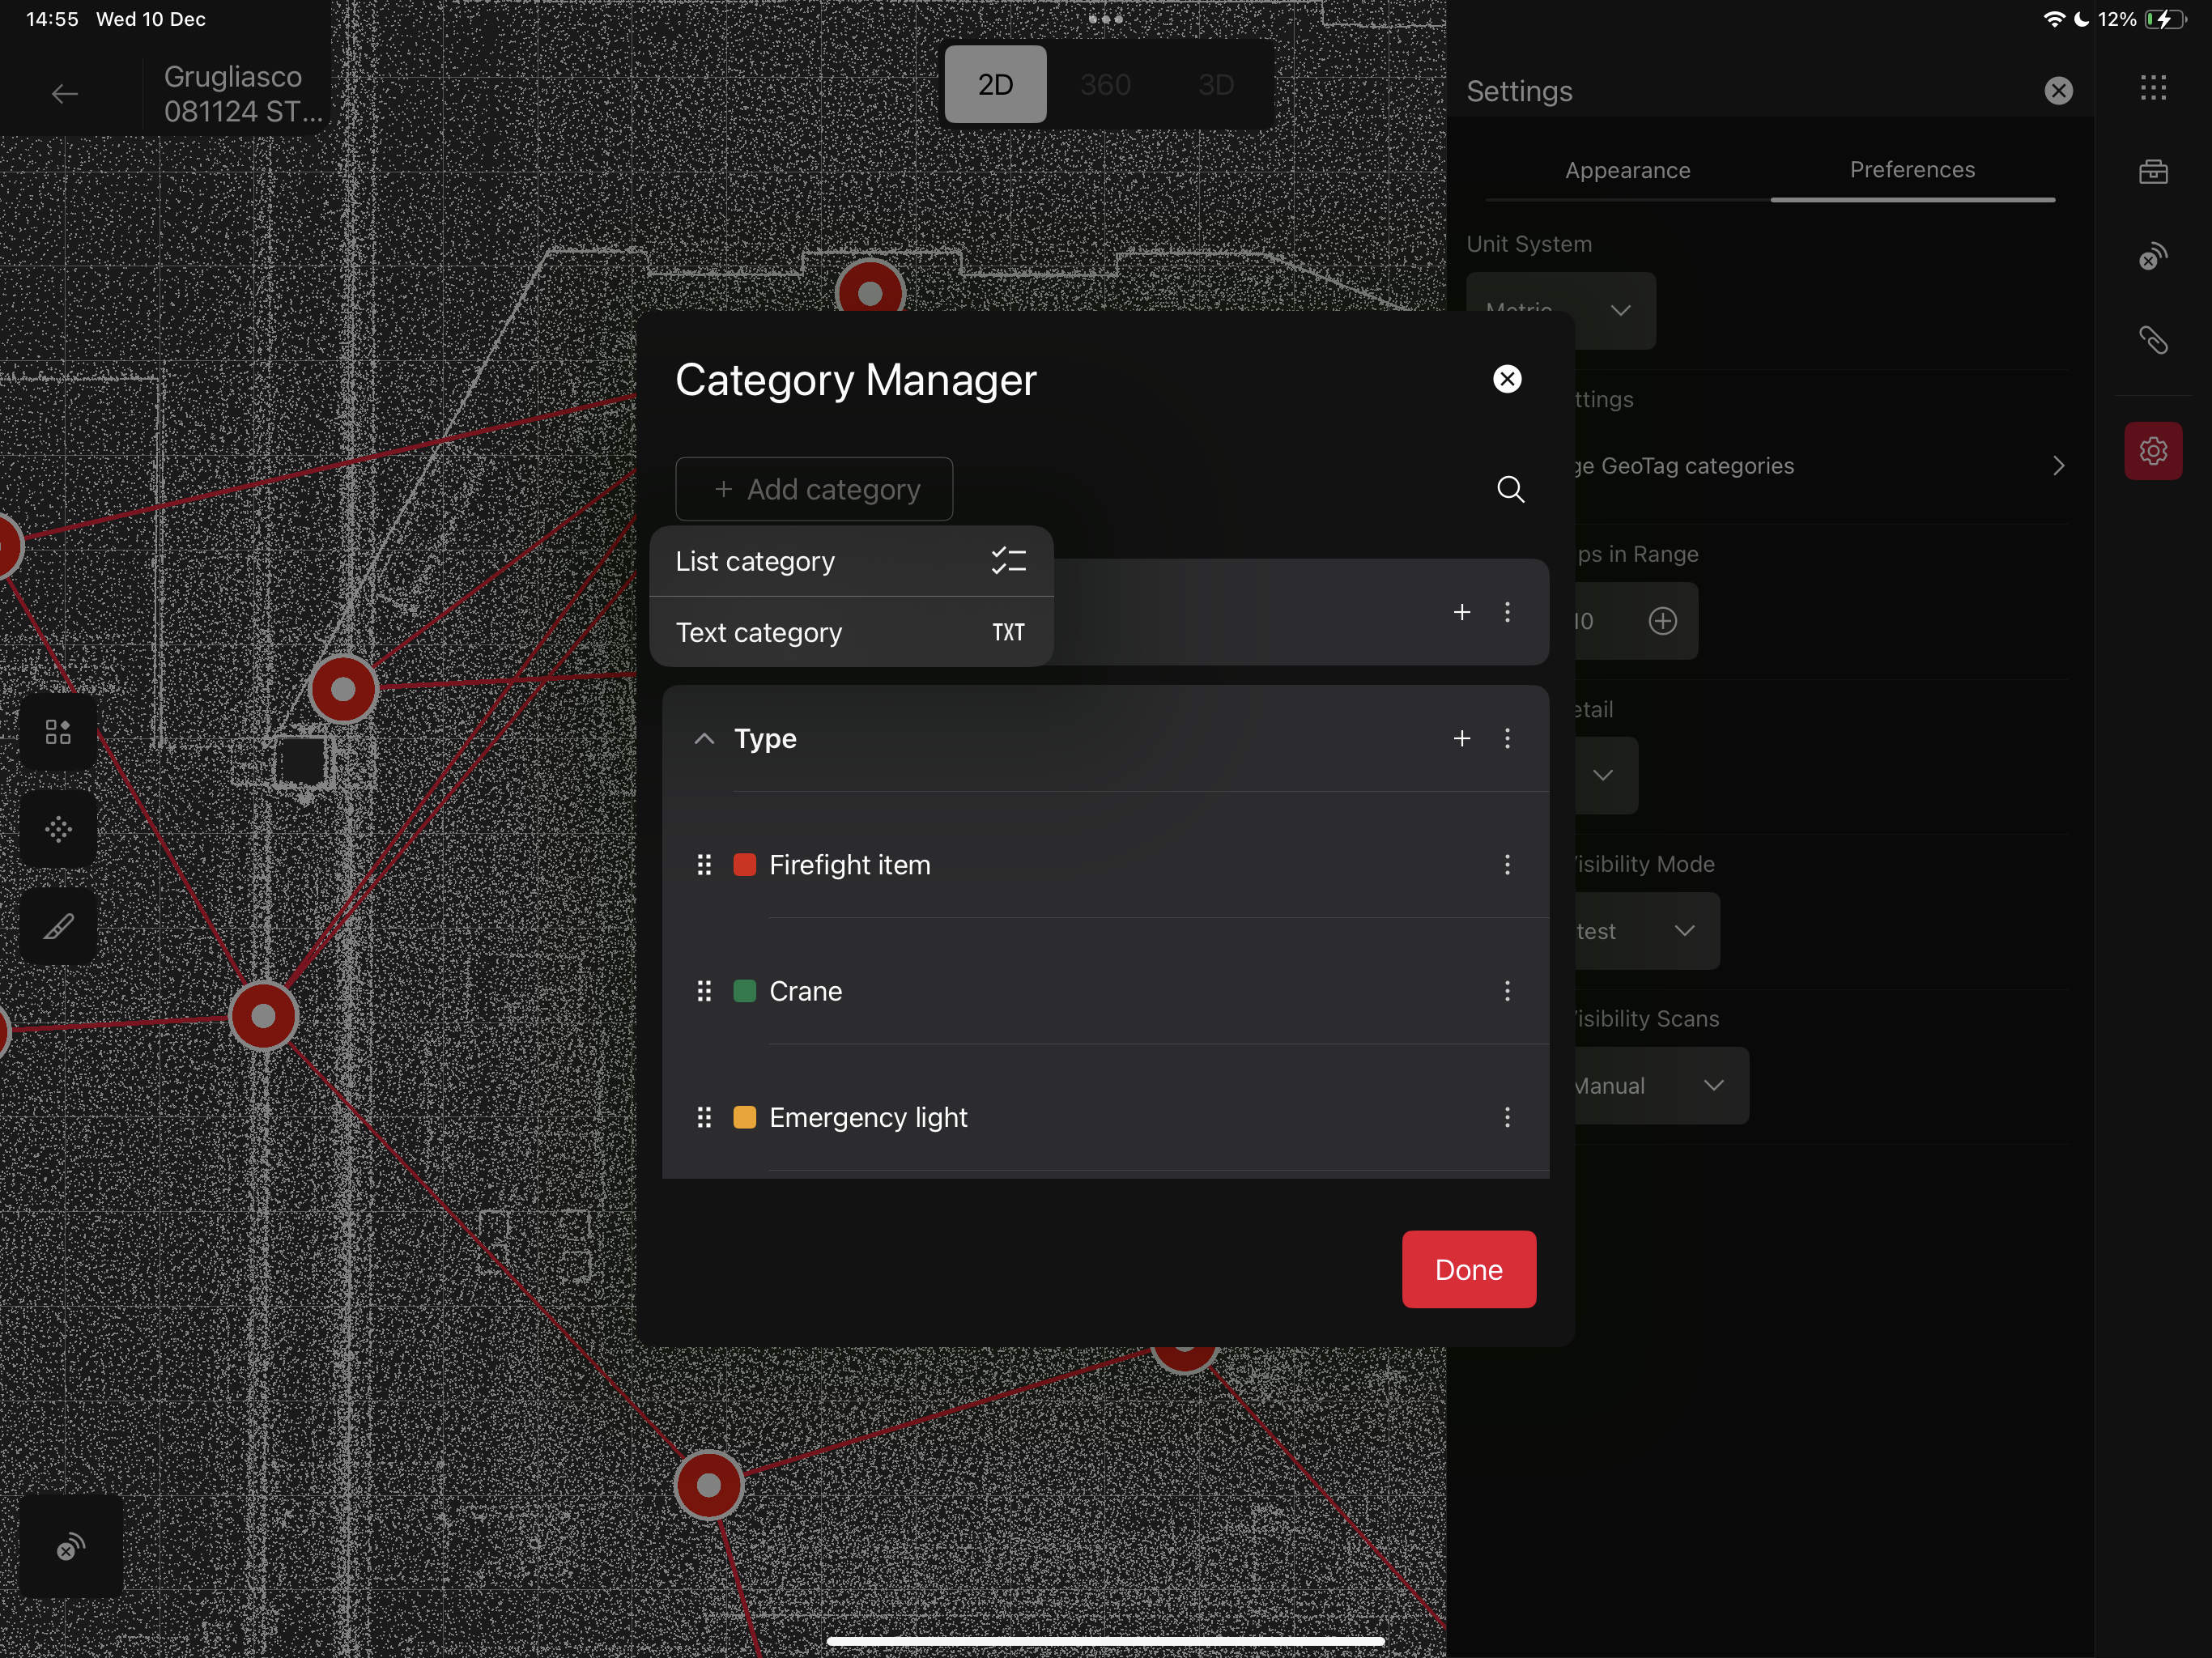
Start to prepare your GeoTags categories in the Job you will make use of them in, making use of the Category Manager.
Categories creation:
-
Open the Job
-
Go to Settings → Preferences → Manage GeoTags categories
-
Add category and choose which type of category you want to create
-
List category:
-
Name
-
Value: click on the + icon and choose the name and the color
-
-
Text category:
-
Name
-
-
Step 2- Create a GeoTag
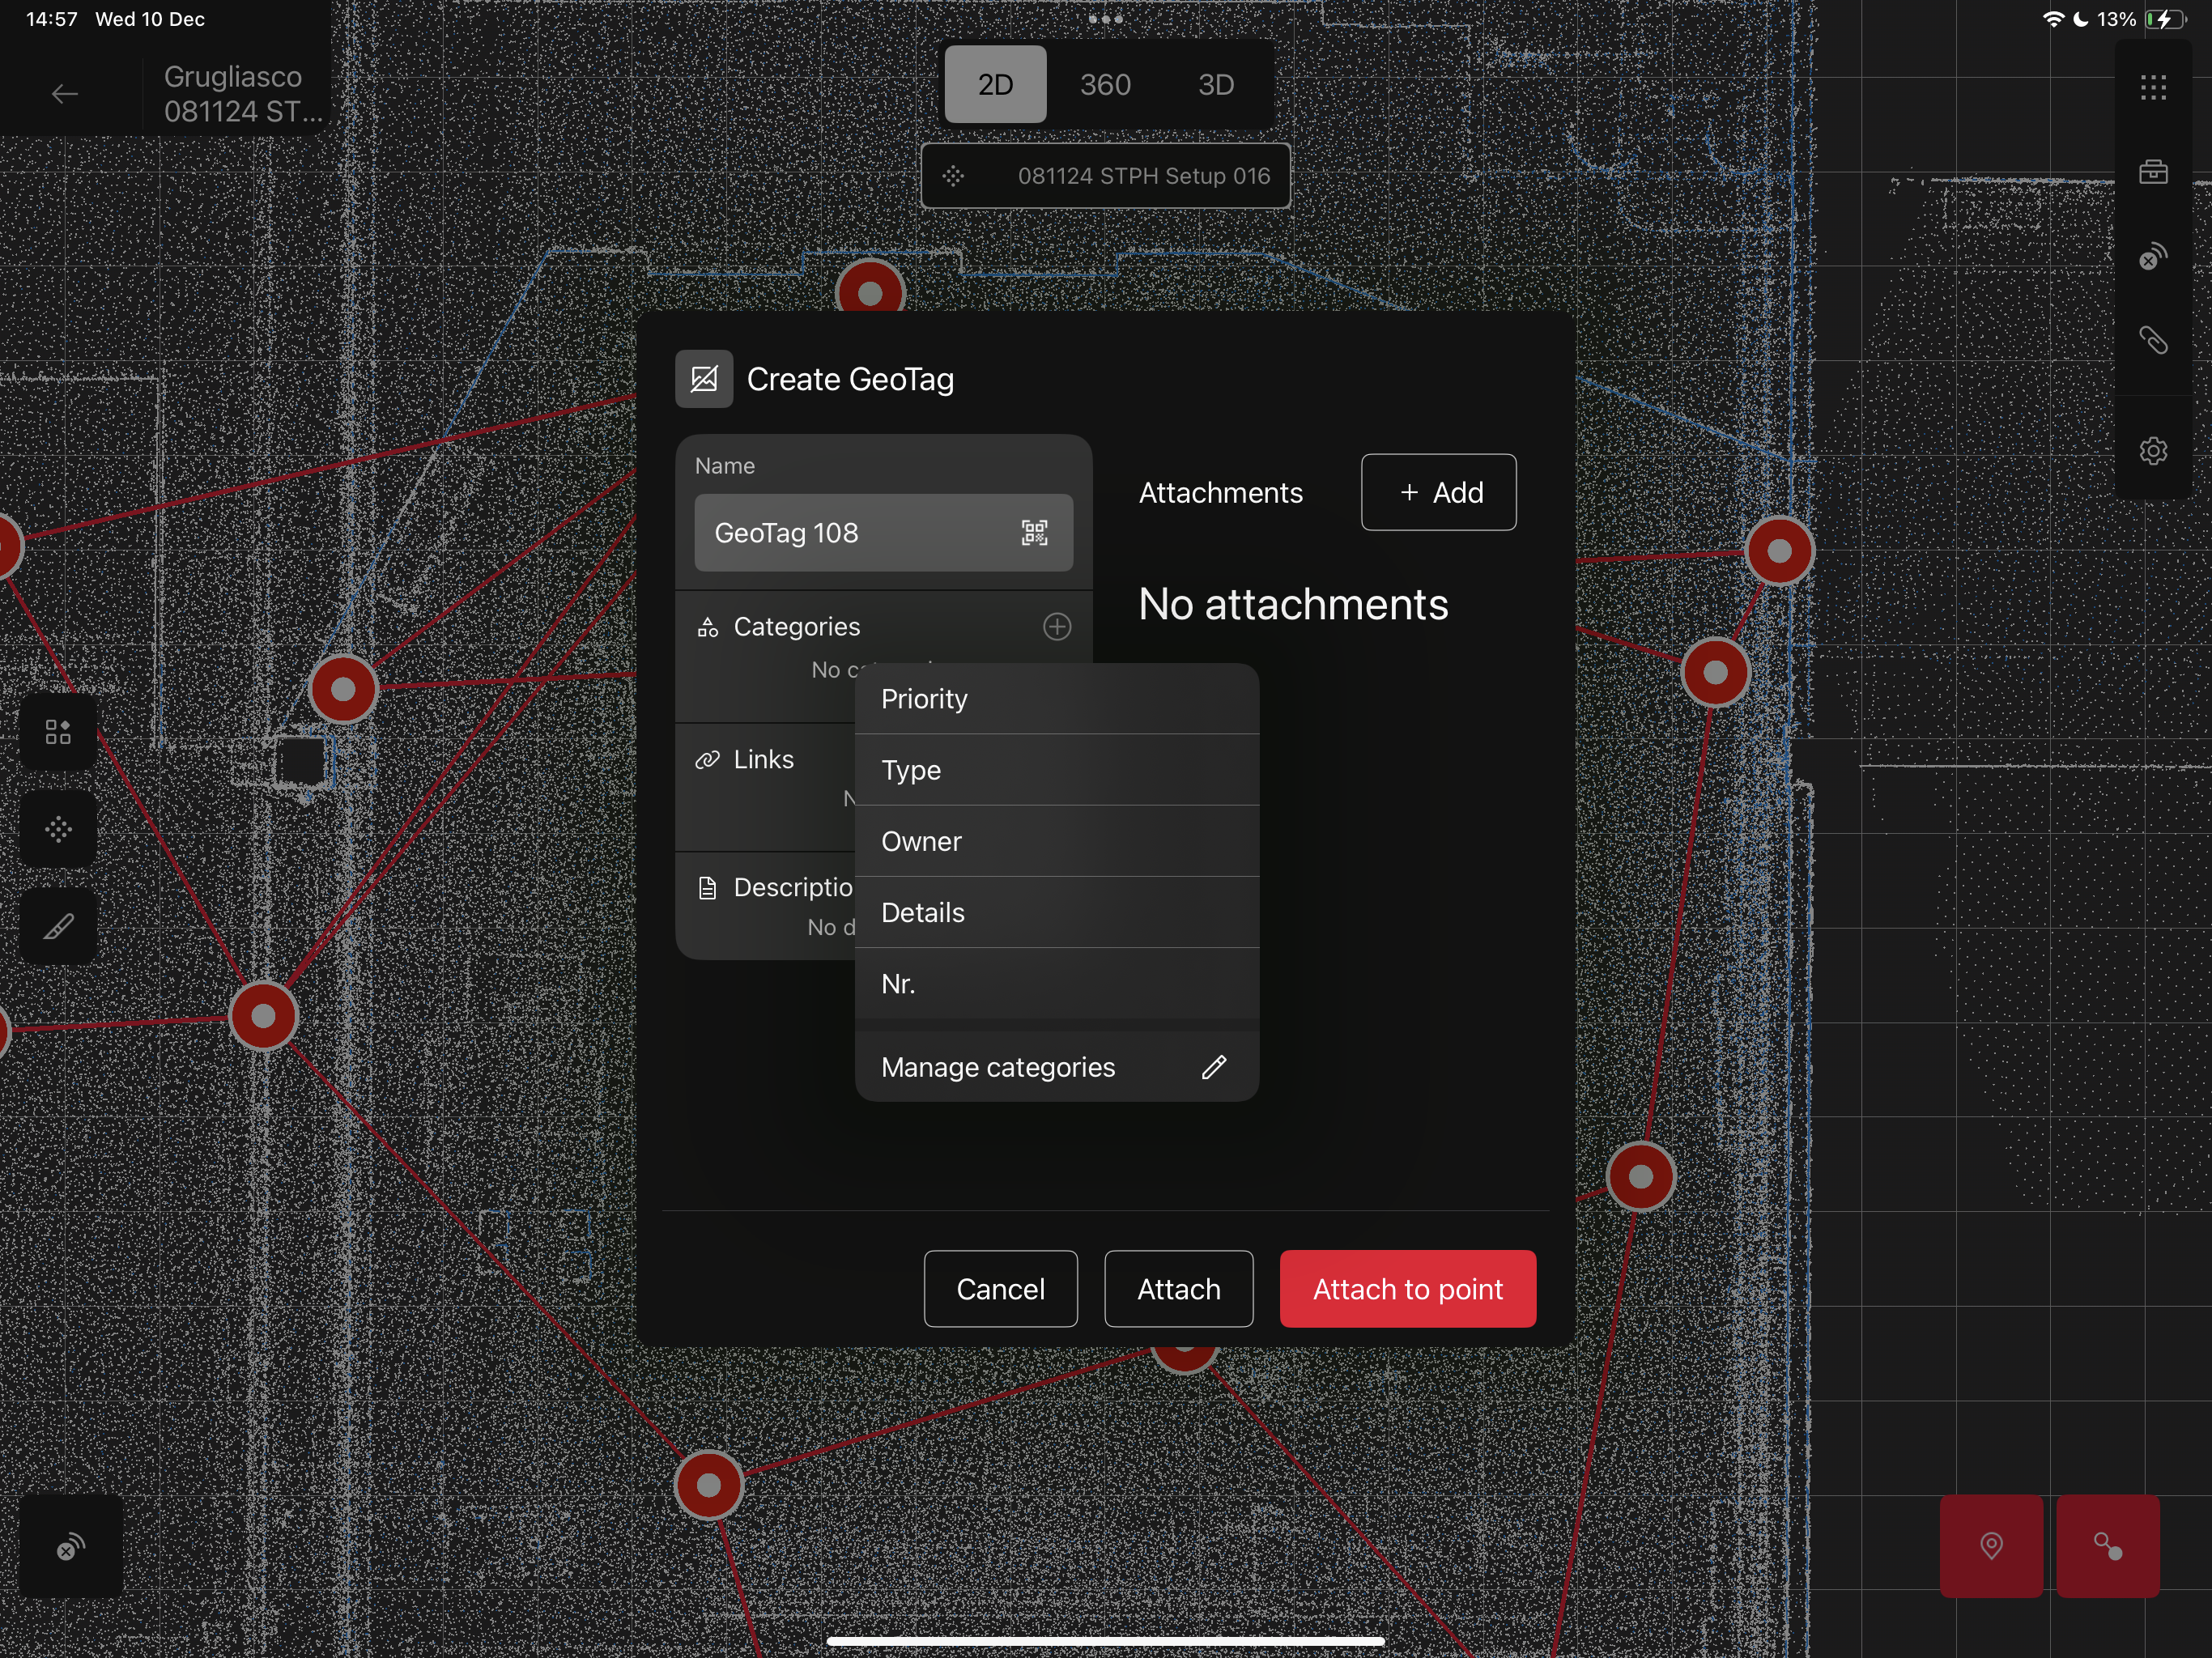
Select one Setup and click on the GeoTag button: you will see the GeoTag creation window, where you can enter:
-
GeoTag Name: you can manually type it or click on the QR code icon to open the camera and scan a QR code containing the name
-
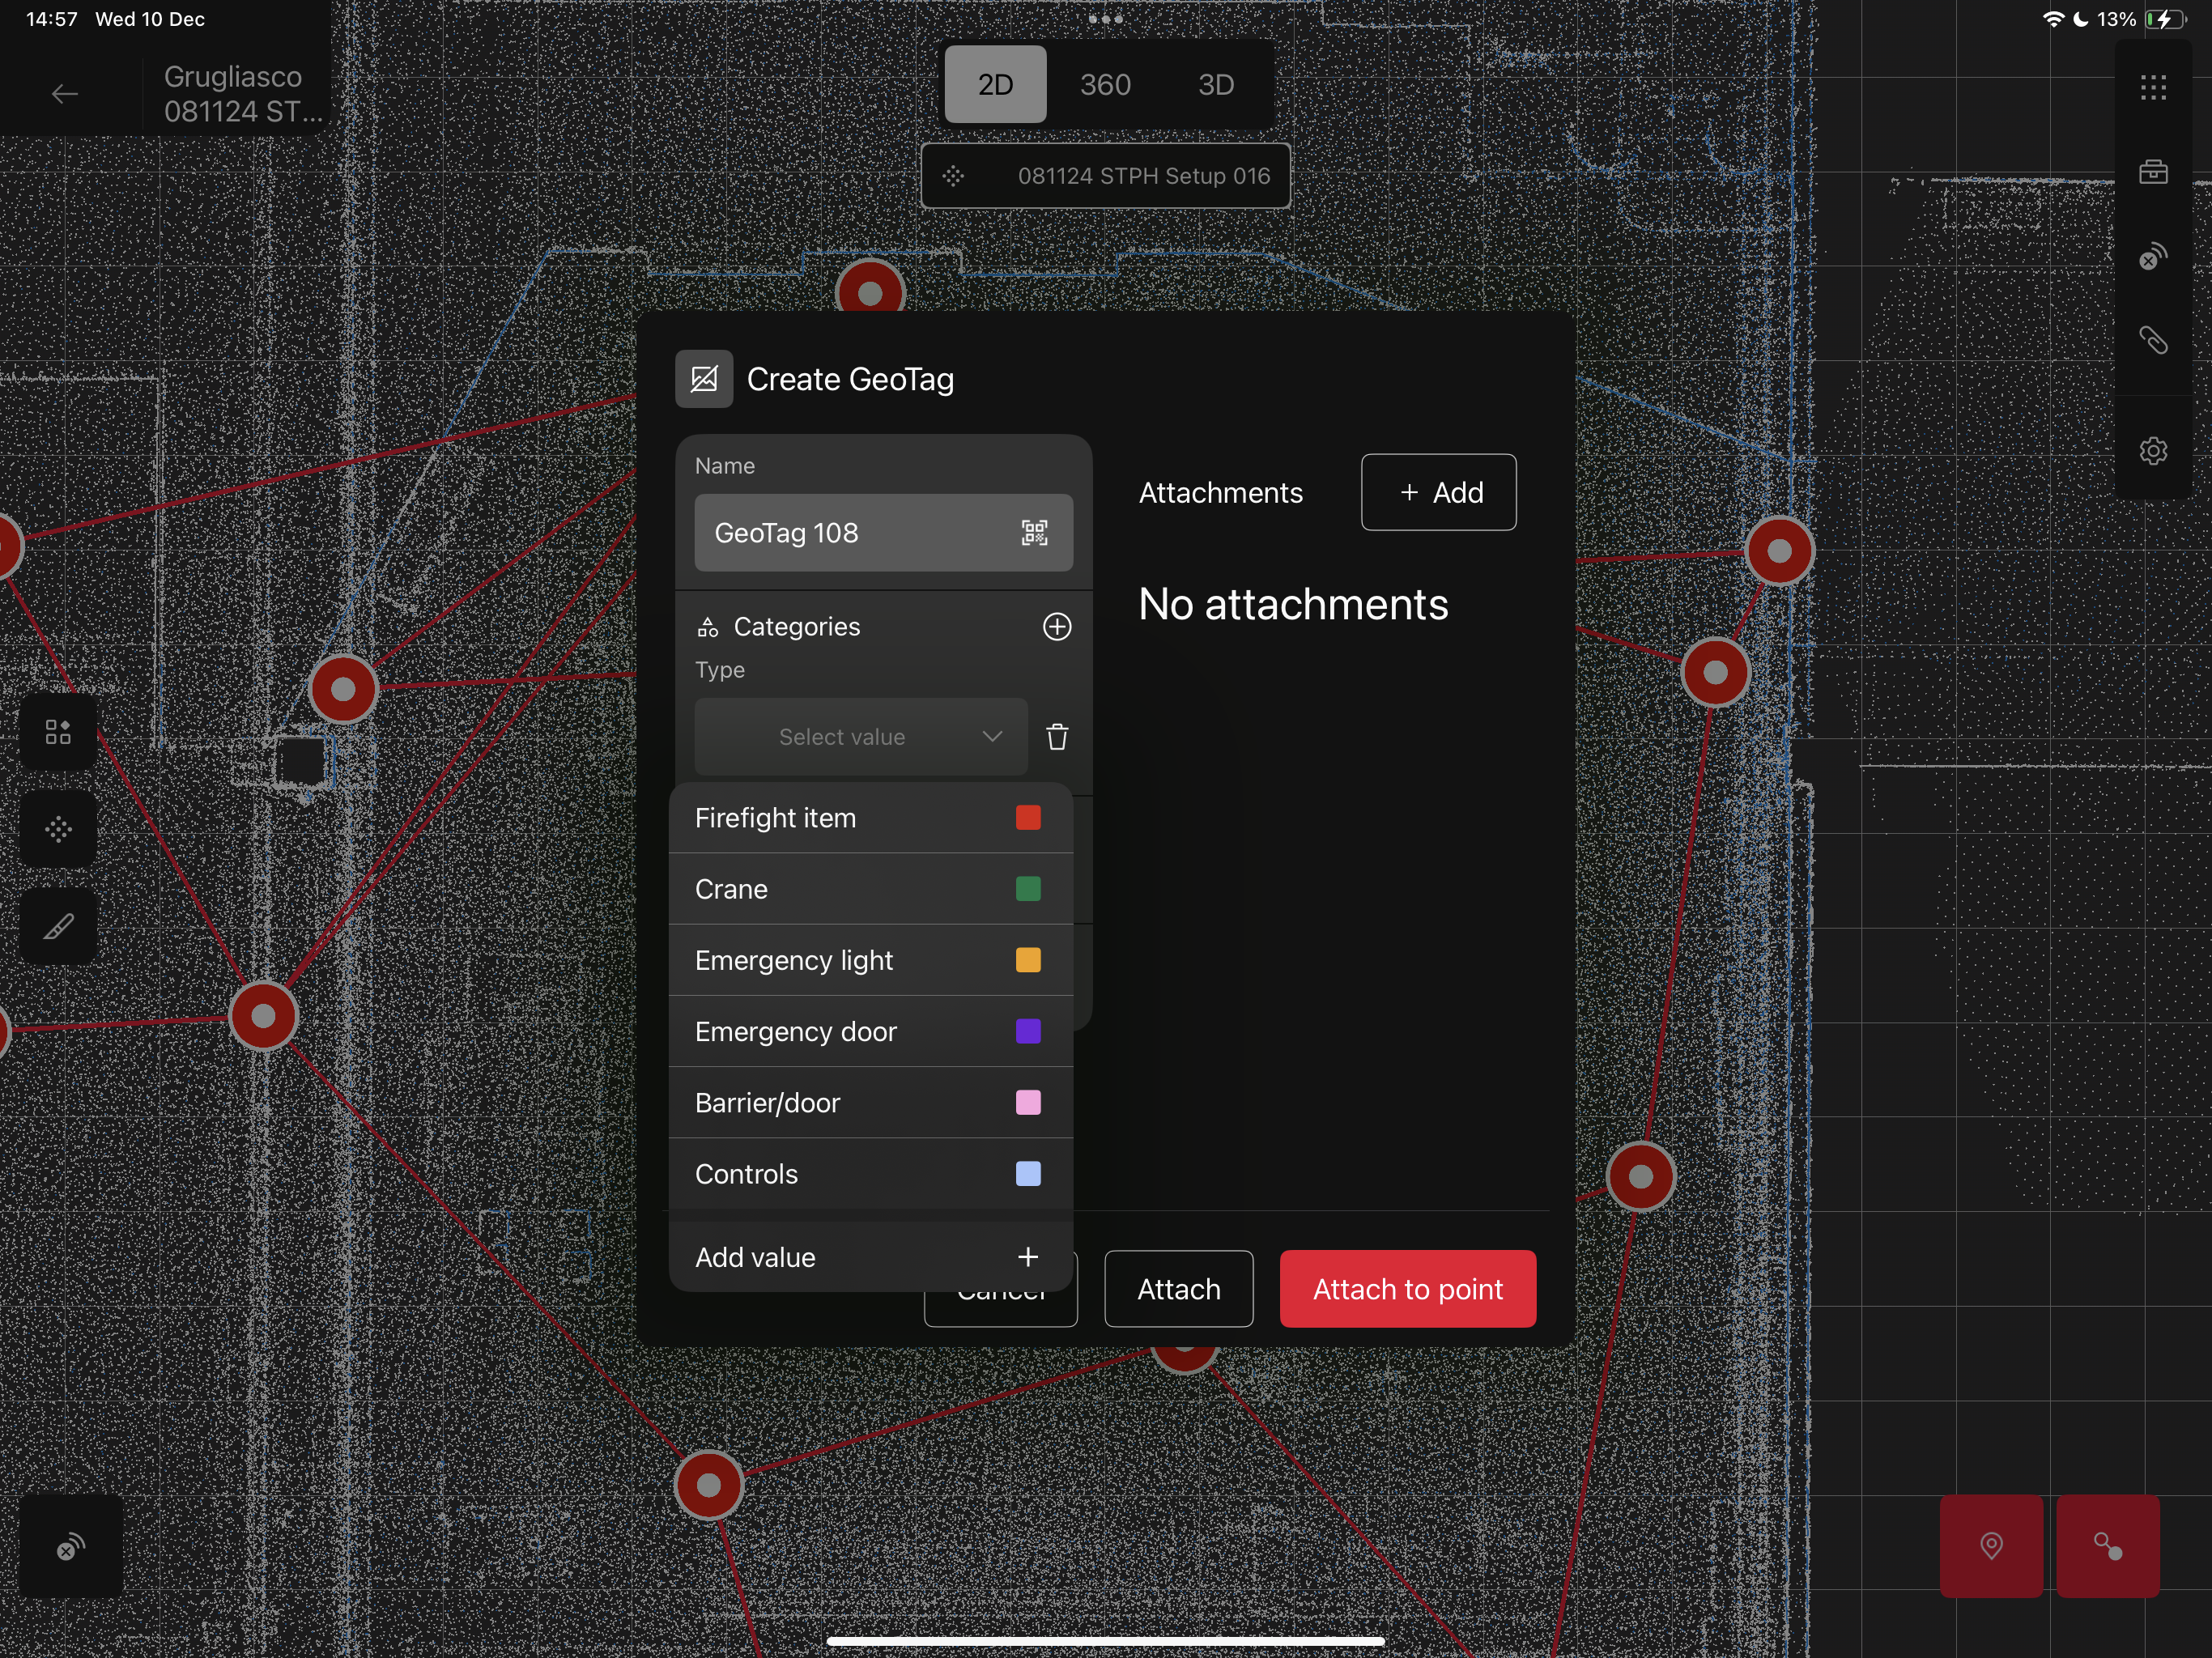
GeoTag Categories: click on the + button to see the list of categories you have created in Step 1 and select the category you want to assign to the GeoTag
The list includes the categories names. As soon as you select one of them, you will see one empty field below the name
-
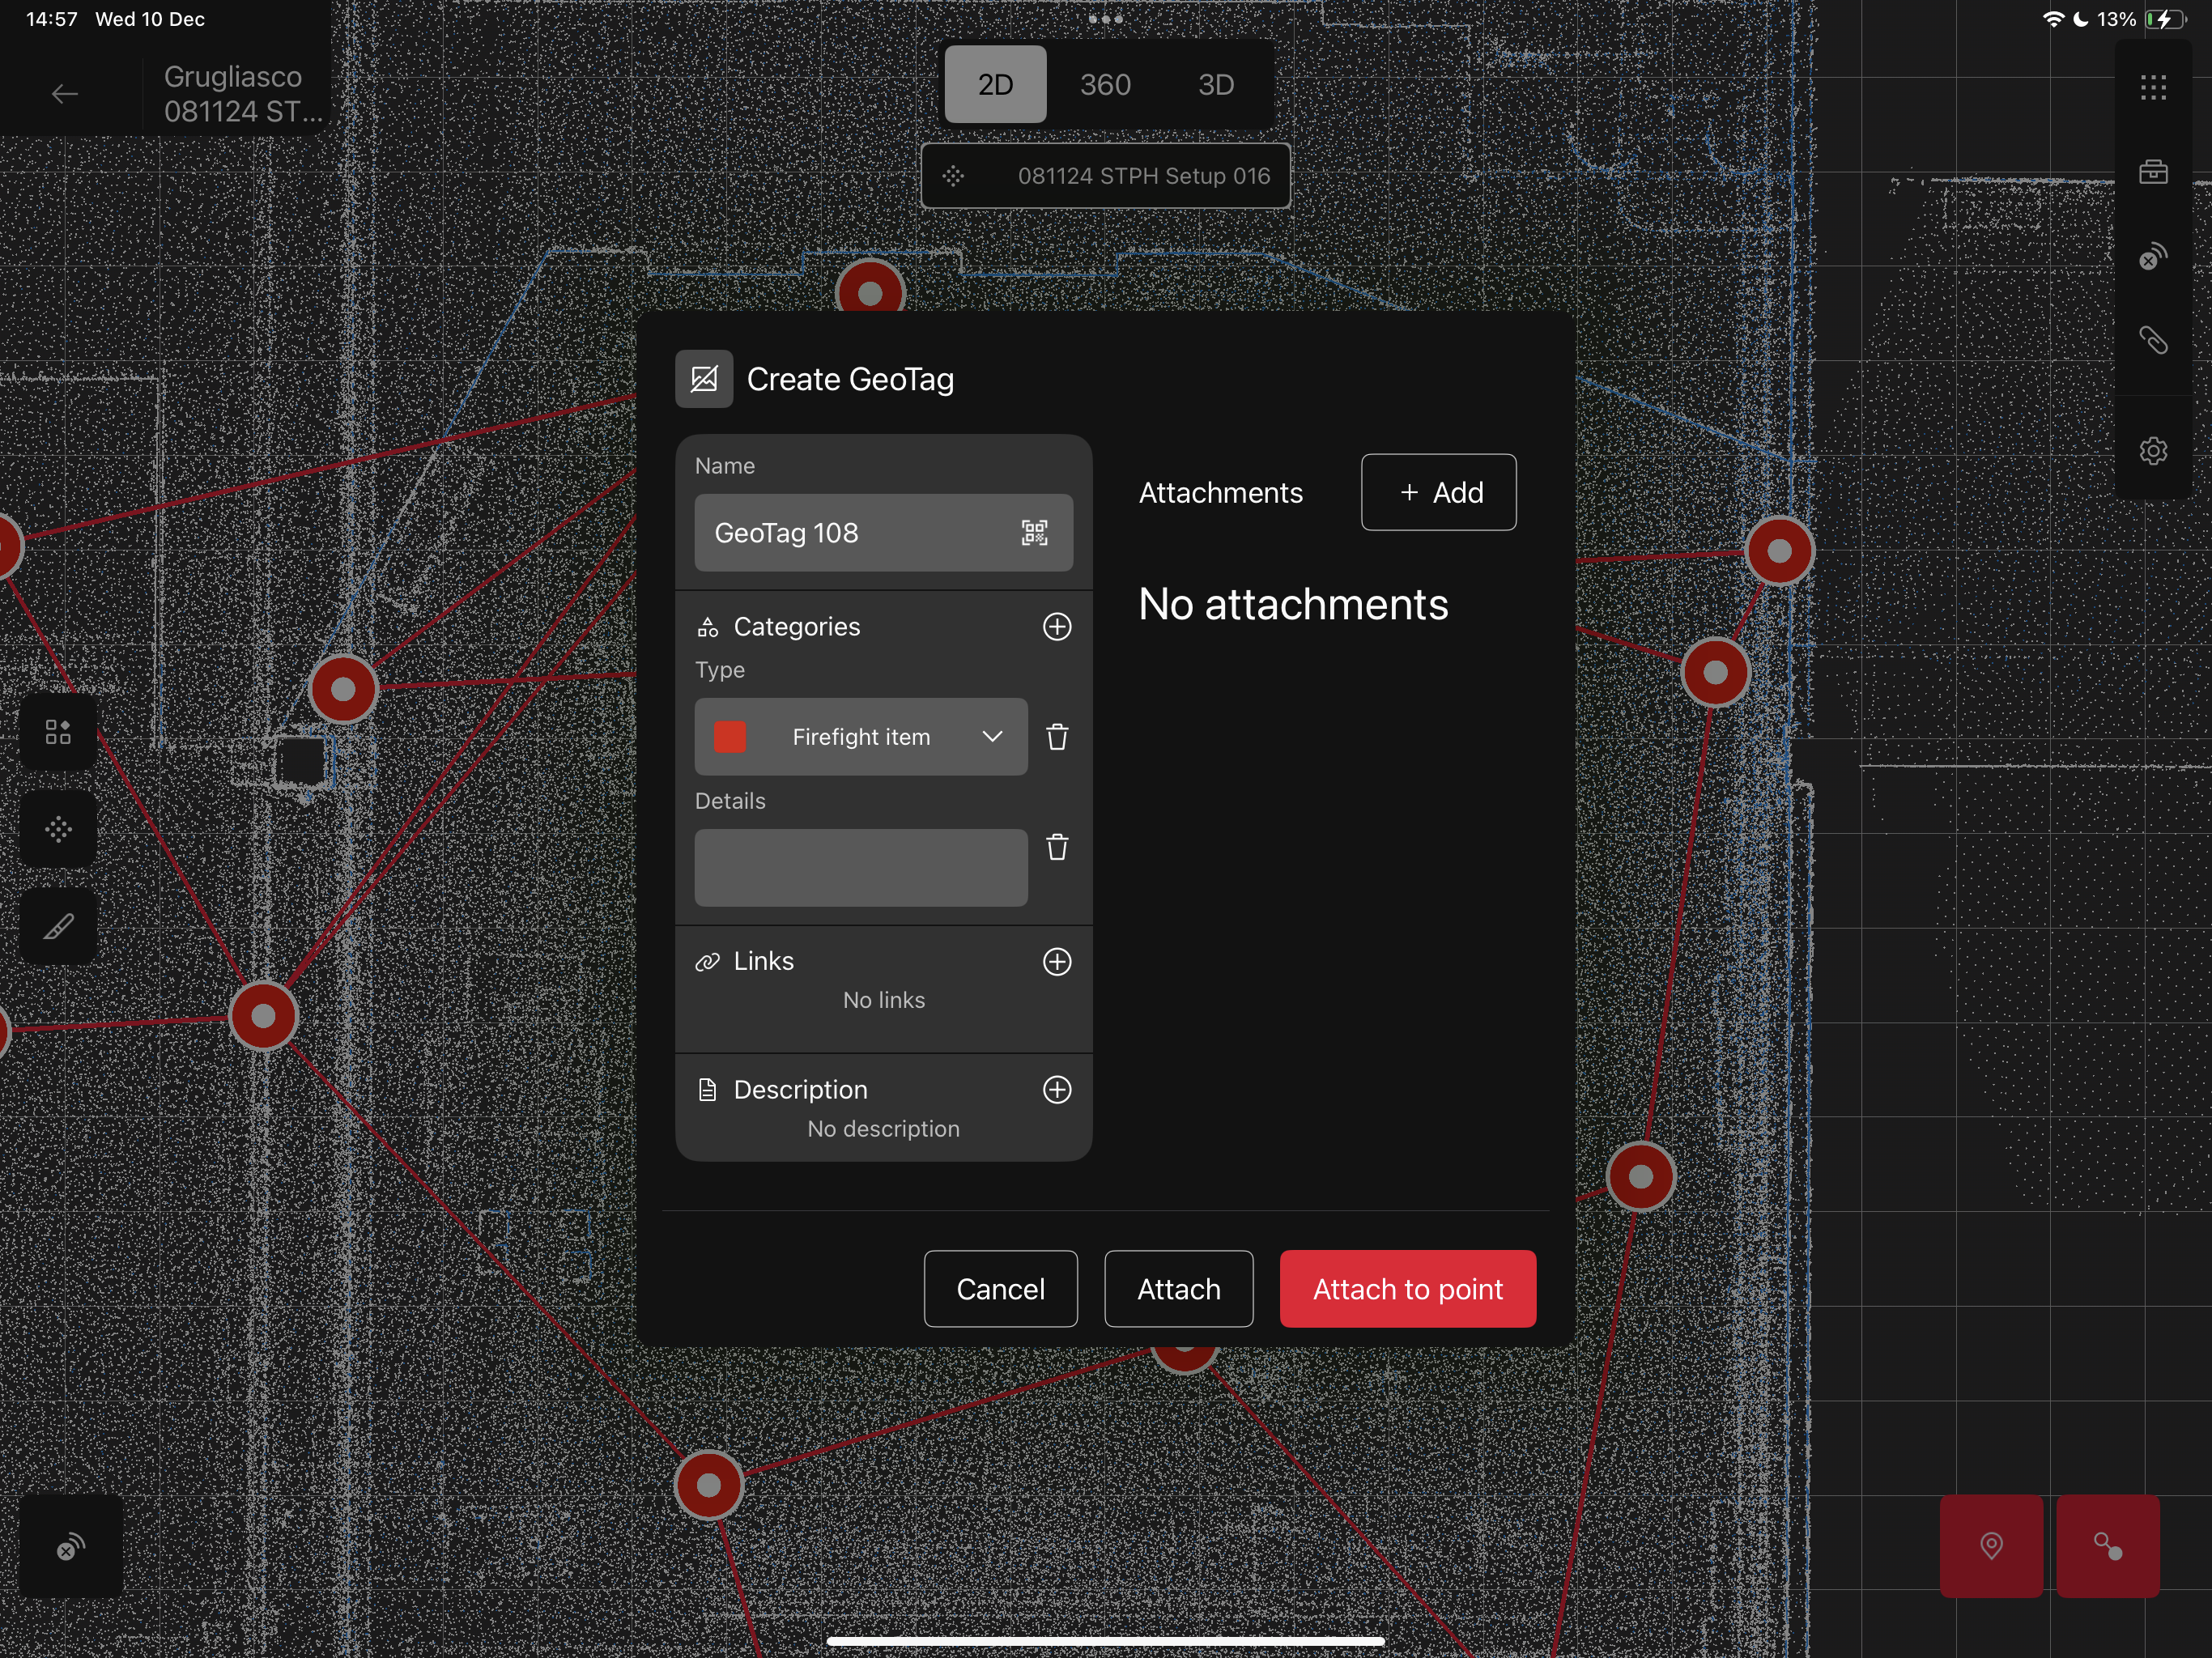
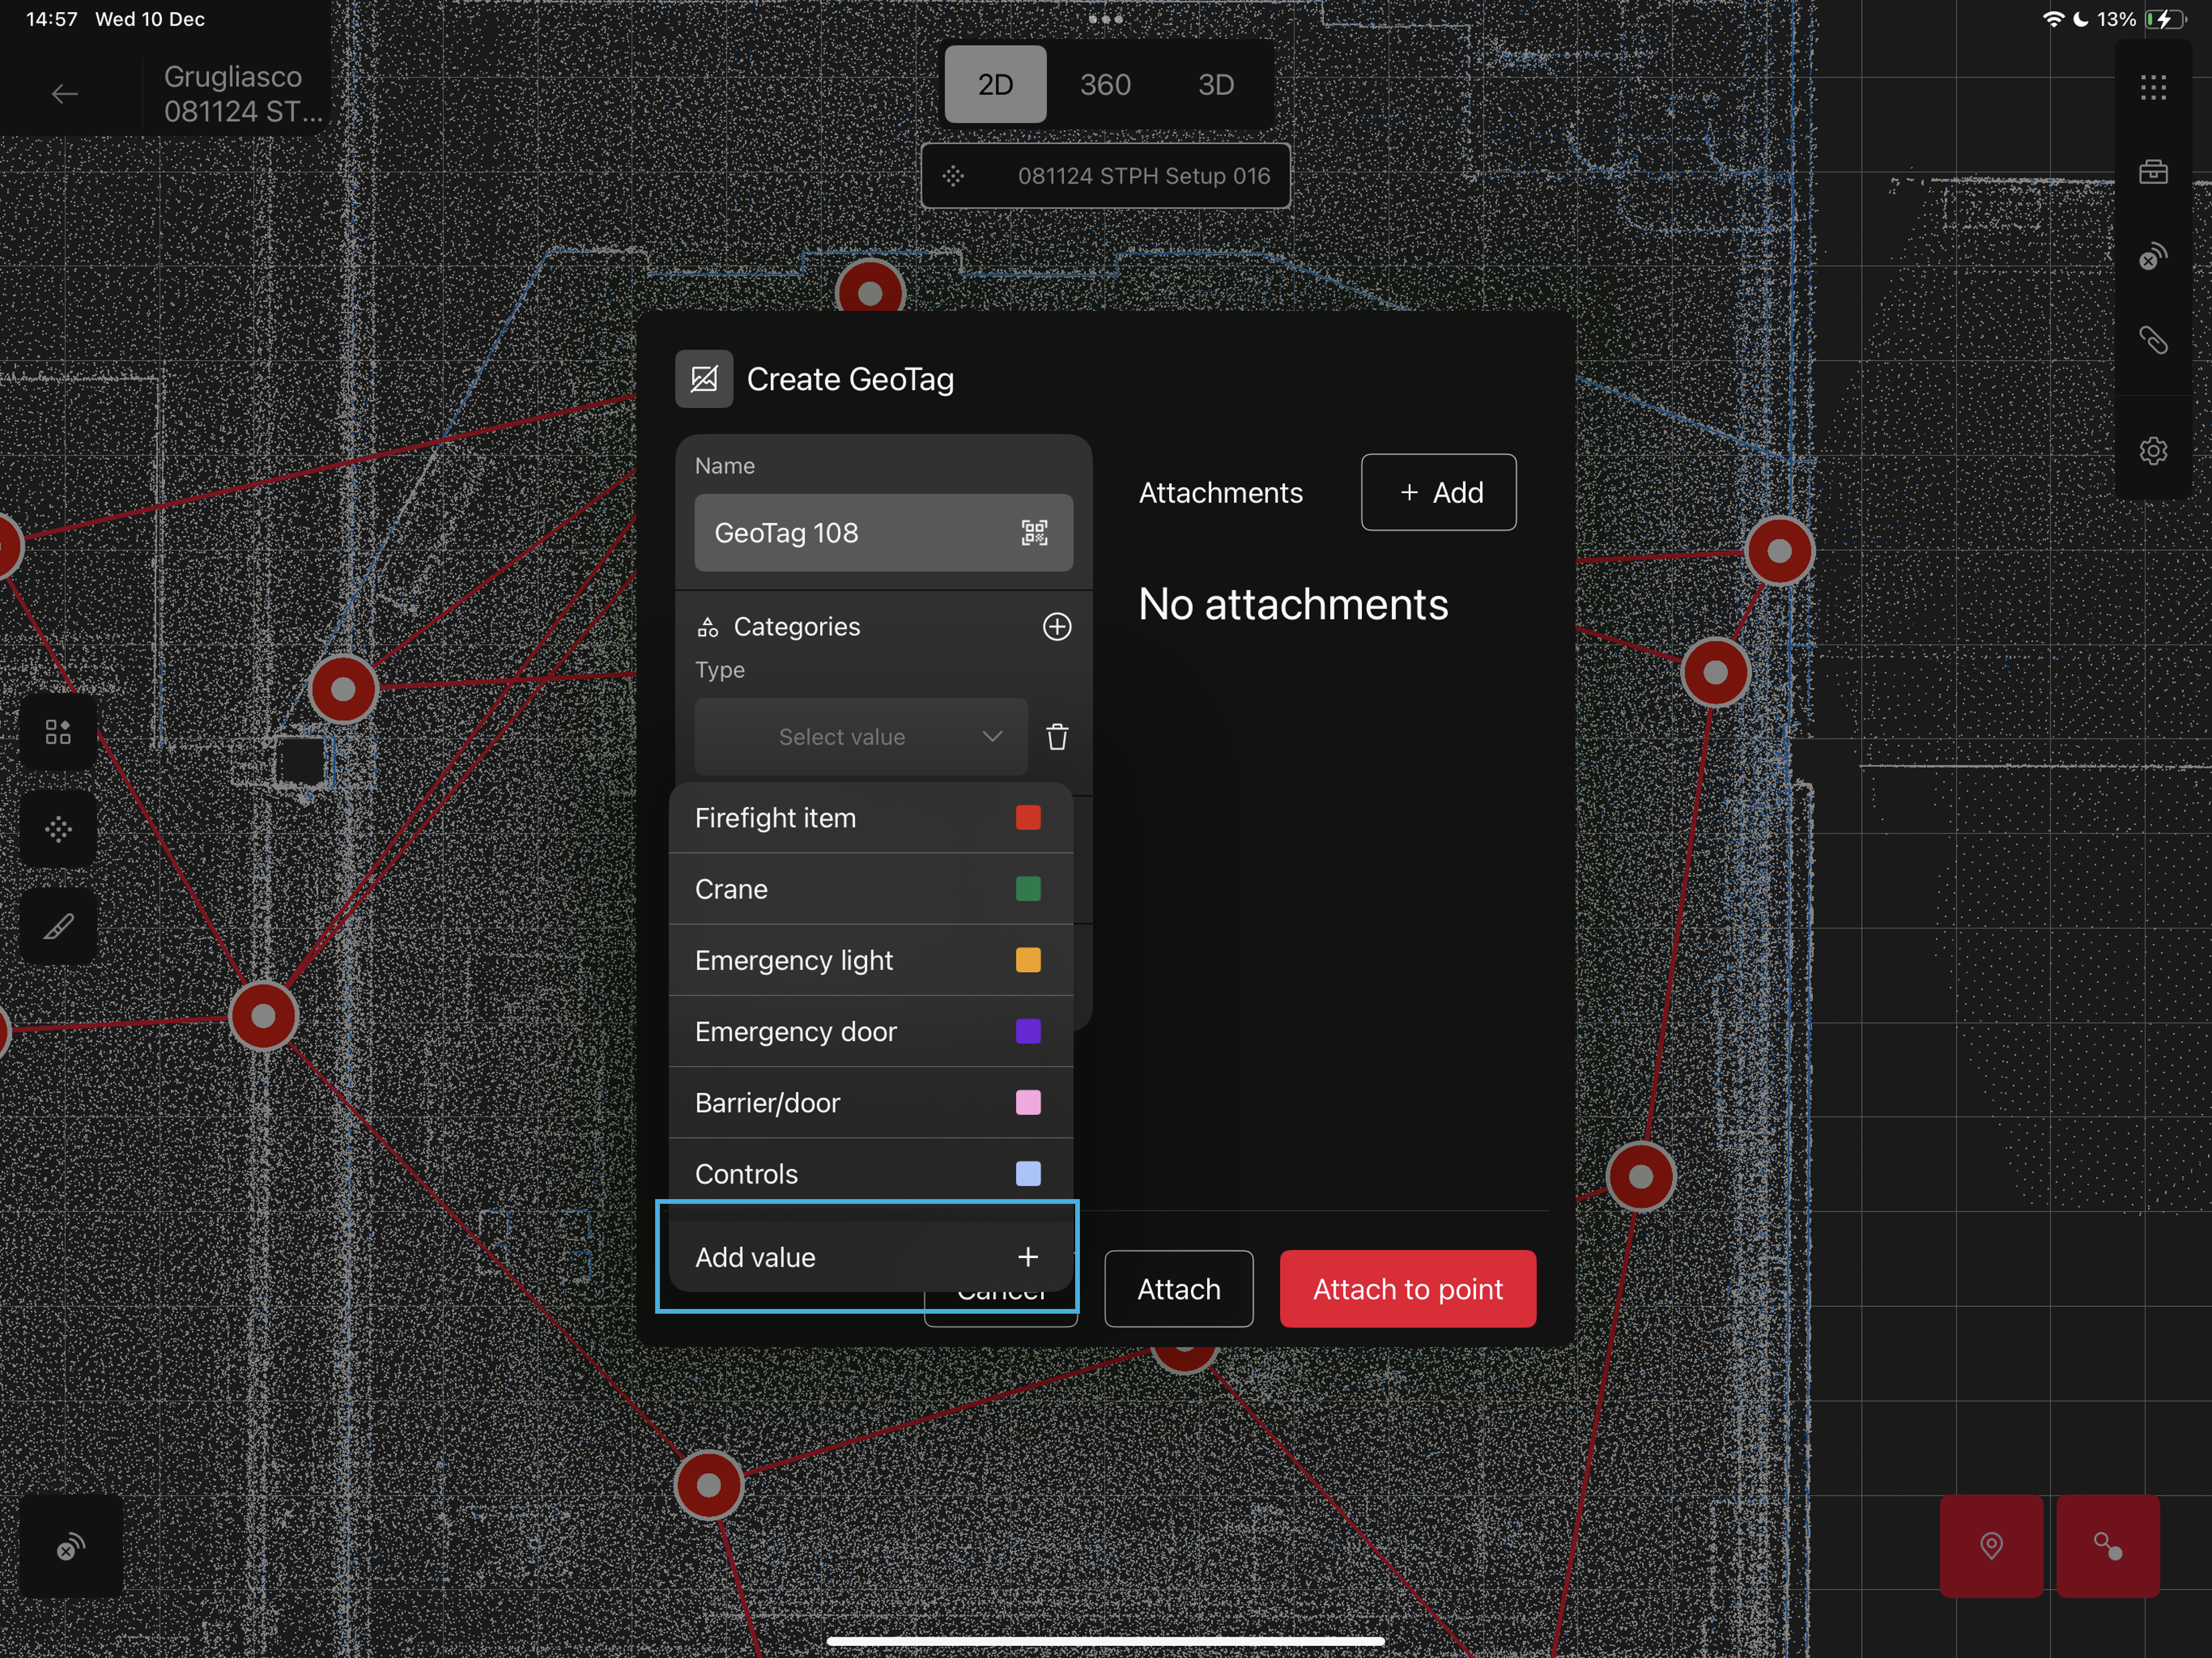
List category: click on the chevron to open the values list and click on one of them to pick the value you want to assign to the category
-
Text category: the empty field can be filled by manually typing any text that describes best your category
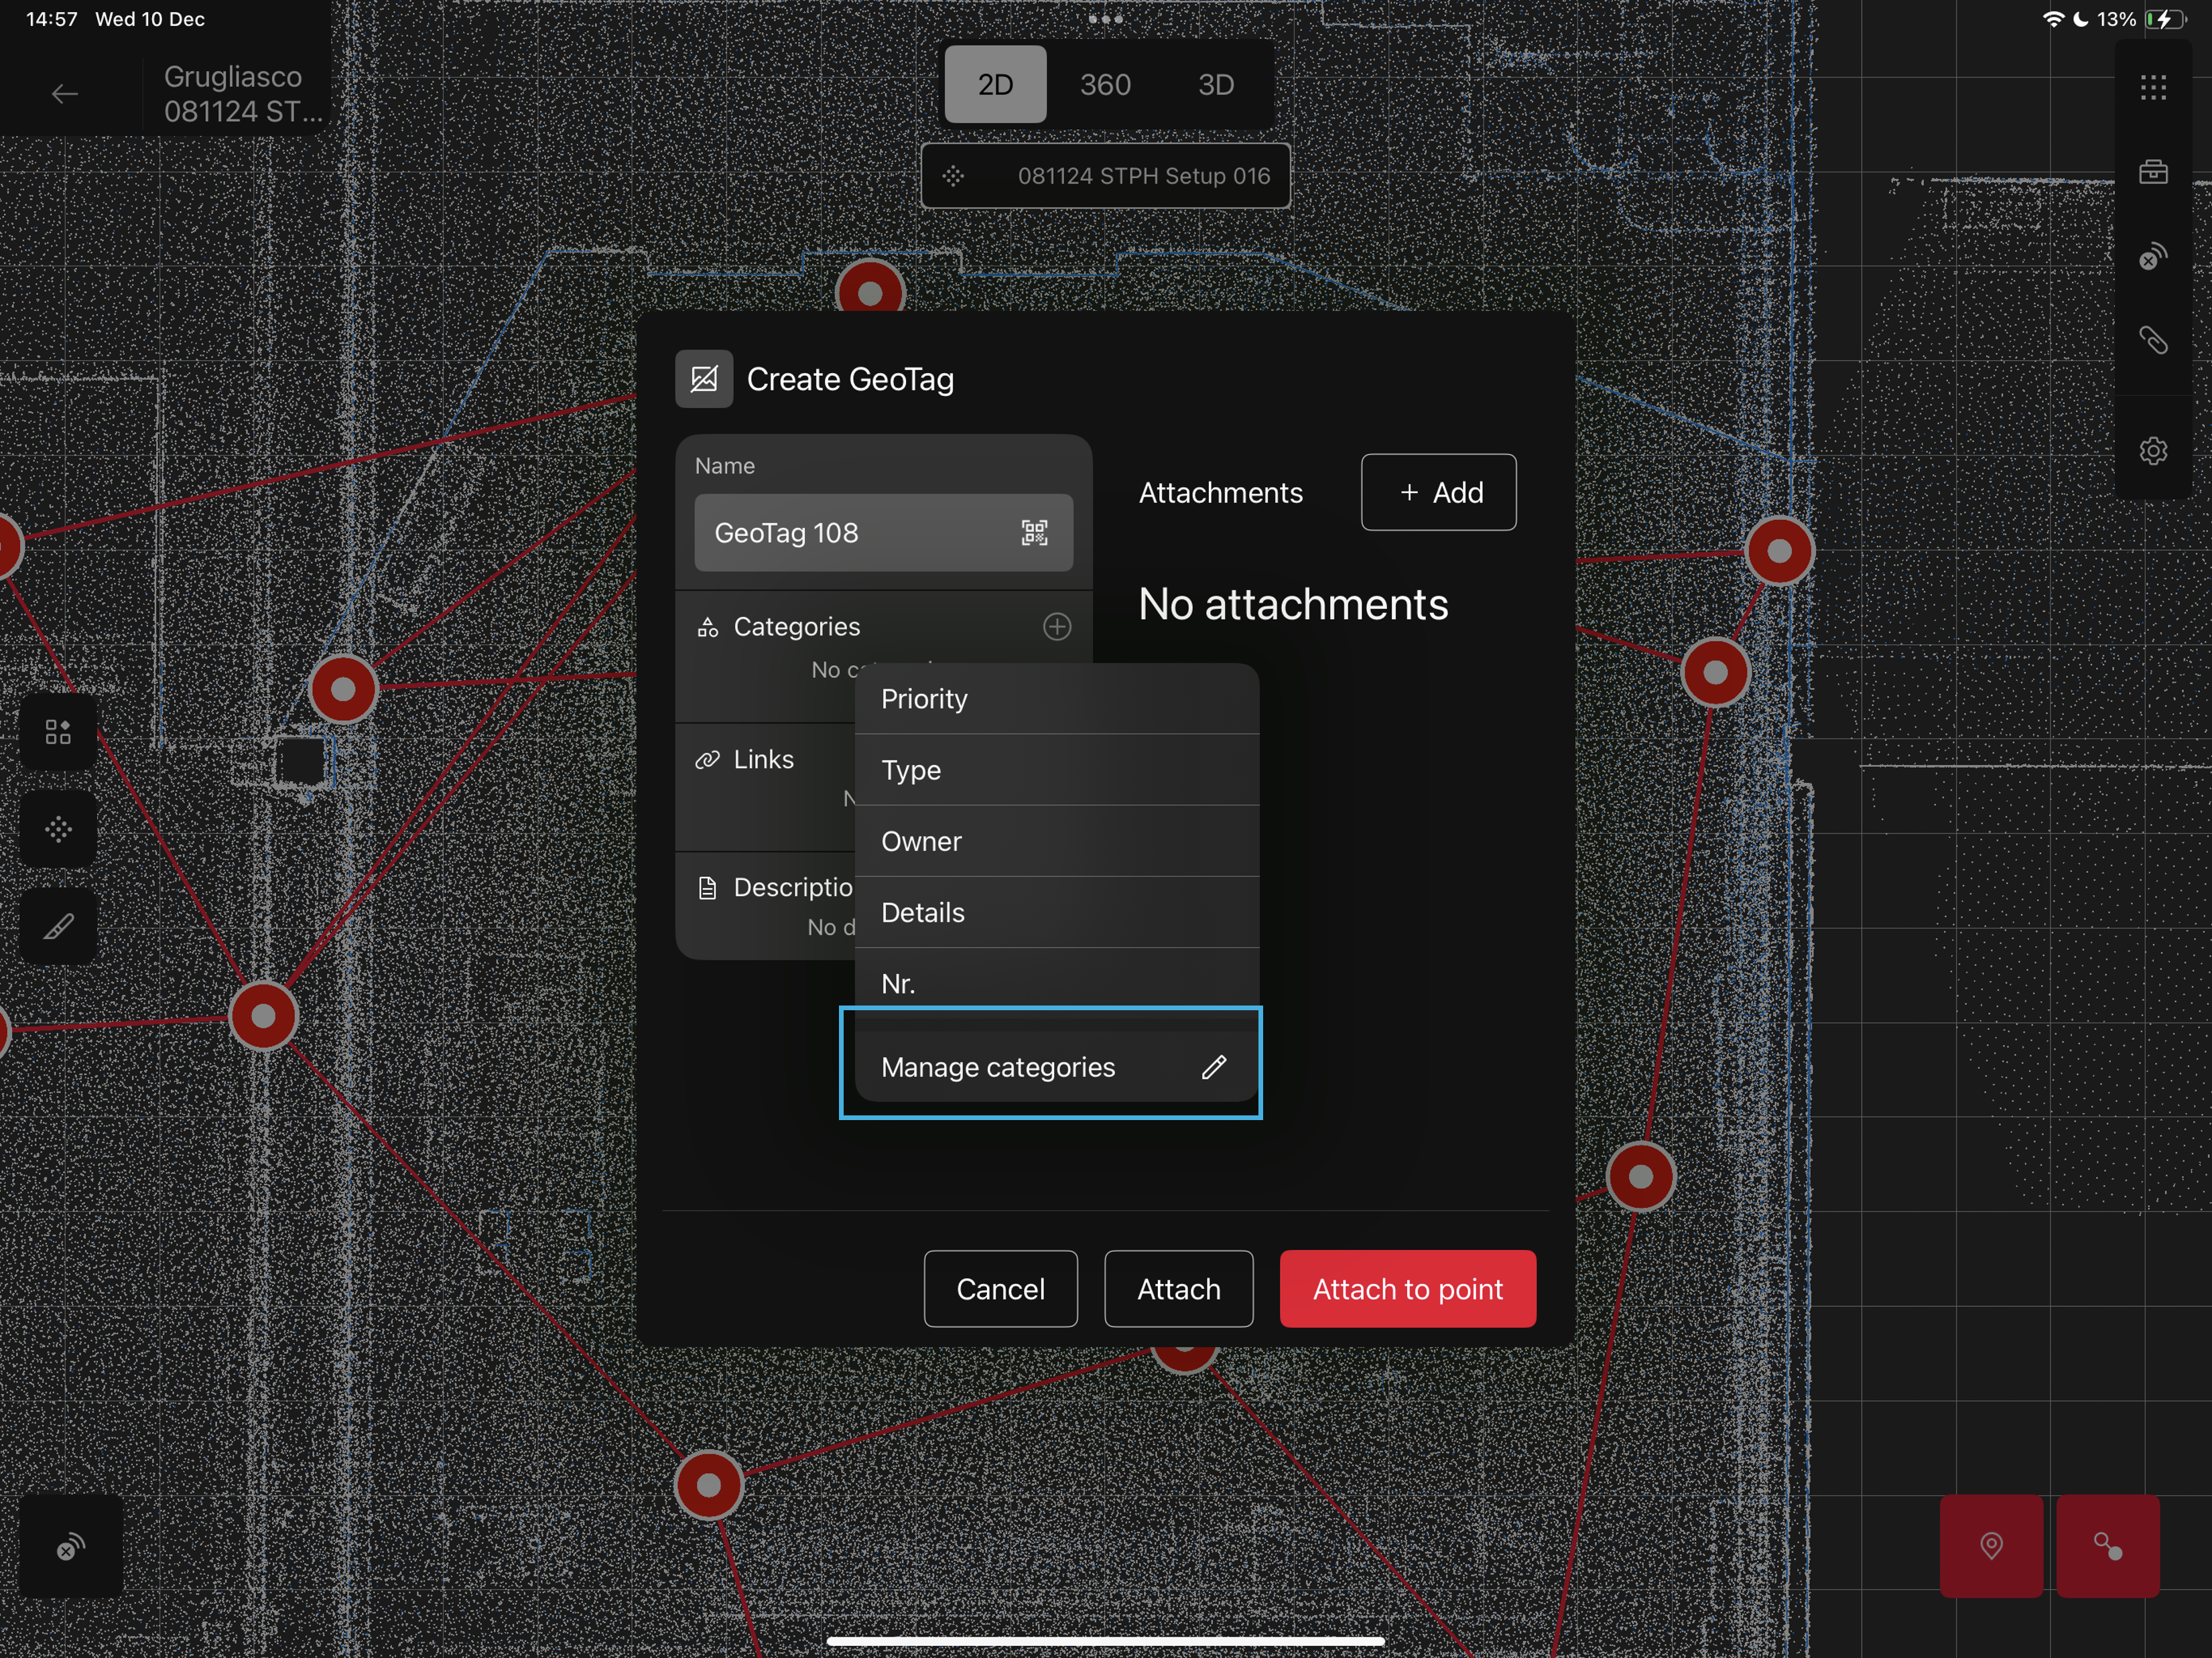
What if I haven’t created the categories in advance and the list is empty or I want to edit the categories/values I see in the list?
No problem, you can access the Category manager without leaving the GeoTag Creation step.
After you click on the + button, at the end of the categories list (in case you have one) or simply as the only button of the list, you can click on Manage categories and access the Category Manager to create new categories, values or edit any of the existing ones
As well, at the end of the values list, there is an Add value button, a shortcut to add an additional value without leaving the creation window.
-
Links: you can enter as many useful URL as you need
-
Description: a free text space where add additional information about the GeoTag
-
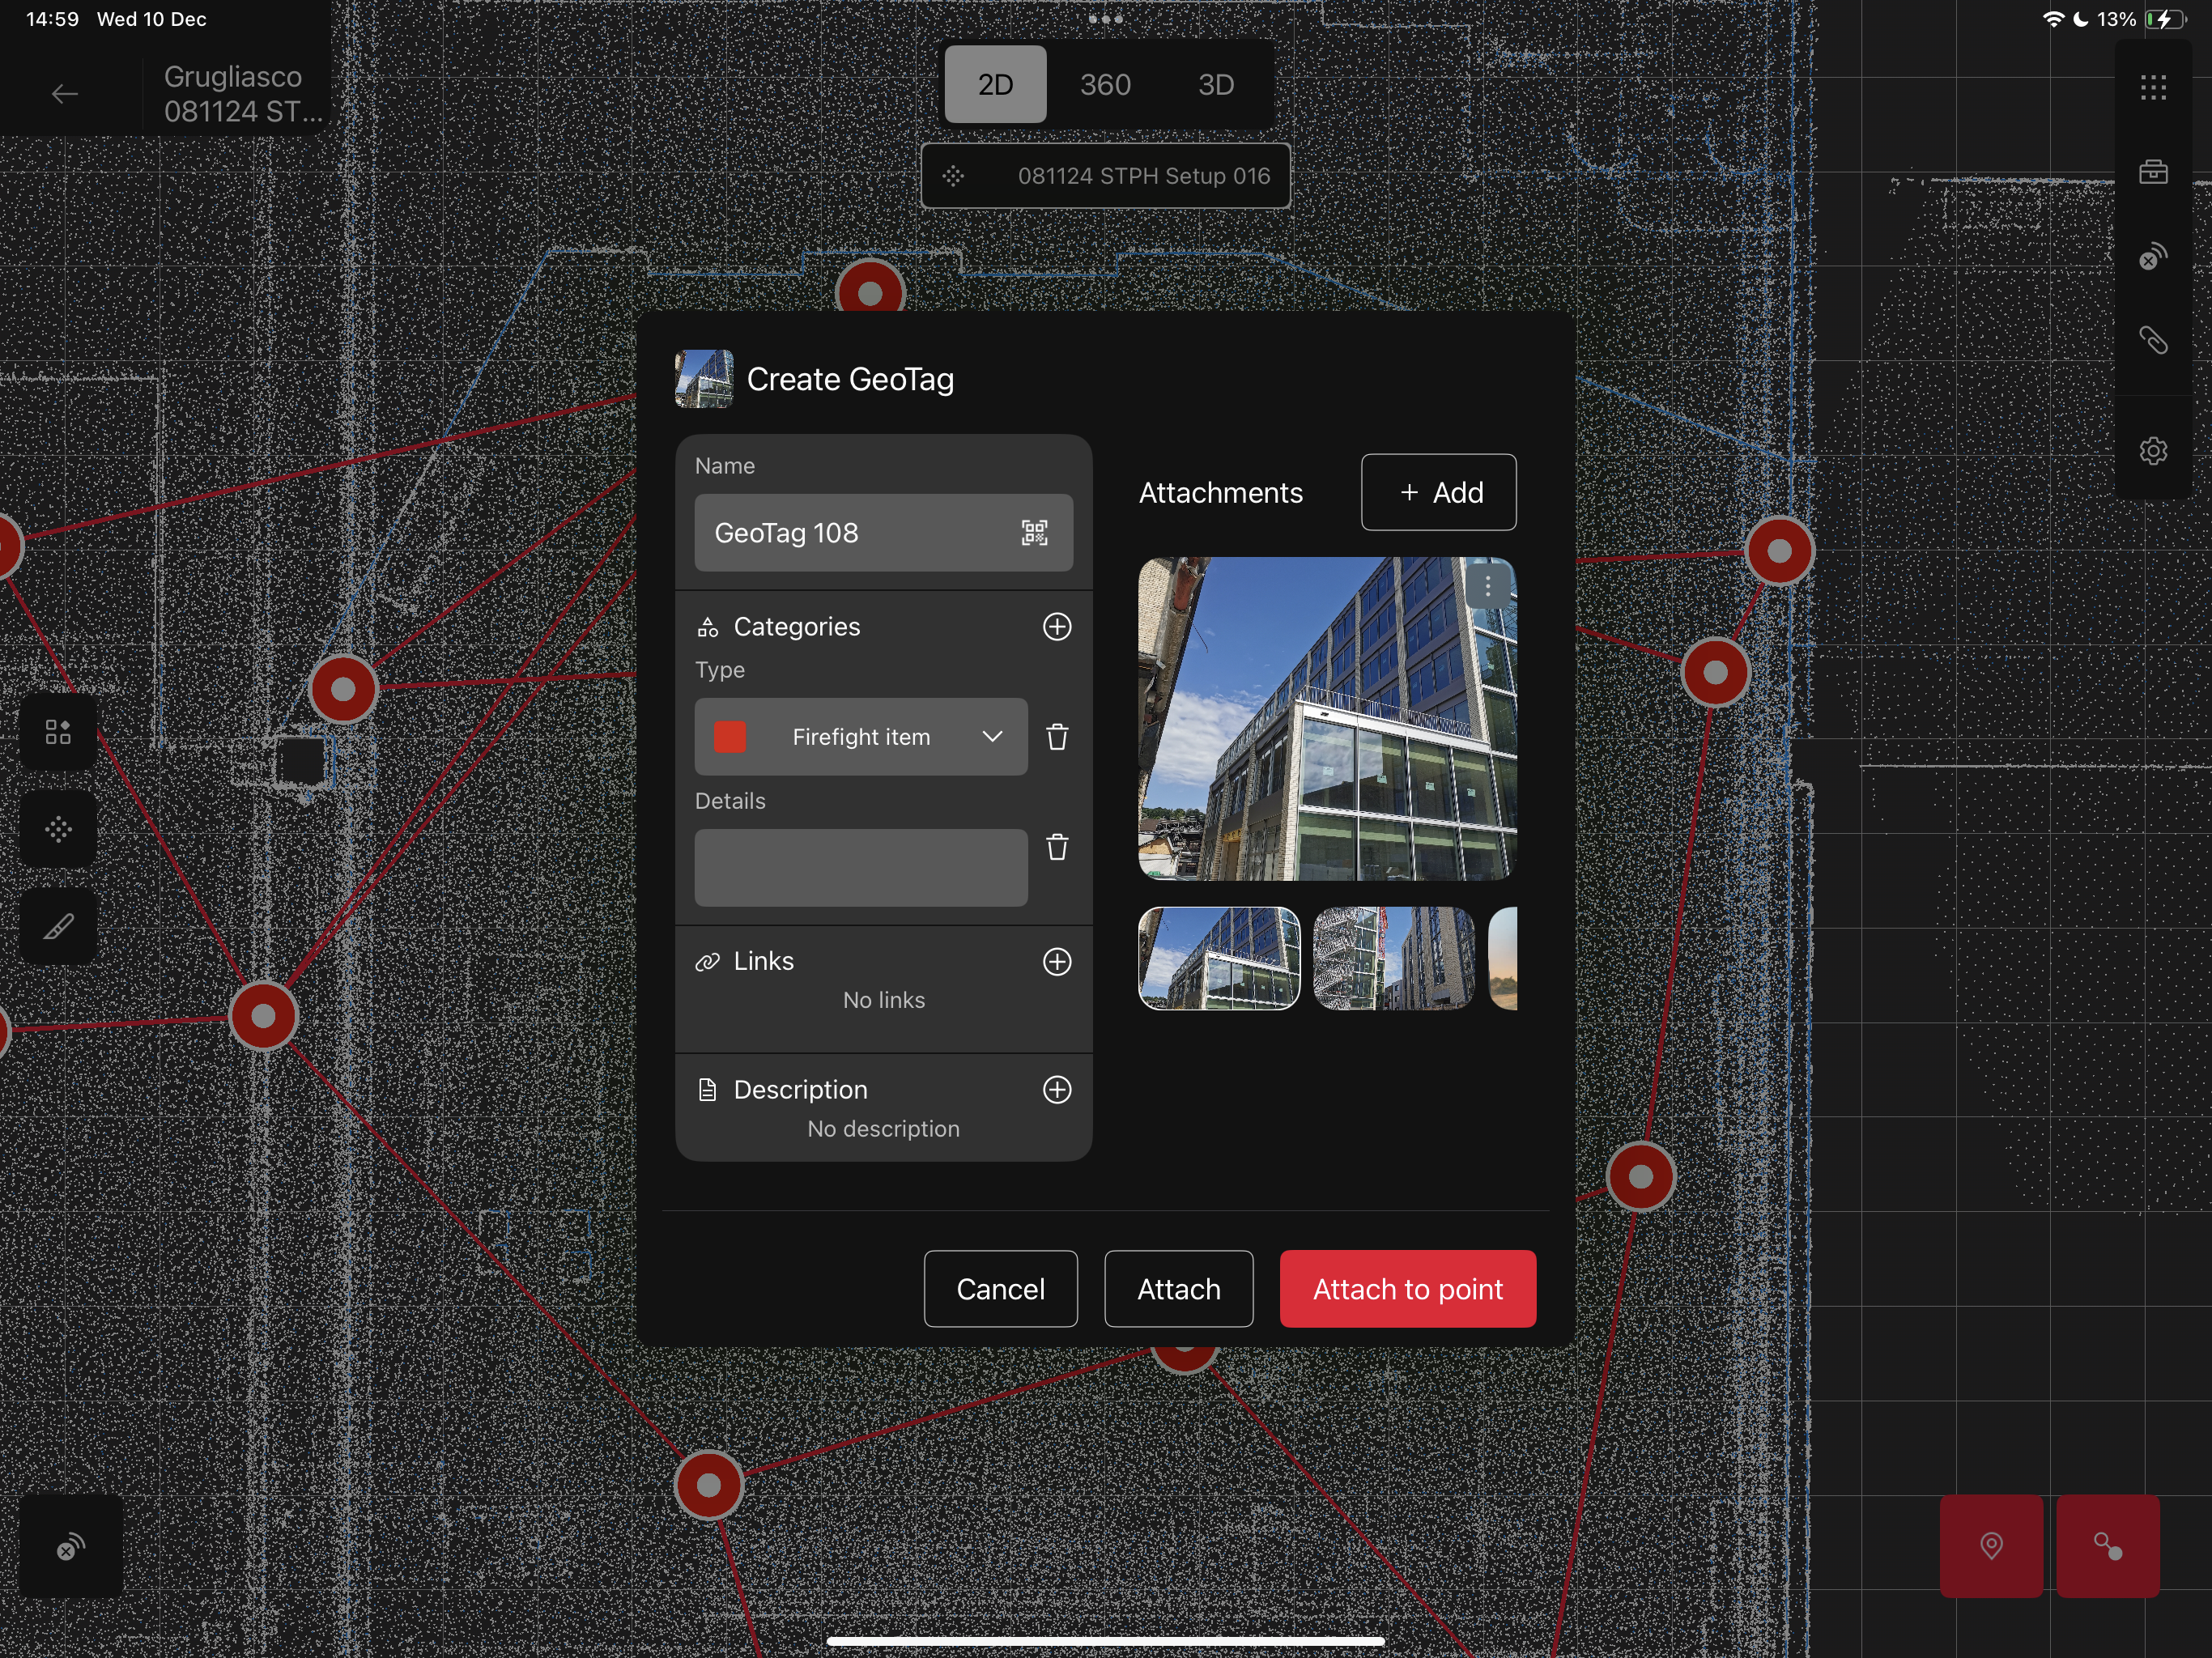
Attachments: click on the + Add button on the top right corner to choose the attachment type to add.
-
Photo: from gallery or to be taken with the camera
-
Video: from gallery or to be taken with the camera
-
Audio: to be recorded with the device microphone
-
File
-
Warning: the file size affects the time of synchronization of the GeoTag with the scanner!
For a smooth workflow and to prevent any synchronization issue, we recommend to not attach files bigger that 1GB
It is possible to add more than one attachment per GeoTag, of different type. Therefore you can potentially create a GeoTag that has for example 2 images, 1 video, 3 files, 1 Audio.
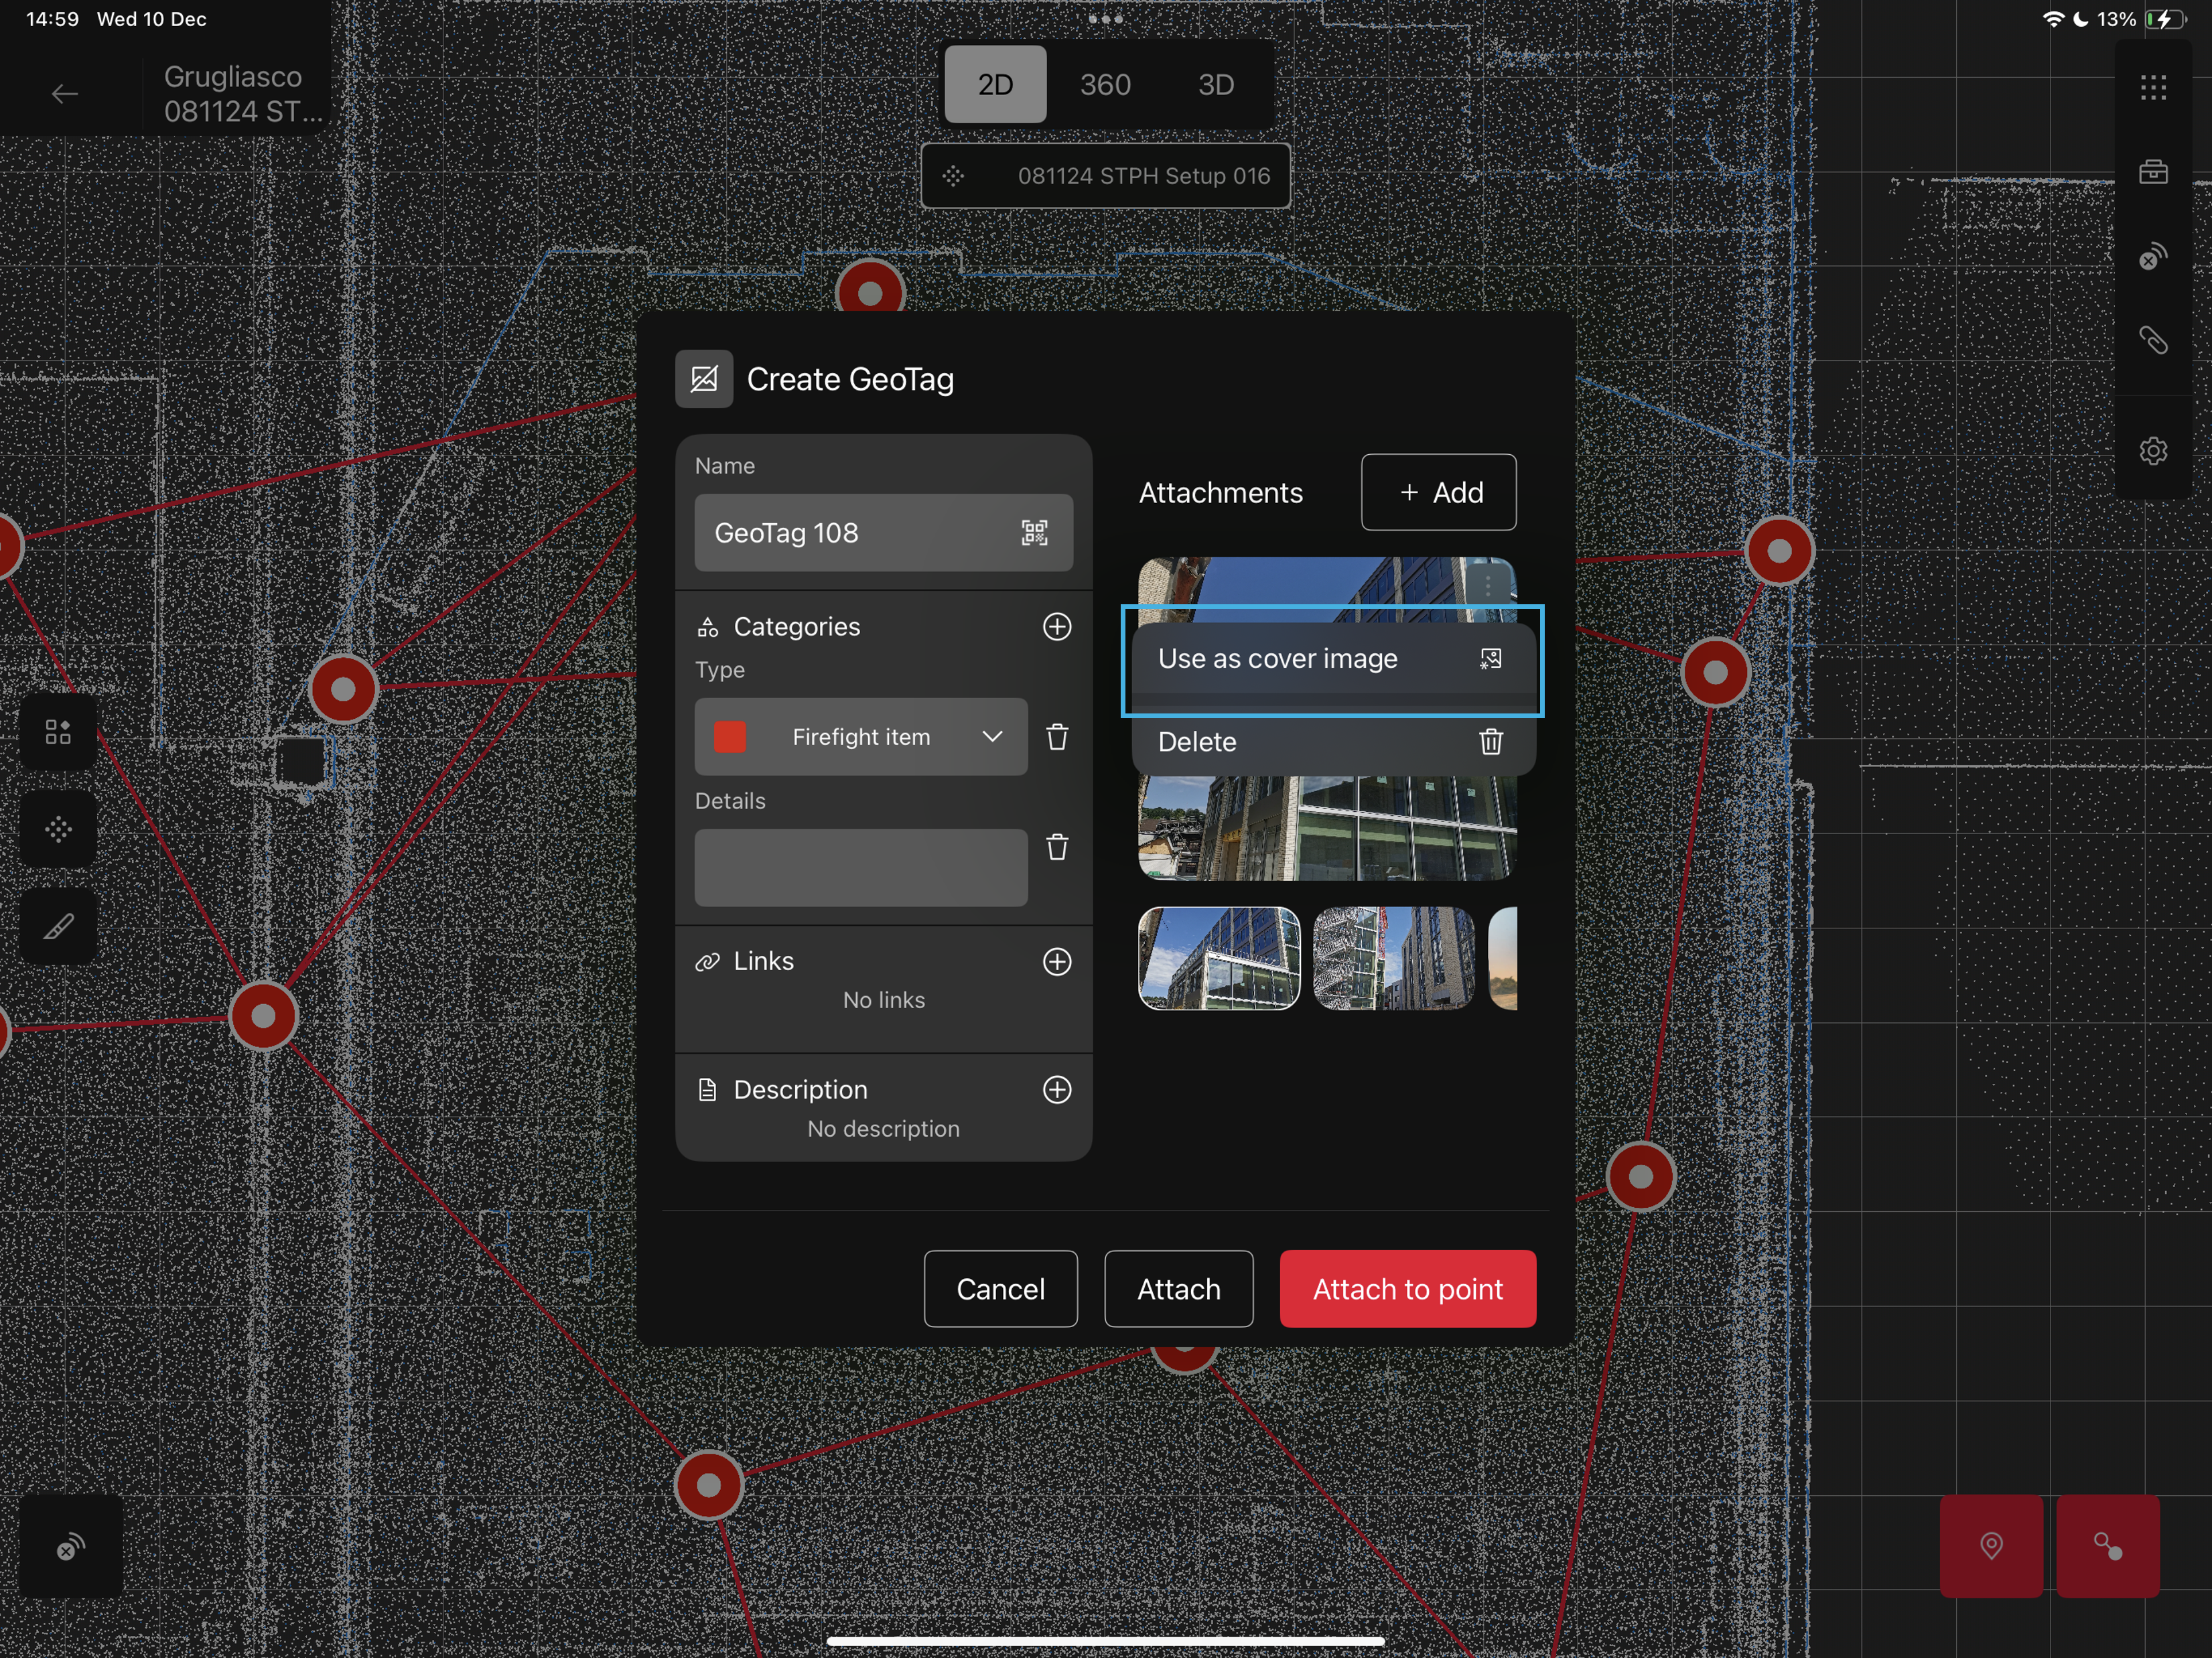
What’s new?
Cover Image: If you click on the menu (top right corner of any Image Attachment), you will be able to use that image as preview image of the GeoTag in the data browser.
As soon as you set the cover image in the GeoTag creation window, the icon next to the header will update immediately, giving you a preview of how the cover image will look.
If you delete the image from the Attachment list, the cover image will be kept.
If you delete the image from the Attachment list, the cover image will be kept.
Step 3 - Attach the GeoTag
Once all the information have been entered in the creation window, you have two possibilities:
-
Attach the GeoTag to the Setup:
-
click on Attach button to save the GeoTag and attach it to the Setup you have previously selected (Step 2).
-
The GeoTag will be visible only in the right hand side data browser, in the nested view of the Setup
-
Attach te GeoTag to a specific point of the Setup:
-
click on Attach to point
-
Navigate and put the crosshair in correspondence to the point you want to attach the GeoTag to.
-
click Attach
-
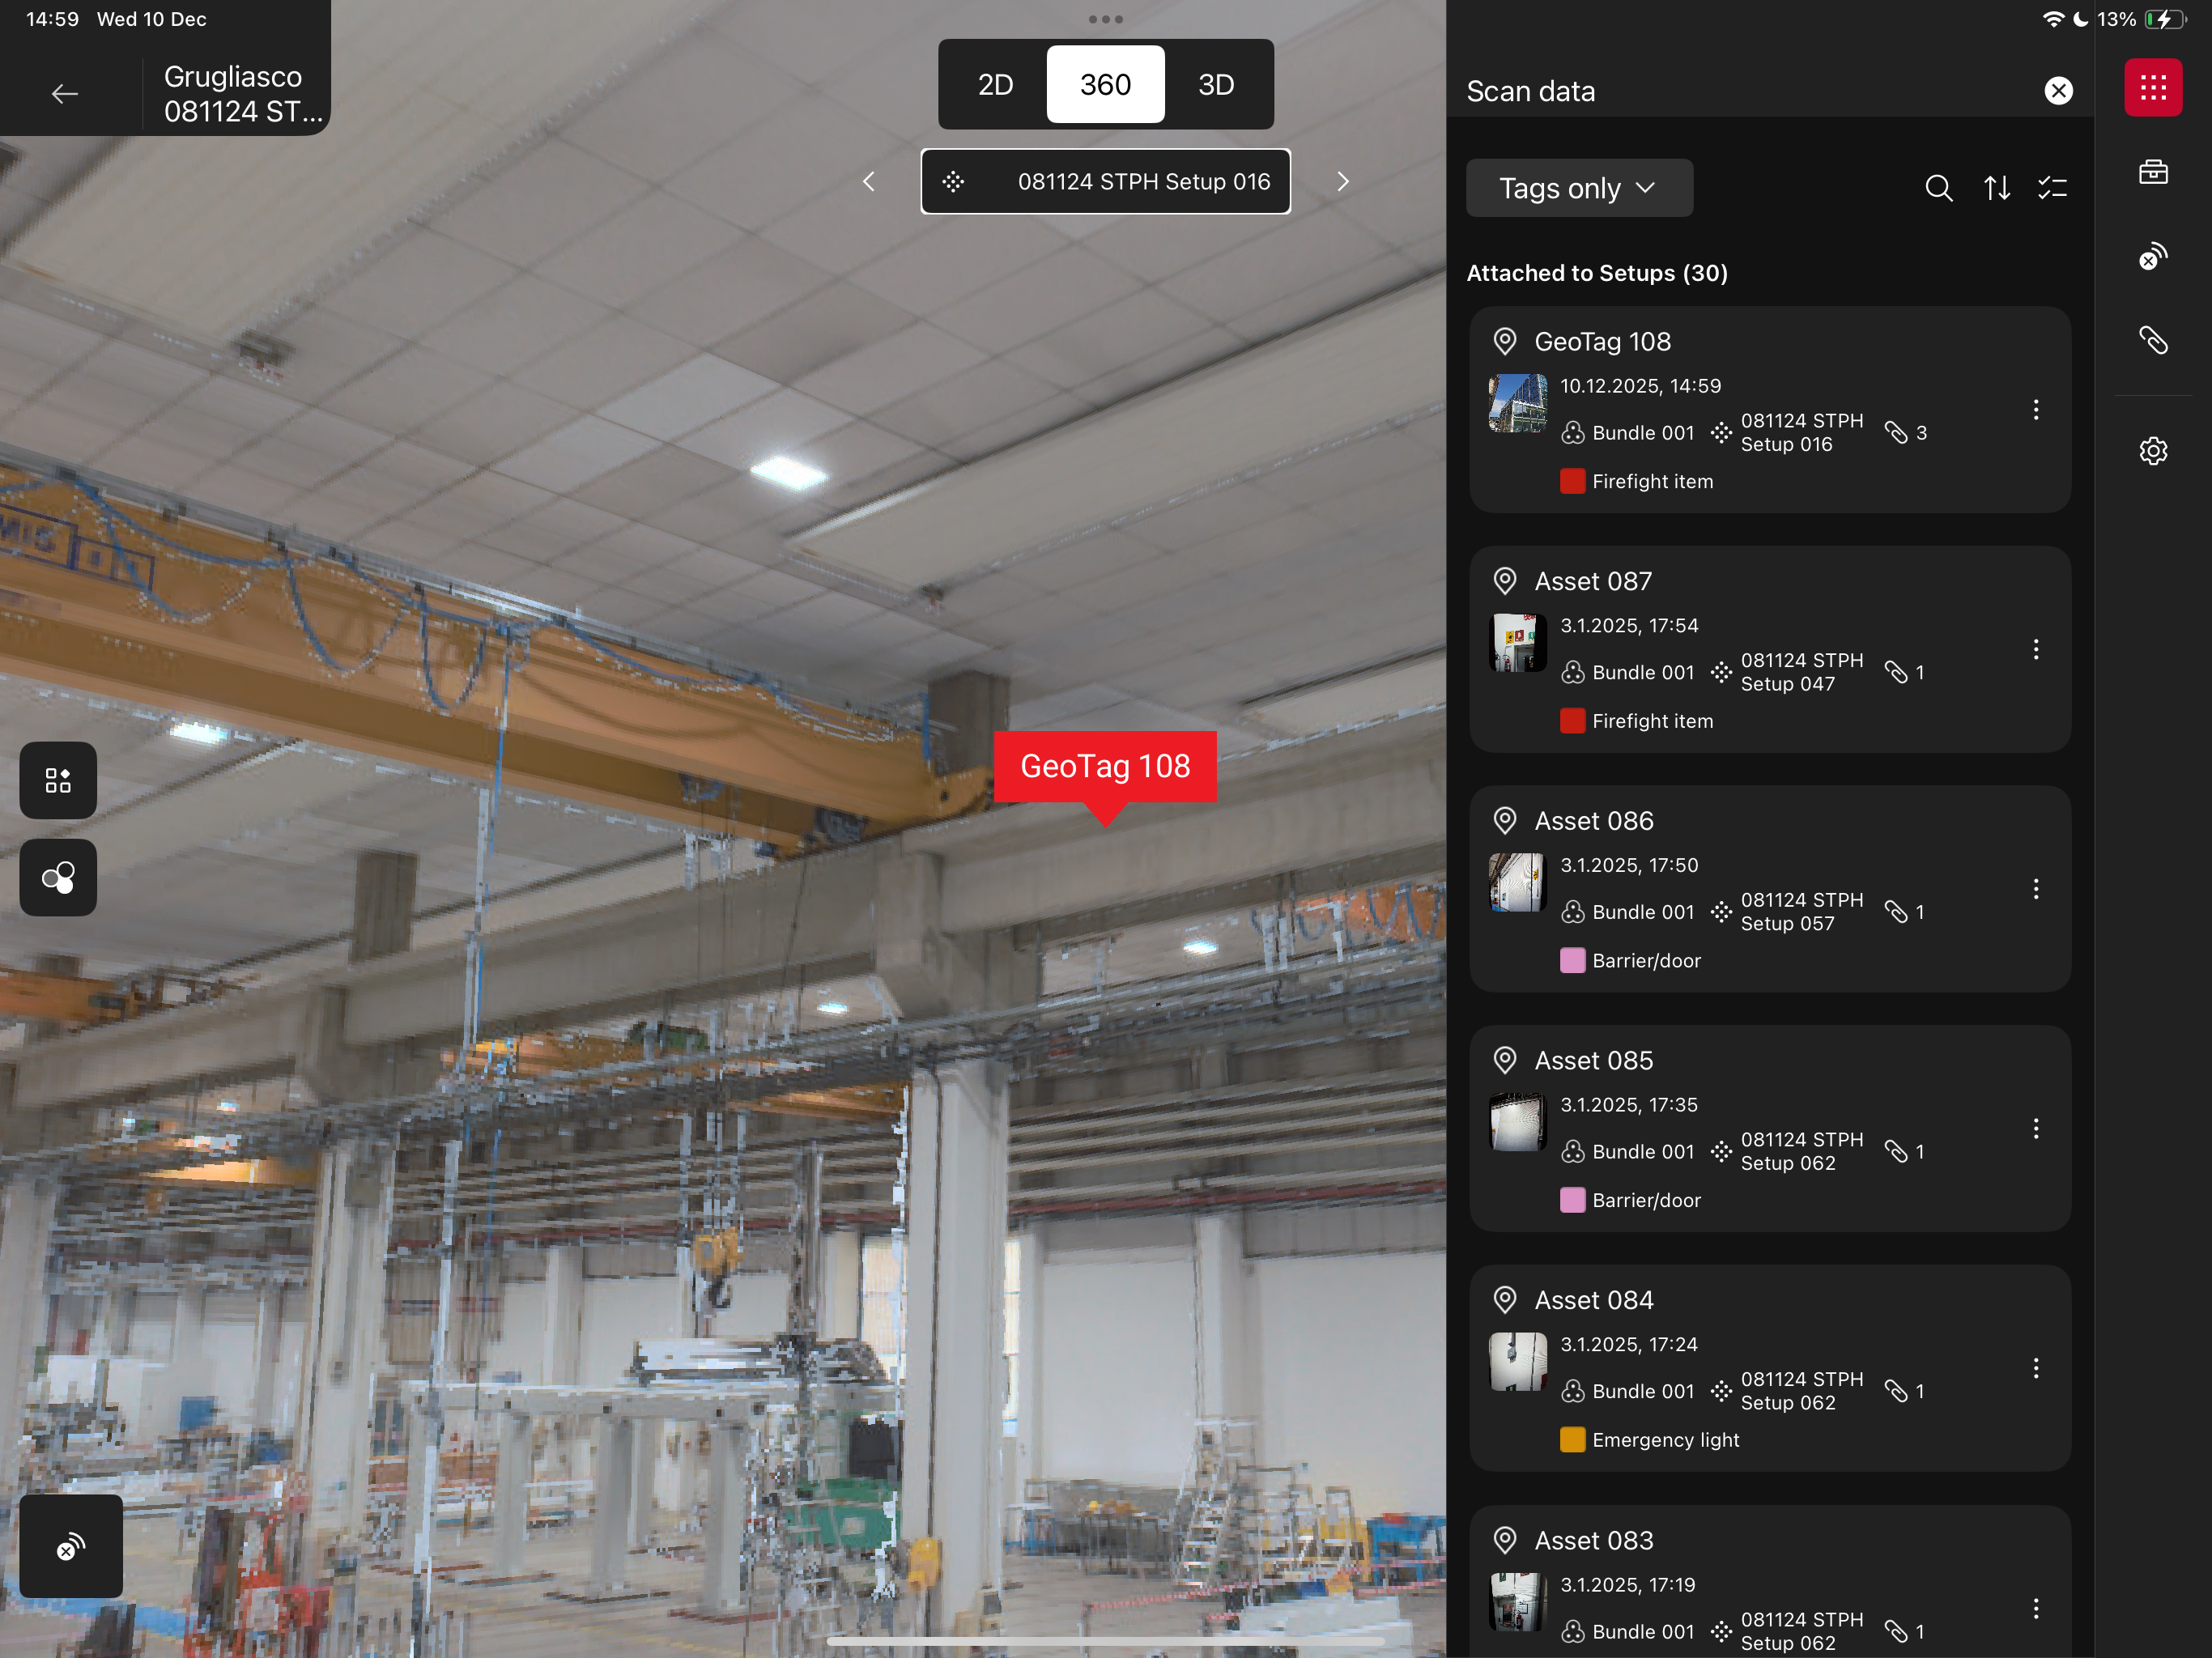
The GeoTag will be visible in the right hand side data browser, in the nested view of the Setup and as a label in 360 and 3D view.
Other Options
Preview
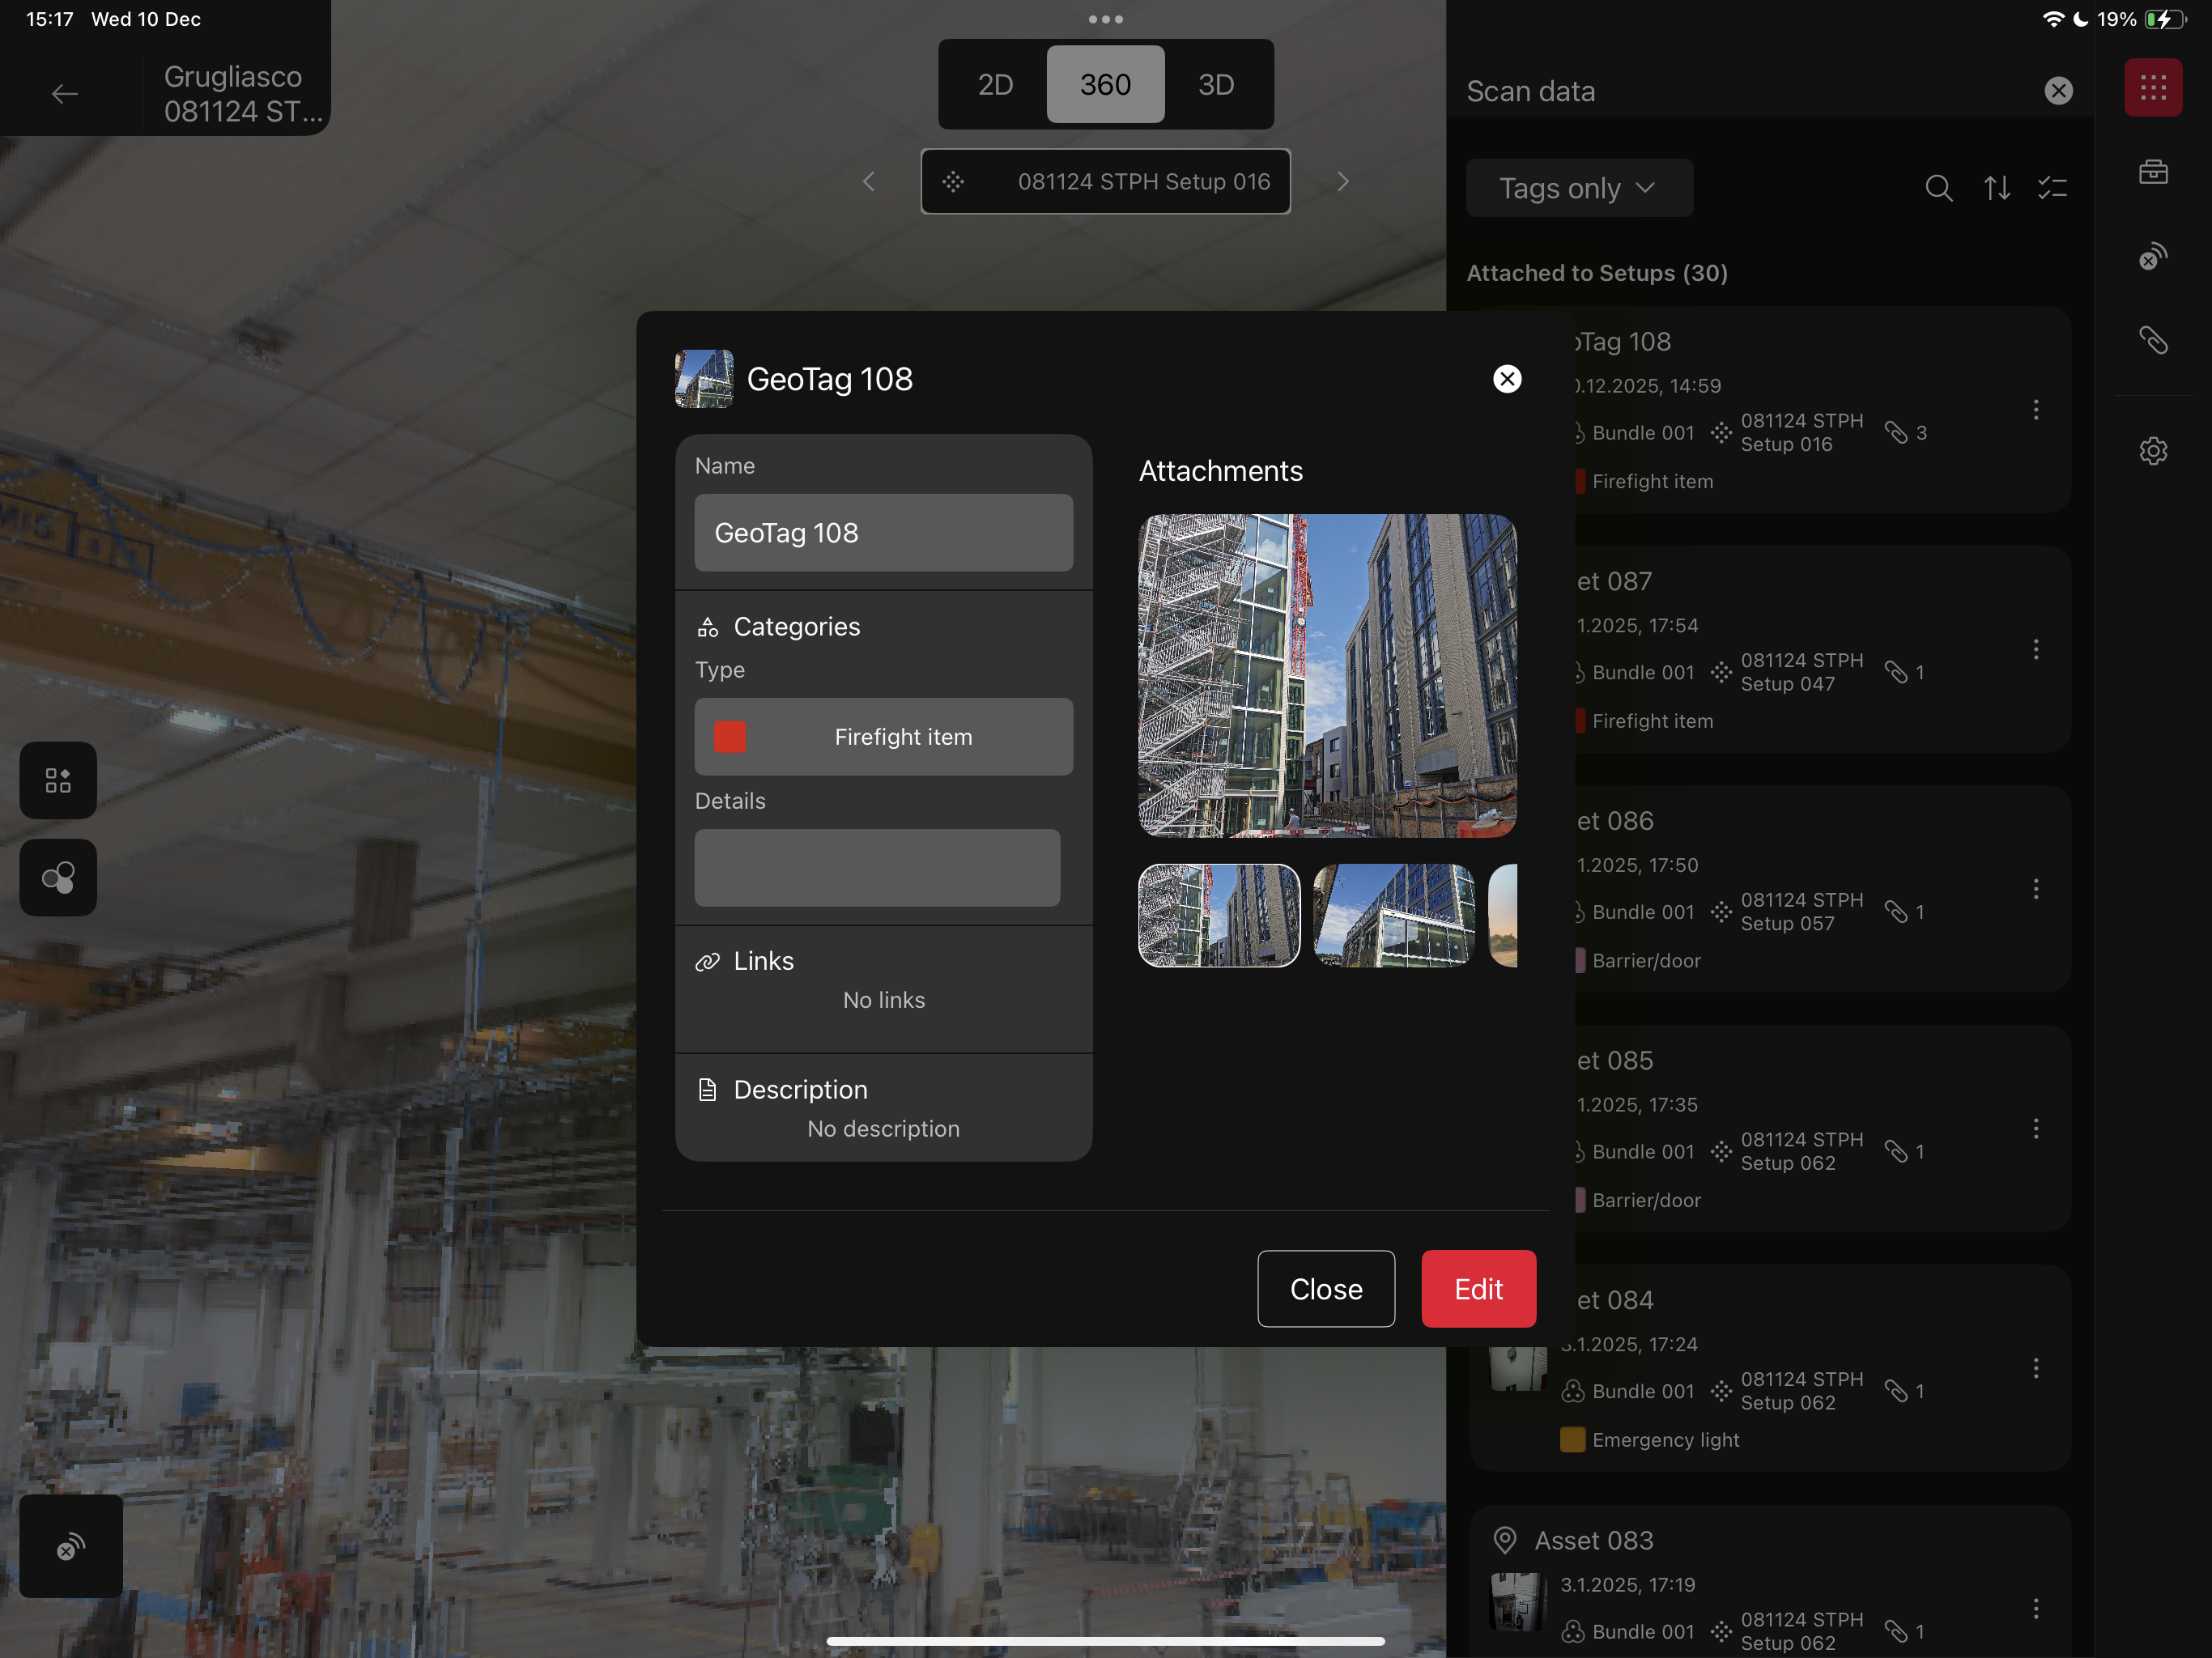
To have a preview of the GeoTag and quickly check the information associated to it, you can click on the thumbnail (cover image): a preview window will open, which shows the GeoTags details in ready-only mode.
If you want to edit some of them, you can click Edit and enter the editing mode.
The Edit mode can be accessed as well from the GeoTag menu in the data browser.

Relocate within the Setup
This option is valid for both GeoTags attached to a Setup and attached to a point.
You can find it in the GeoTag data browser menu:
-
Click on Relocate within the Setup
-
Navigate and locate the crosshair in the point you want to attach the GeoTag to
-
Click Attach
If used on GeoTags attached to a Setup, the operation will let you choose a point where to attach the GeoTags, therefore changing the type from Attached to Setup to Attached to a point.
GeoTags conversion
As of Field360 6.2, a new GeoTags architecture has been implemented among Leica software. For this reason it is necessary to convert the Geotags created with any older version of Field360 in order to be able to continue working with them.
The conversion is immediate and happens at the Job opening
After the conversion, you will be able to make use of all the new Geotags features (like the categories and the multiple attachments) with all of you GeoTags, independently from the creation version.
In case you would like to keep a version of the Job with the old GeoTag structure, we recommend to export a backup copy of it.
New GeoTags created with Field360 v.6.2 or converted GeoTags are NOT compatible with older versions of Field360